Weeks 12-13 (12/7-12/18): Studying Shape and Line with Holiday Cards and Drawings
K/1 Activity
Remote Learners:
To watch the videos and submit a picture of your finished project on the Seesaw App, click this link
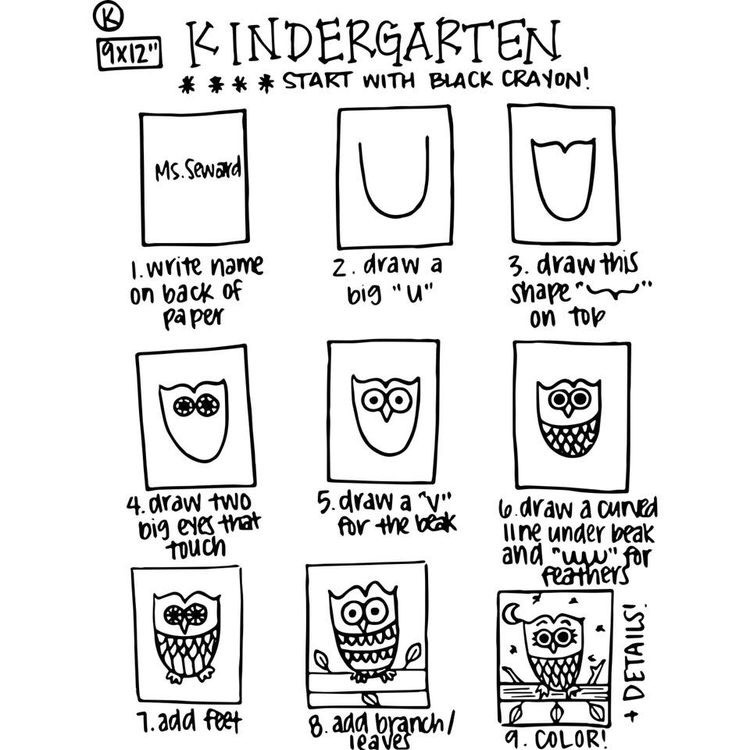
Listen to the read along below, then follow along with the learn to draw video to create your own gingerbread boy or girl.
|
|
|
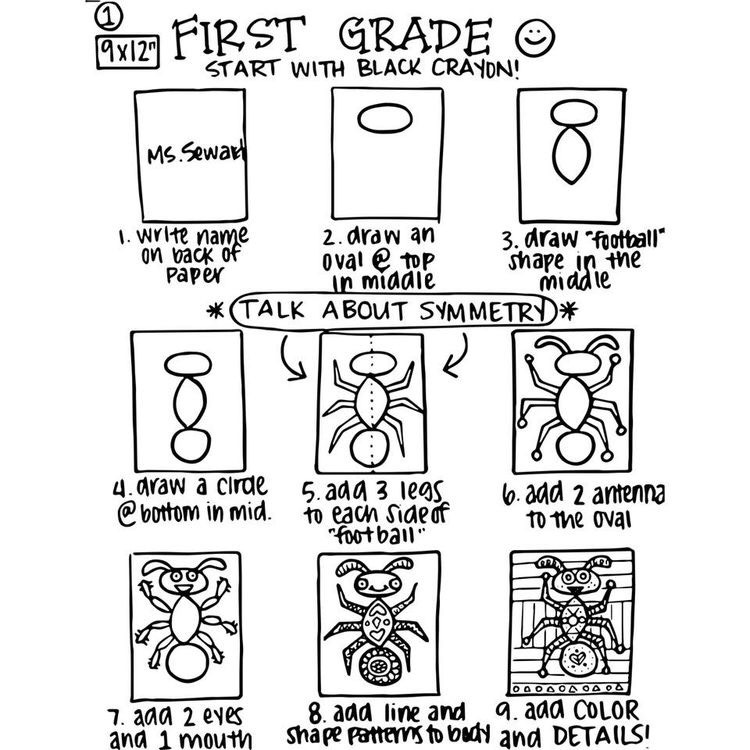
Here are some other great holiday how-to-draws that would be great for the front of a holiday card.
- Take a piece of white or colored paper and fold it in half.
- Use pencil to follow along with the video of your choice. Once you have finished your drawing in pencil, outline it with your black sharpie marker
- Color in your drawing with crayons (markers may bleed through)
- Write your message on the inside with black marker, don't forget to sign your name!
- Try making a card for each different drawing.
|
|
|
|
2/3 Activity
Remote Learners: Click this link to bring you to the activity on Seesaw
Here are some other great holiday how-to-draws that would be great for the front of a holiday card.
- Take a piece of white or colored paper and fold it in half.
- Use pencil to follow along with the video of your choice. Once you have finished your drawing in pencil, outline it with your black sharpie marker
- Color in your drawing with crayons (markers may bleed through)
- Write your message on the inside with black marker, don't forget to sign your name!
- Try making a card for each different drawing.
|
|
|
|
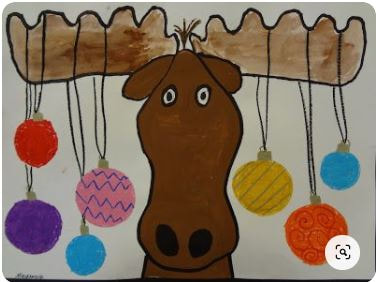
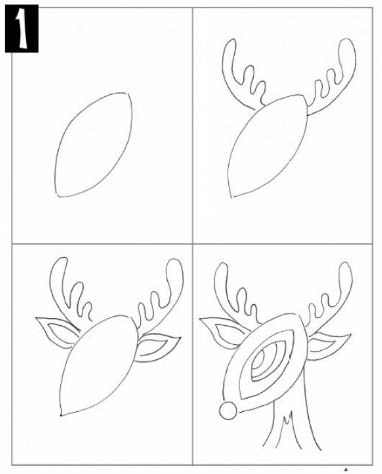
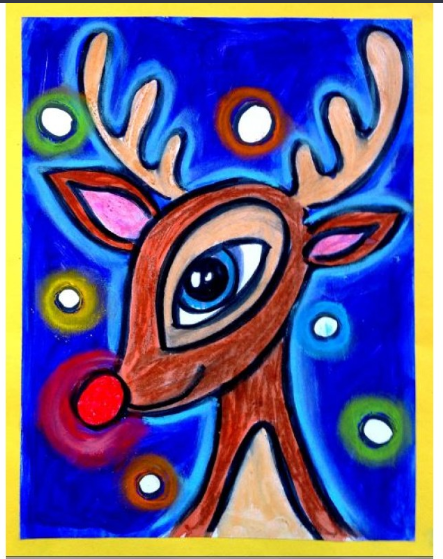
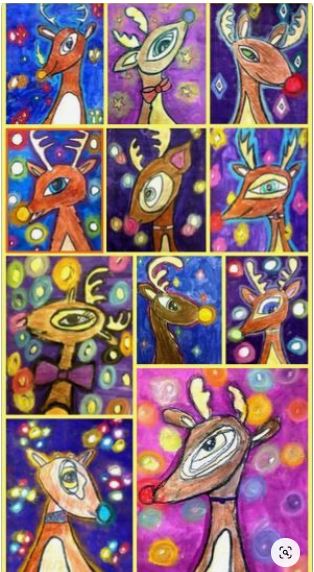
4/5 Activity
Remote Learners:
If you can't log in to your Seesaw account, here are the steps to the project
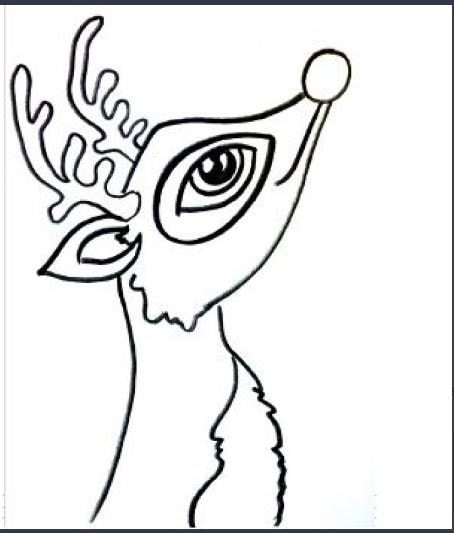
- Hold your paper the Portrait way and draw a football shape for the reindeers head, then add antlers.
- Add ears right underneath the antlers. They are made up of two flame-like shapes each.
- Next add the neck, nose and fill in the different parts of the eye. When your drawing is how you like it outline everything with black sharpie marker.
- Use oil crayons to color in your reindeer and make the glowing stars in the background.
- Use blue watercolor paint to fill in the night sky behind your reindeer. The white circles you drew for the stars will appear when you paint over them with the watercolor paint.
|
|
Here are some great videos on how to draw evergreen trees. Give each method a try then choose your favorite to make some holiday cards for your family and friends!
Steps:
- Take a piece of white or colored paper and fold it in half.
- Use pencil to follow along with the video of your choice. Once you have finished your drawing in pencil, outline it with your black sharpie marker
- Color in your drawing with crayons (markers may bleed through)
- Write your message on the inside with black marker, don't forget to sign your name!
- Try making a card for each different drawing.
|
|
|
|
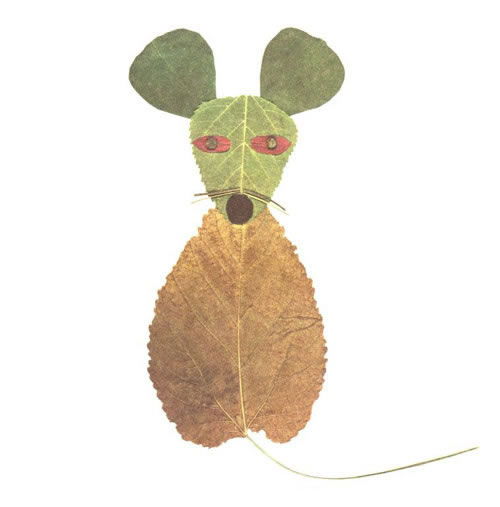
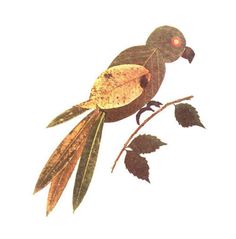
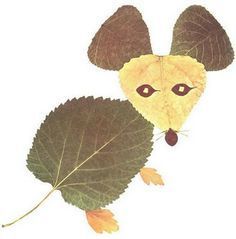
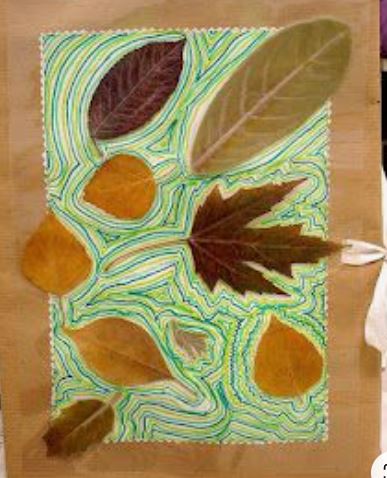
Weeks 9-11 (11/16-12/4): Studying Shape and Line with Fall Leaves
K/1 Activities
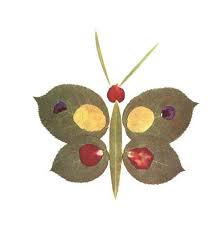
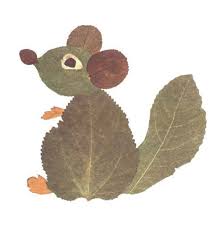
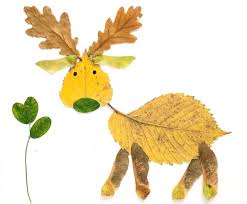
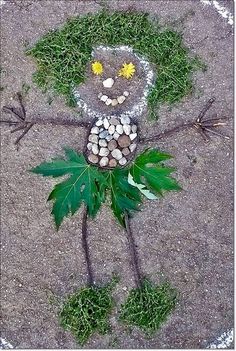
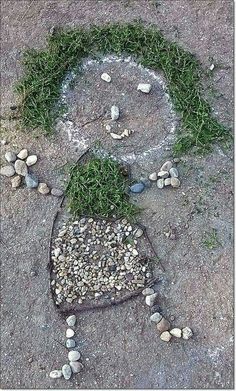
Listen to the read-aloud, then try and make a leaf man or animal of your own. You will need paper, a selection of fall leaves, glue and crayons or markers if you'd like to color in the background around your leaf creation. Have Fun!
|
|
|
|
|
|
|
|
|
2/3 Activities
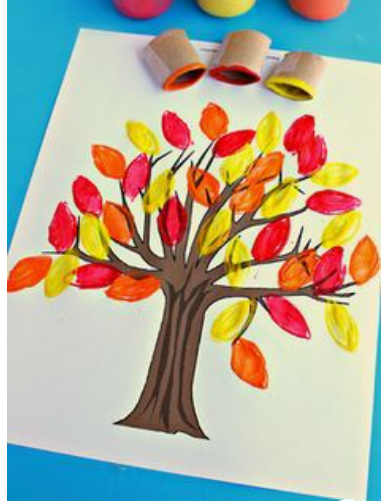
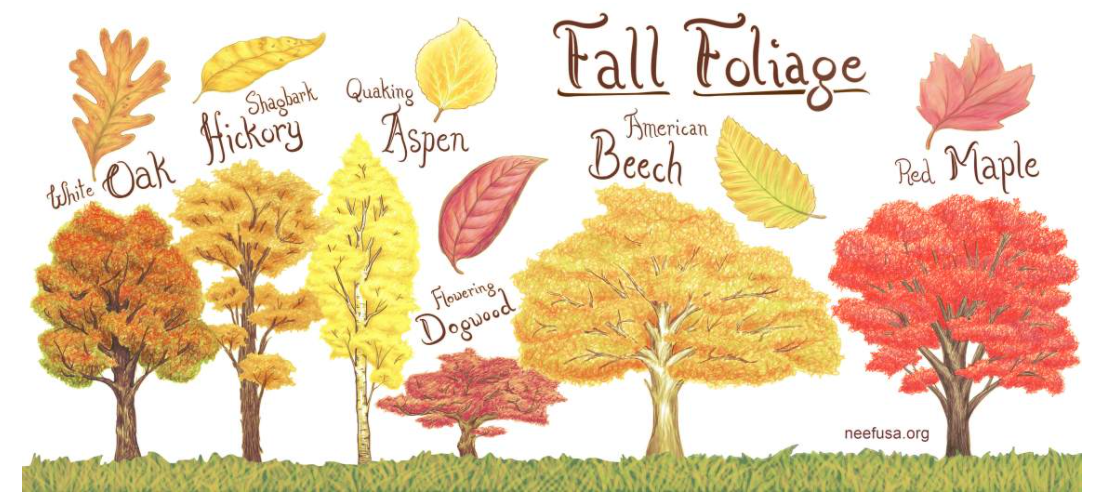
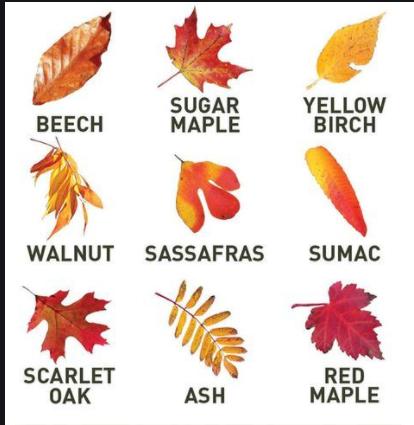
Ever wonder Why leaves change color in the Fall? Watch the video below to find out, then practice drawing and painting your own Fall leaves.
|
Steps:
|
4/5 Activities
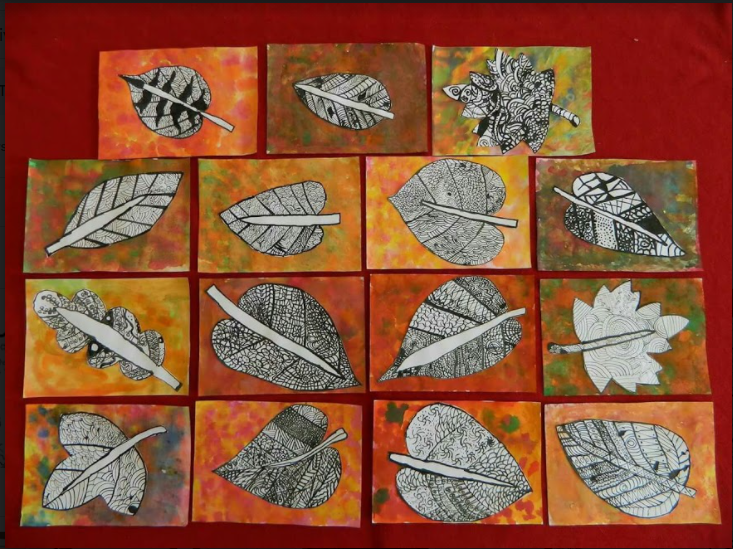
This project combines the elements of Shape, Line and Color and should take you 2-3 50 minute sessions to complete.
|
Steps:
|
Weeks 7 and 8 (11/2-11/13): Wassily Kandinsky and the Element of Shape
K/1 Activities
Wassily Kandinsky is a famous abstract artist that loved shape, color and music. Listen to the read-aloud to learn more about him, then watch the you tube demonstration on how to create our own version of Kandinsky's famous painting "Squares with Concentric Circles." After you have watched the video all the way through try the project on your own. You may use crayons, watercolor paints, or both to add color to your concentric circles. Have fun!
|
|
|
2/3 Activity
Watch both videos below to learn about the art element of Shape and for a step by step tutorial on how to create a piece of artwork showing positive and negative shapes.
|
|
|
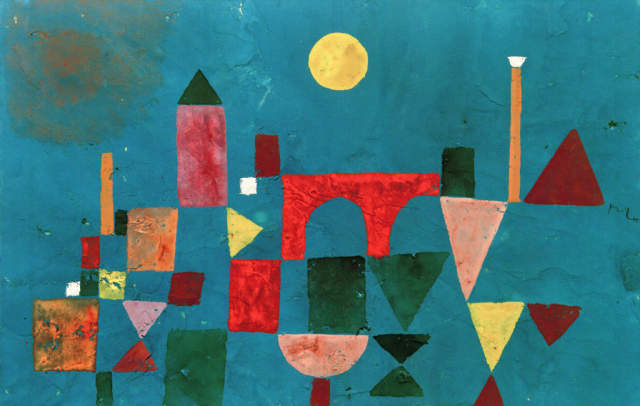
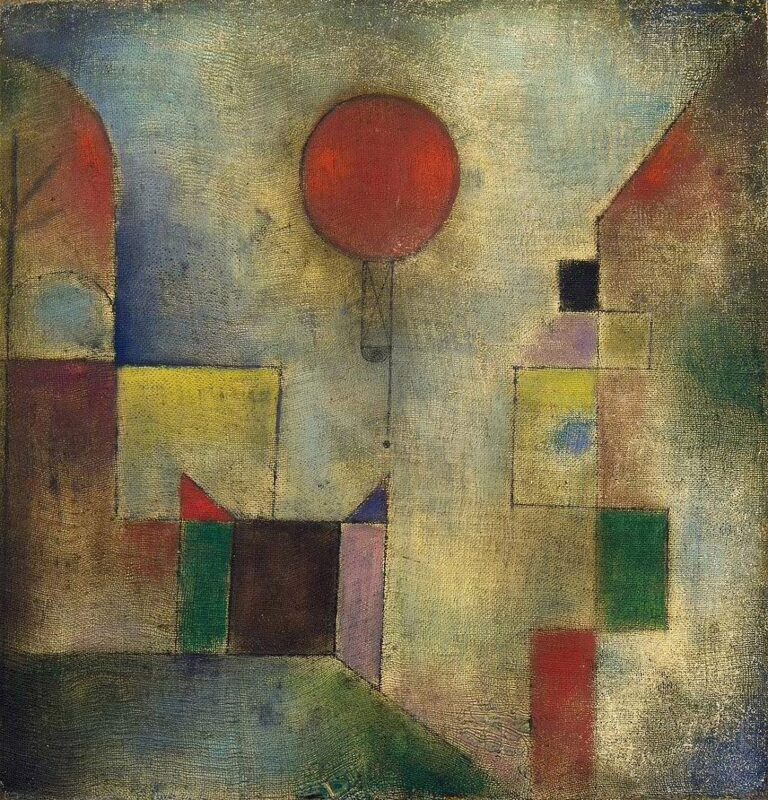
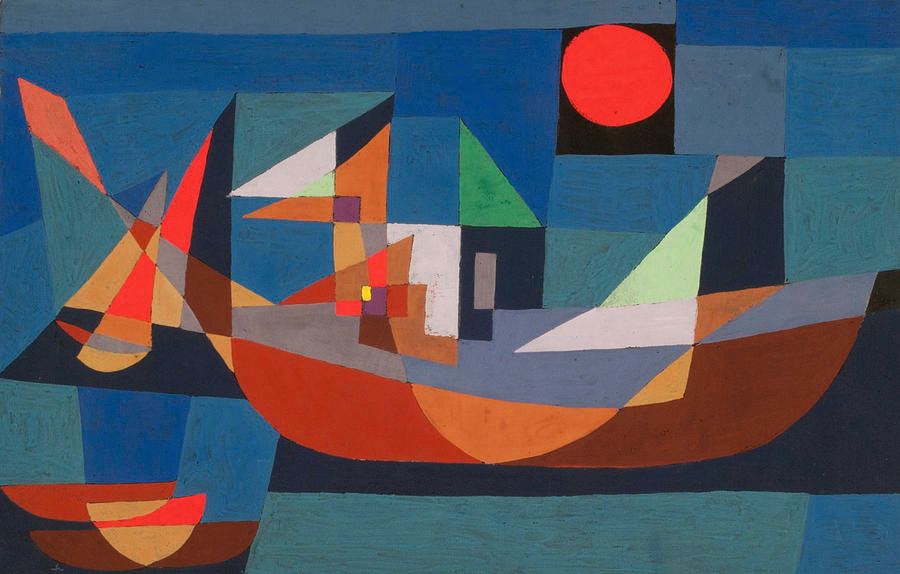
4/5 Activity
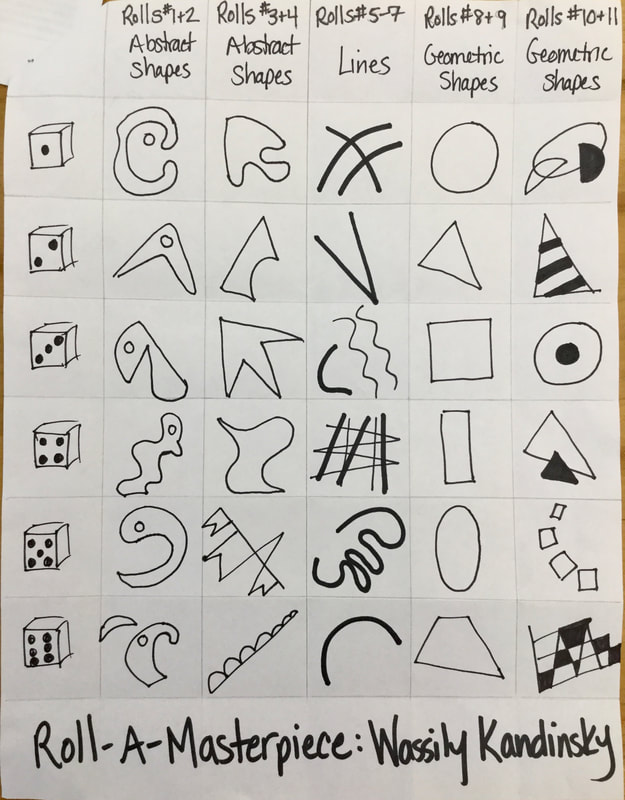
Watch the videos below to learn about the art element of Shape and for an introduction to the art of Wassily Kandinsky. We will be looking closely at how he uses both organic and geometric shapes, as well as a variety of lines, to create his bold abstract art. After watching the videos and scrolling through the slideshow use the resources provided at the end of this post to create your own abstract work of art in the style of Kandinsky.
|
|
|
Scroll through the images in the slideshow below to get more familiar with Kandinsky's work
|
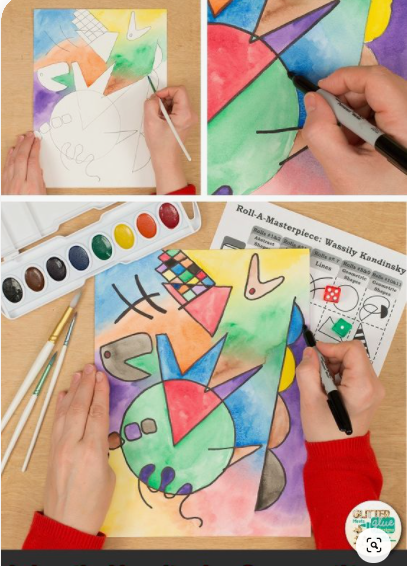
Roll-A-Kandinsky Masterpiece
|
Here is an example of a finished project
Week 6 (10/26-10/30): The Art Element of Shape
K/1 Activities
Here are some fun learn to draw videos to try out for Halloween week. Remember to think about the kinds of lines and shapes you are using to draw your pictures.
|
|
|
2/3 Activities
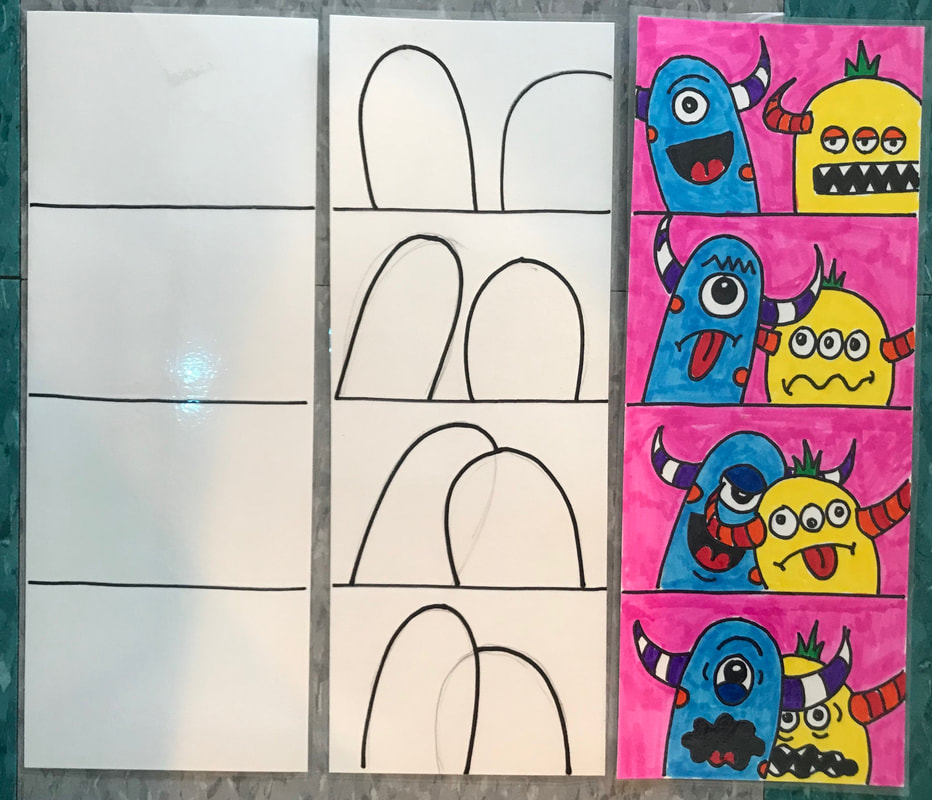
This week give this monster photo booth project a try
|
Steps:
|
Here are some fun Halloween themed learn to draws. Remember to think about line and shape as you practice your drawings.
|
|
|
4/5 Activity
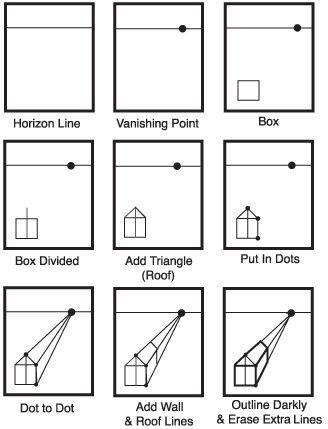
This week try out this haunted house drawing using basic perspective.
|
Steps:
|
Weeks 4/5 (10/12-10/23): Halloween Cat's and Pumpkins
*With a school holiday and a half day coming up, these projects will take at least two art classes/home sessions each
Grade K and 1 Activity
|
|
|

|
Practice your scissor skills to make these Halloween Cats
Steps:
|
Grade 2 and 3 Activity
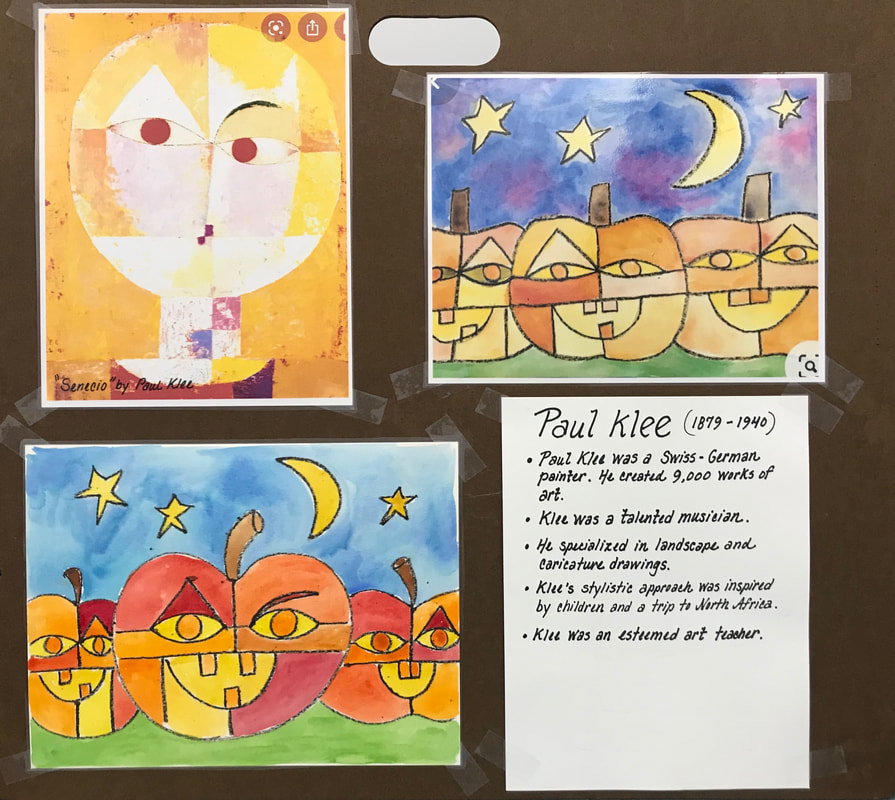
Paul Klee Style Pumpkins
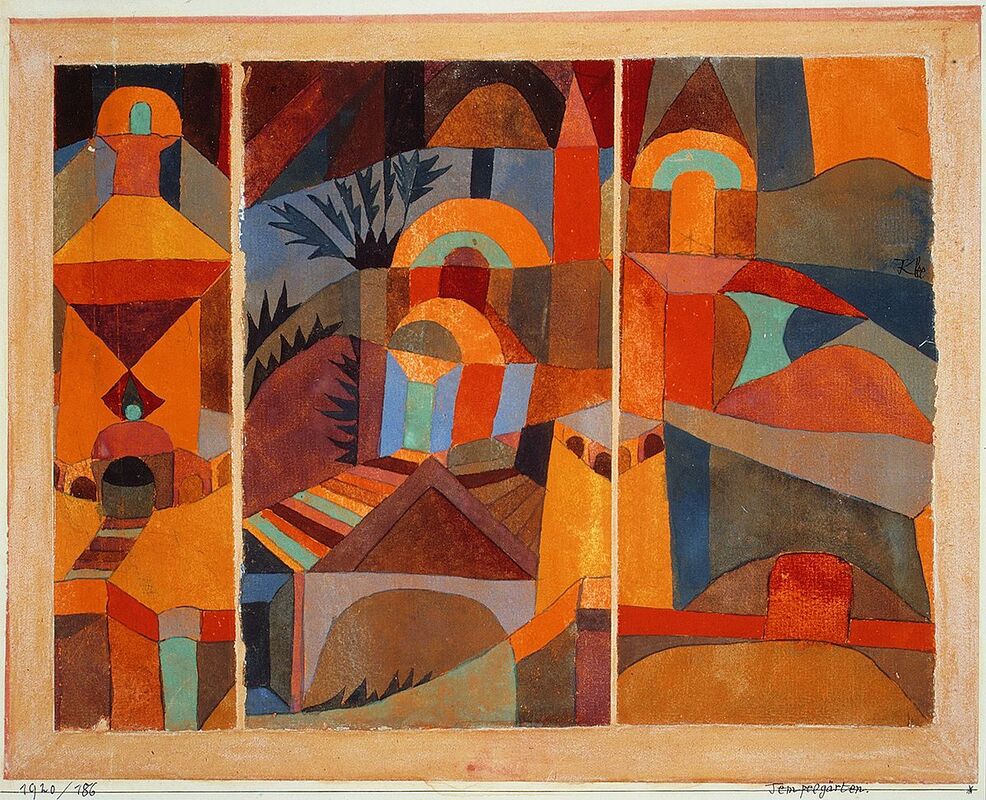

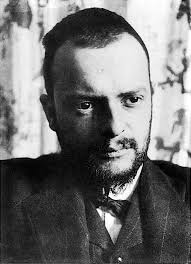
If Paul Klee were to paint a pumpkin, what would it look like?
Steps:
Steps:
- Use a pencil to draw 1-3 large pumpkins on your paper, your pumpkins may overlap. Don't forget to add details like eyebrows and teeth to your pumpkins, and add details in the sky too, like a moon and stars.
- Create Balance in your drawing by drawing lines through your pumpkin to break it up into different sections. Don't overdo it, 4-6 sections are enough.
- Use a black crayon to carefully outline all your pencil lines.
- Use watercolor paints or crayons to add color to your drawing. If using watercolors, make sure to mix a few shades of orange to fill in your sections.
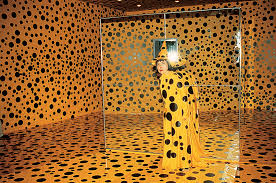
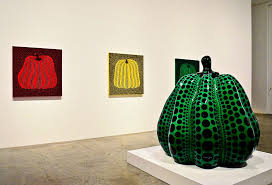
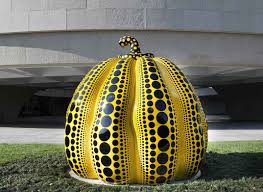
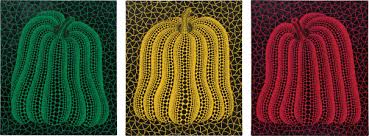
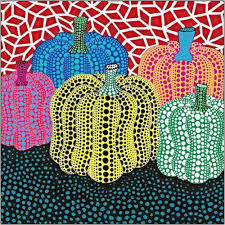
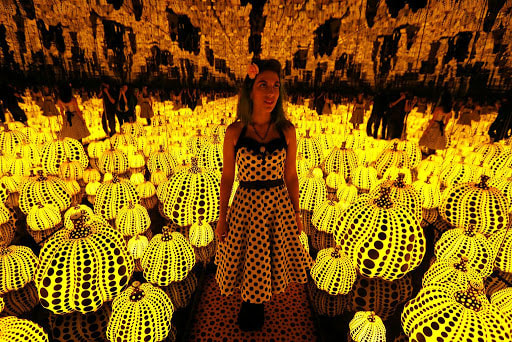
Grade 4 and 5 Activity
Who is the Artist Yayoi Kusama? Click her name to find out


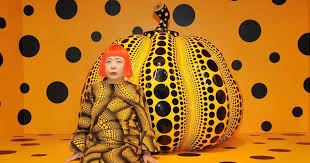
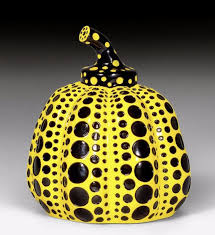
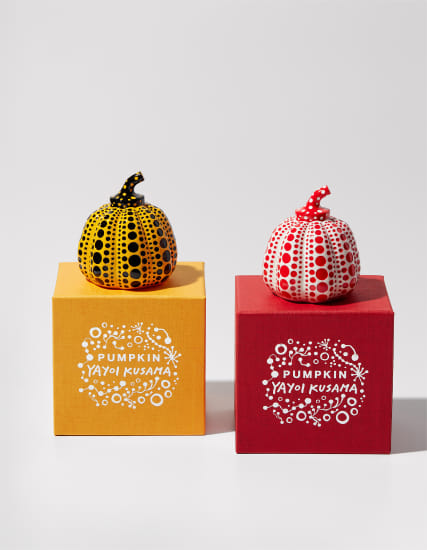

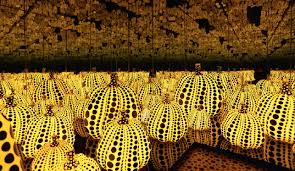
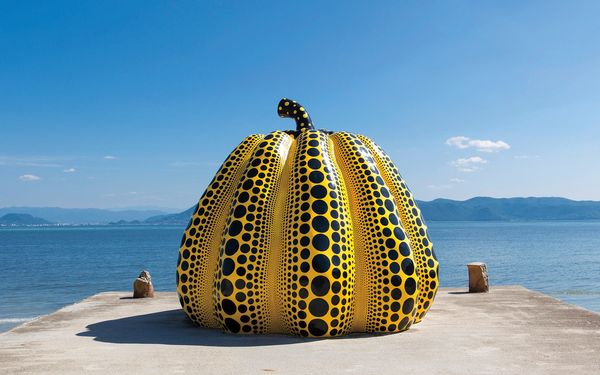
|
*Click the download to the right for step by step instructions
|
| ||
Week 3 (10/5-10/10-9): Continue working with the Art Element of Line
Kindergarten and 1st Grade Video and Activity
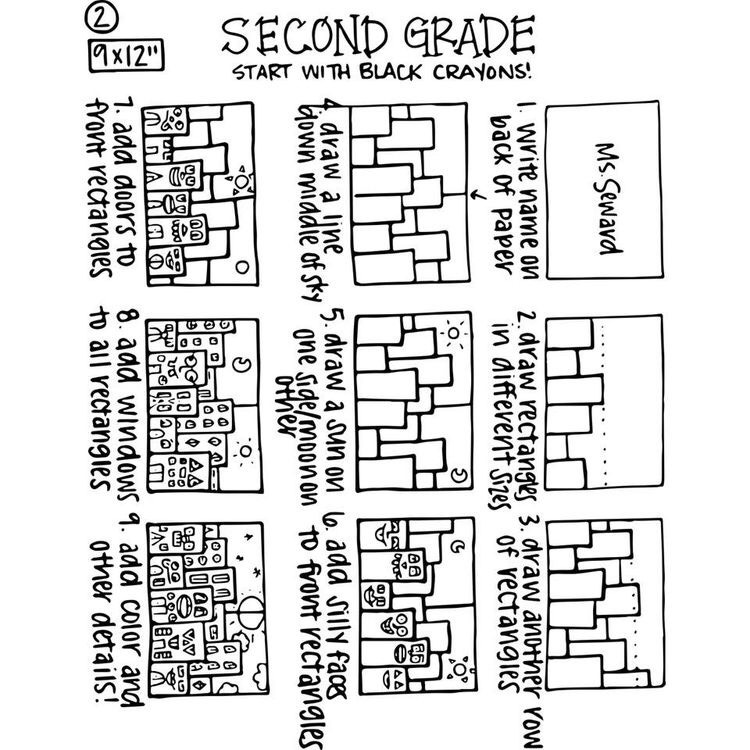
2nd and 3rd Grade Activity
|
Patchwork Landscapes
|
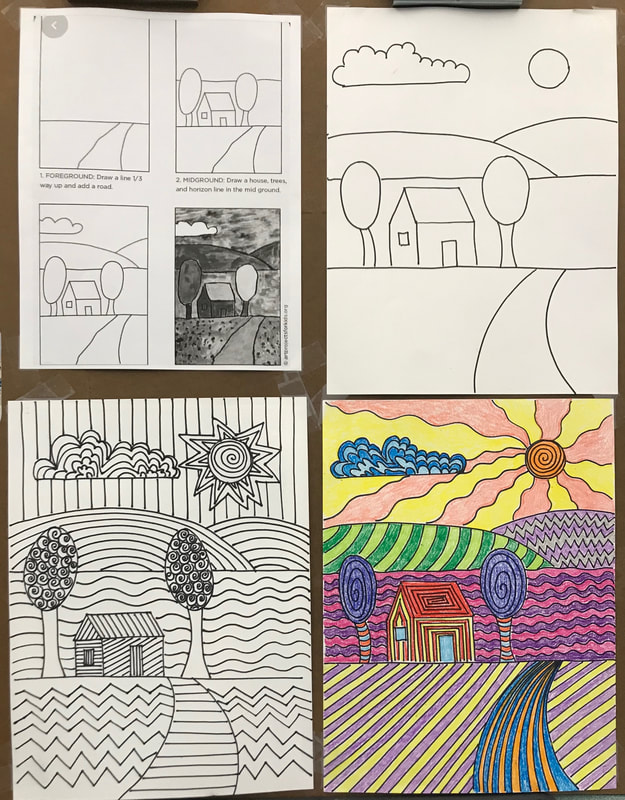
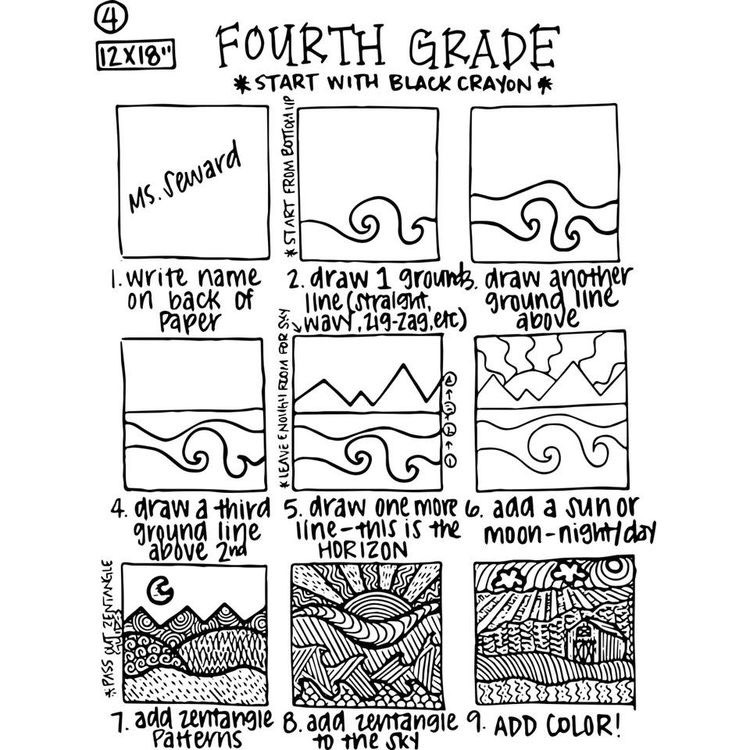
4th and 5th Grade Activity
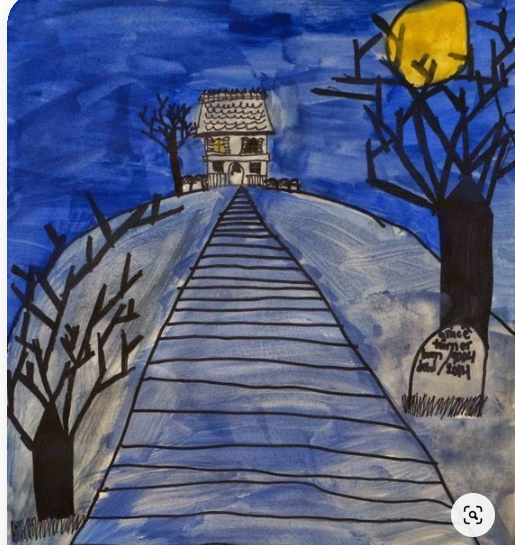
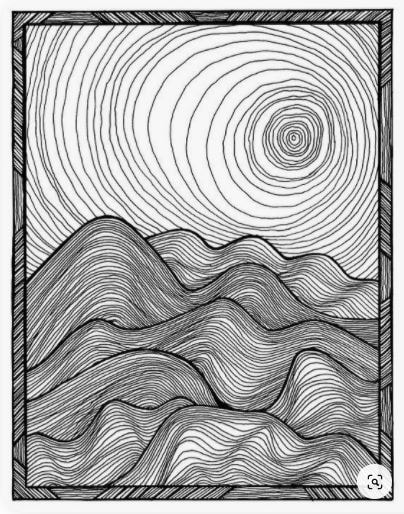
Rolling Hills
|
|
Week 2 (9/28-10/2): More work with Lines
Kindergarten and 1st Grade Video and Activity
*Contour lines go around the outer edges of the object your are drawing
|
Steps:
|
2nd and 3rd Grade Video and Activity
Activity
4th and 5th Grade Video and Activity
*Contour lines go around the outer edges of the object your are drawing
|
|
Steps
|
Week 1 (9/21 - 9/25): Lines are all around us!
We're kicking off the school year in Art class by studying and thinking about the Art Element of Line. They are truly all around us!
K and First Grade Video and Activity
K and 1st Activity
|
1. Use a cup or coffee mug to trace 6-9 circles on a piece of paper.
2. Using a black marker, draw a different type of line on top of each circle to make the hair for your face. Lines to try our include vertical, horizontal, diagonal, curved, zig zag, curly, wavy and even scribble for a realy bad hair day! 3. Last, put faces on your people to go along with their hair style. Do they look surprised? Happy? Mad? Don't forget to add eyebrows, eyelashes and ears (if their hair is not covering them) Special thanks to Mr. Kristopher's Art Room for sharing this lesson. http://owholmesartgallery.blogspot.com/2011/09/first-grade-artists.html |

|
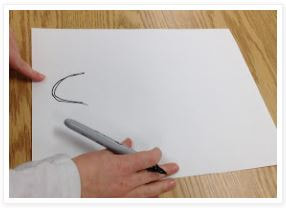
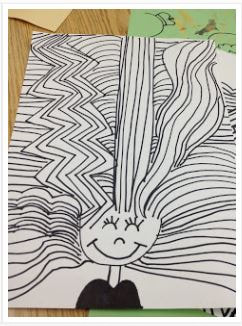
Second and Third Grade Video and Activity
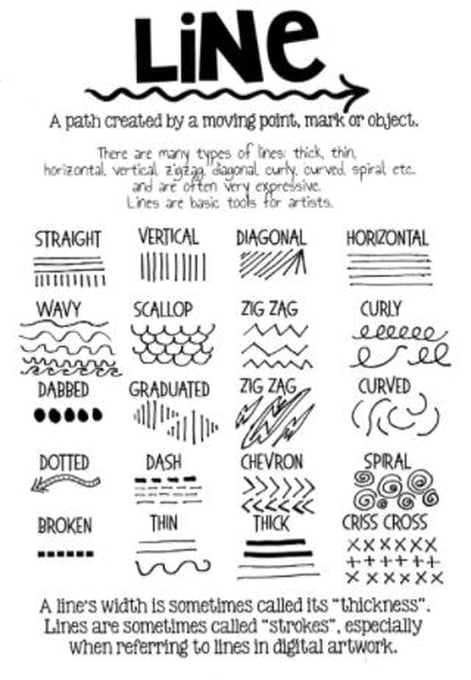
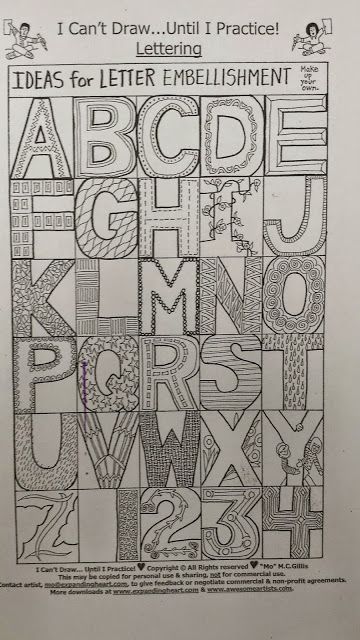
2nd and 3rd Grade Activity
|
1. With a black Sharpie (for no smudges), draw a U-shape near the bottom of the paper
|
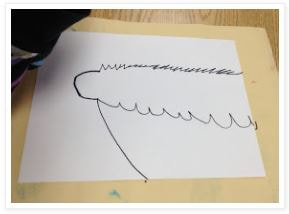
2. Choose 5 different lines from the chart above to 'grow' out of the U-shape.
|
3. Repeat each line at least 5 times.
|
|
4. Continue to add lines till all space is filled.
|
5. Add a neck, shoulders, and a face for a bad hair day!
Special thanks to http://artipelagoteacher.blogspot.com/2013/01/bad-hair-day.html?m=1 for sharing this lesson 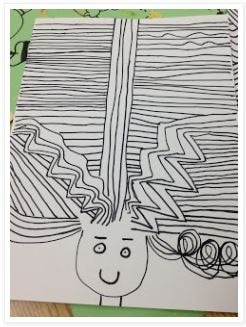
|
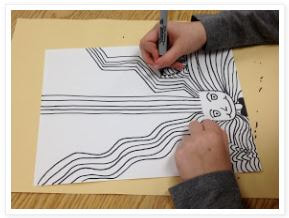
Fourth and Fifth Grade Video and Activity
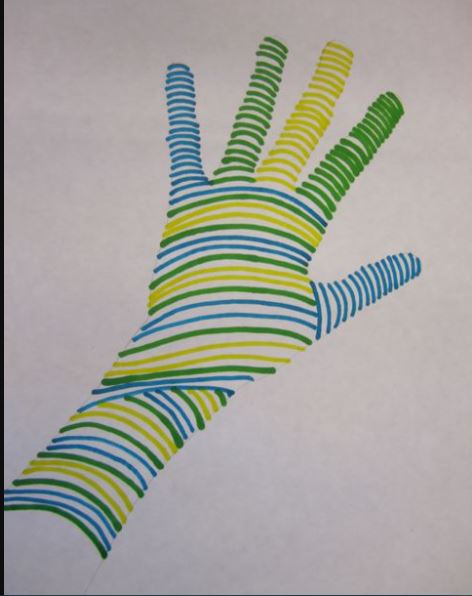
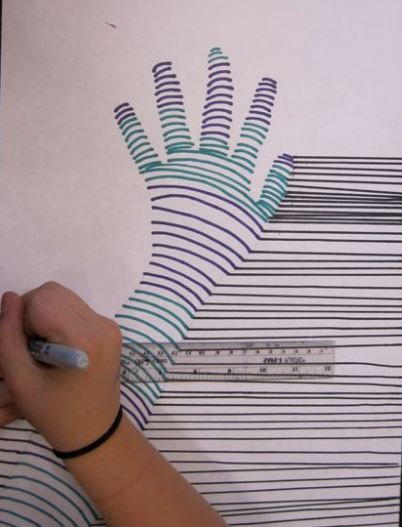
4th and 5th grade activity: Lined Hands
|
1. Trace your arm and hand lightly with a pencil. Next, using a marker, make curved lines all the way up your arm and around your hand and each finger. Make sure you space your curves carefully. You may alter the angle of your curves and make patterns with your colors if you wish.
|
2. Using a ruler and a black maker, make horizontal lines from the bottom of your paper all the way to the top. When possible, try to line them up to meet the colored curved lines at the edges of your arm, hand and fingers. Start on just one side of the hand.
|
3. Finish drawing your horizontal lines on the other side of your arm and hand. The curved lines will give your hand and arm a 3-D quality.
Special thanks to https://josettebrouwer.edublogs.org/2011/11/30/line-hands/ for sharing this lesson 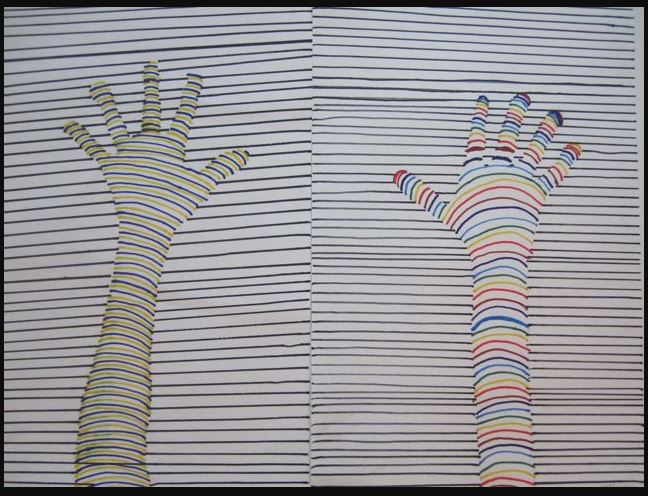
|
Week 12 (6/17-end of Summer): Art From Packing Materials
I've been feeling a bit guilty about all the cardboard boxes and bubble wrap piling up at our house, so as a final art invitation for this year I'm offering some suggestions for turning all that recycling into art work. These open ended art projects will also give your children a much needed break from all the screen time that has become the norm
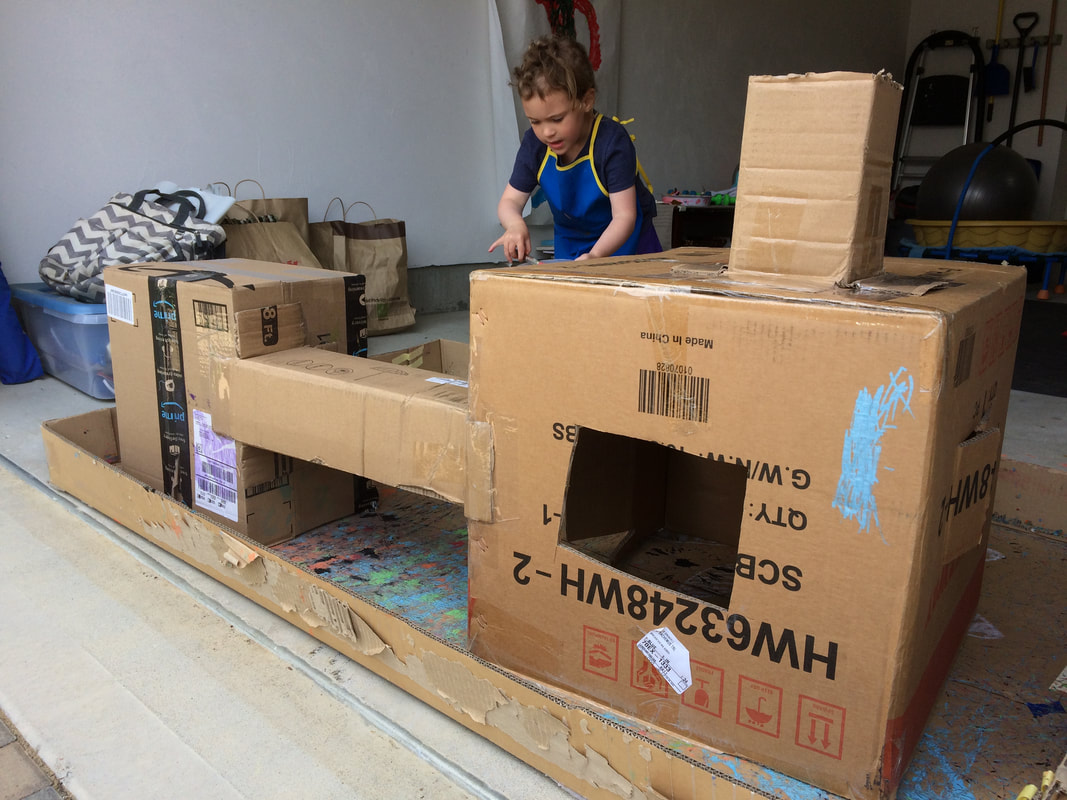
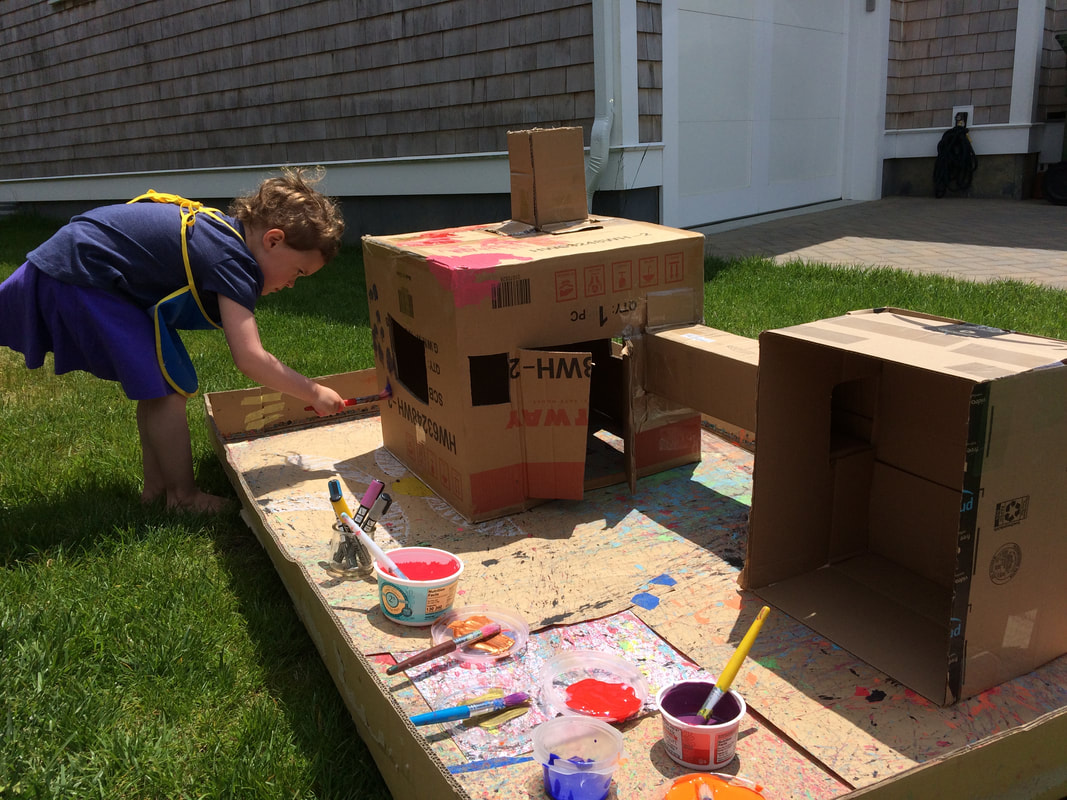
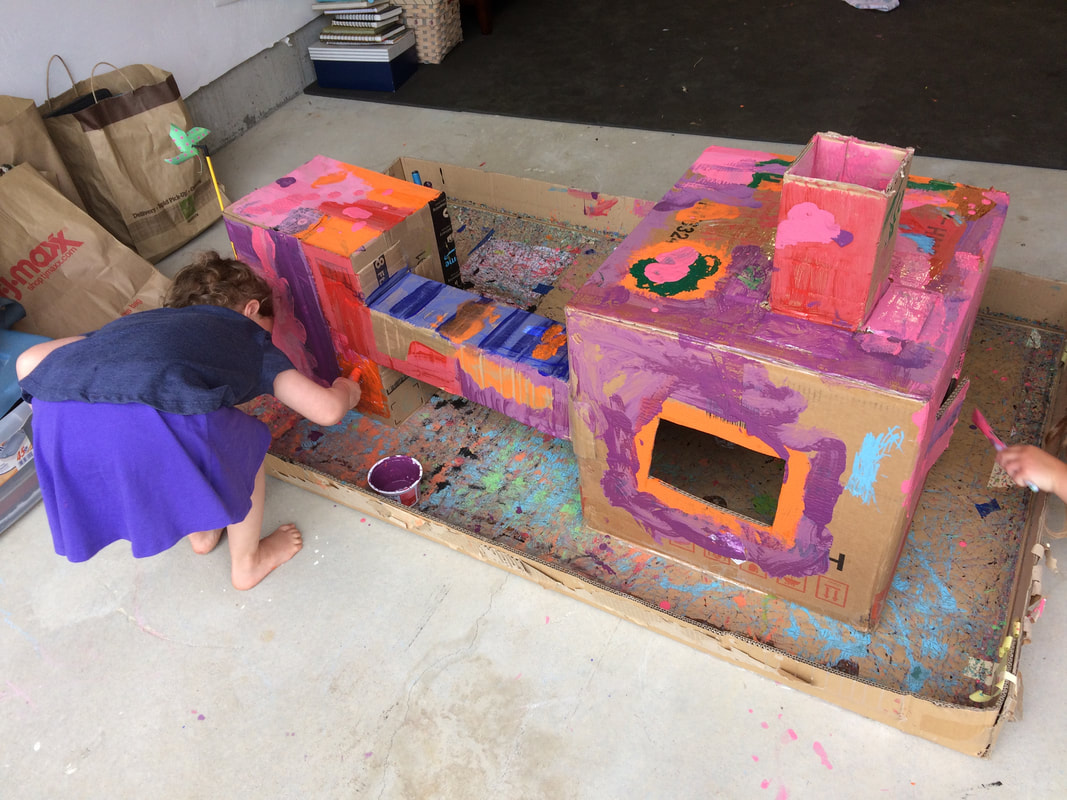
K-2nd Grade: Buildings from Boxes
This one may take a bit of parent help on the construction end using the box cutter and depending on how skilled your child is with a roll of packing tape, but it is well worth the effort in terms of how long they will (hopefully) play with it. I made a dollhouse with my daughter and our neighbor and they have been playing with it in our garage, with the door open, for two weeks now. It is the perfect solution to not being able to play in each other's houses. Scroll through the pics below for inspiration.
This one may take a bit of parent help on the construction end using the box cutter and depending on how skilled your child is with a roll of packing tape, but it is well worth the effort in terms of how long they will (hopefully) play with it. I made a dollhouse with my daughter and our neighbor and they have been playing with it in our garage, with the door open, for two weeks now. It is the perfect solution to not being able to play in each other's houses. Scroll through the pics below for inspiration.
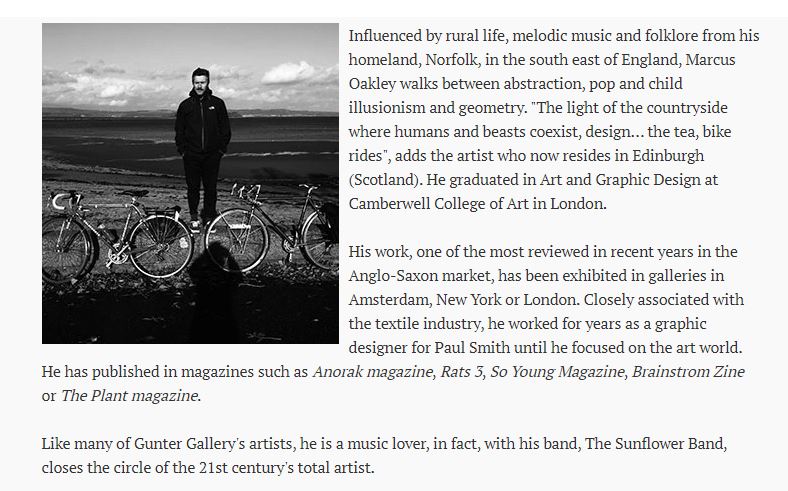
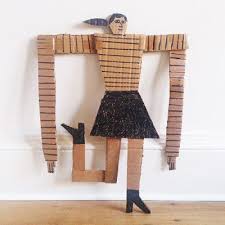
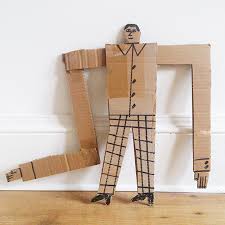
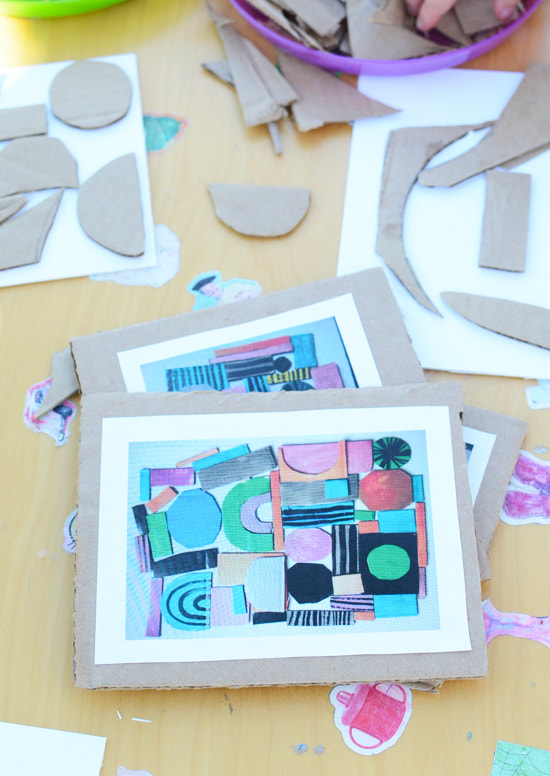
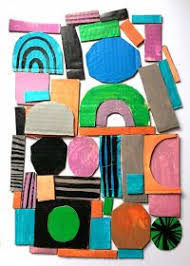
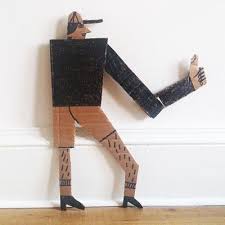
All Ages: Find inspiration from the art of Marcus Oakley. Here's a link to his website http://www.marcusoakley.com/
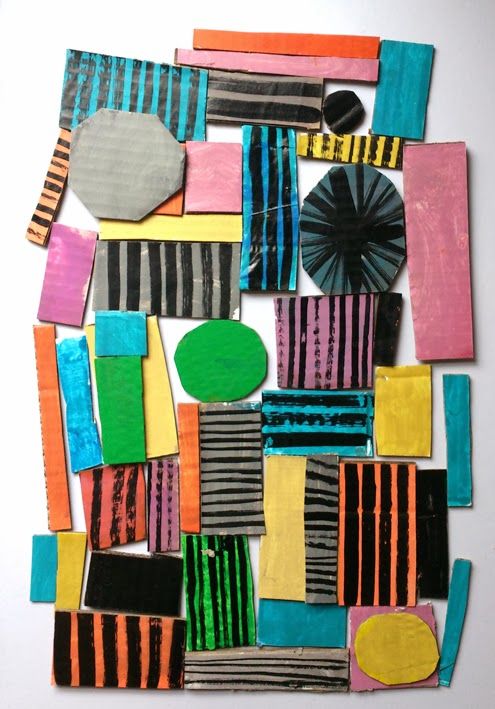
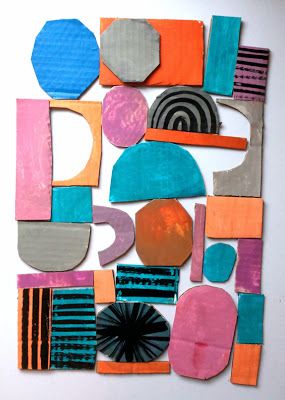
Scroll through the images of his work below and use the step by step lesson plan I have provided to make your own funky, playful, colorful art! This one takes a bit of prep time on the parent end to help with the cutting, but the results are well worth the effort. A simple black frame and, voila, sophisticated modern art for your home.
Scroll through the images of his work below and use the step by step lesson plan I have provided to make your own funky, playful, colorful art! This one takes a bit of prep time on the parent end to help with the cutting, but the results are well worth the effort. A simple black frame and, voila, sophisticated modern art for your home.
| marcus_oakley_lesson_plan.docx |
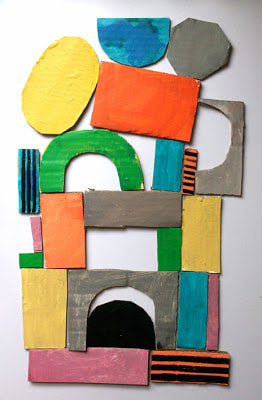
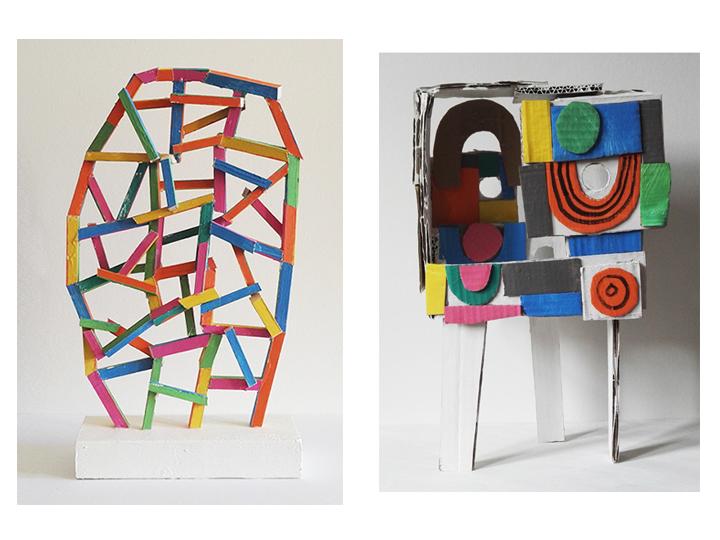
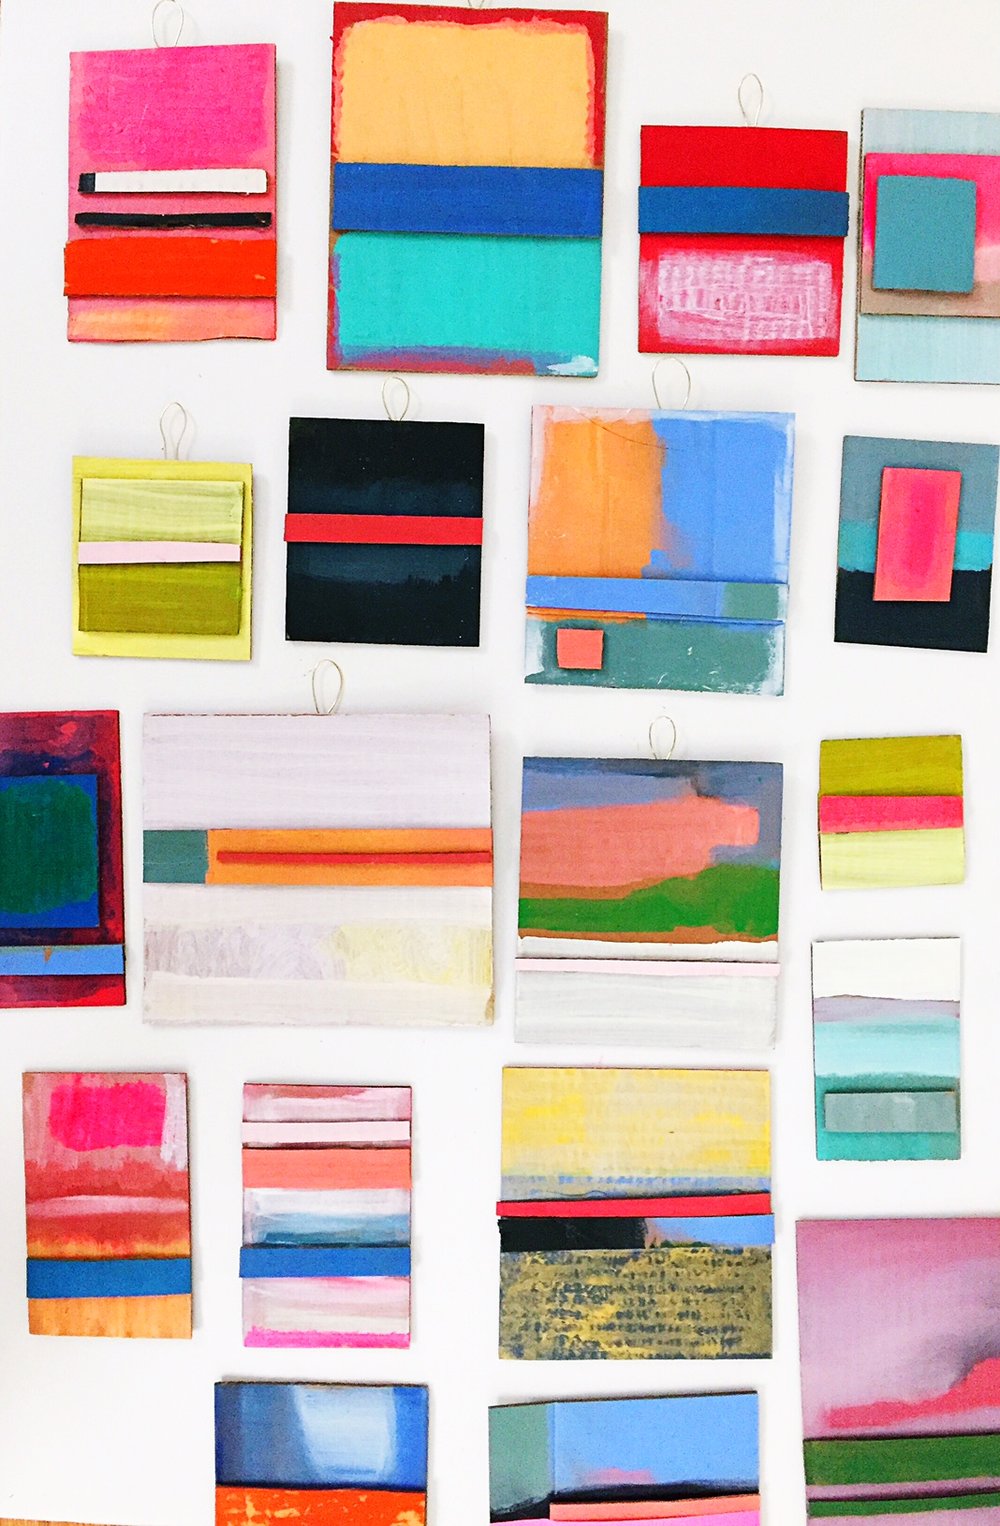
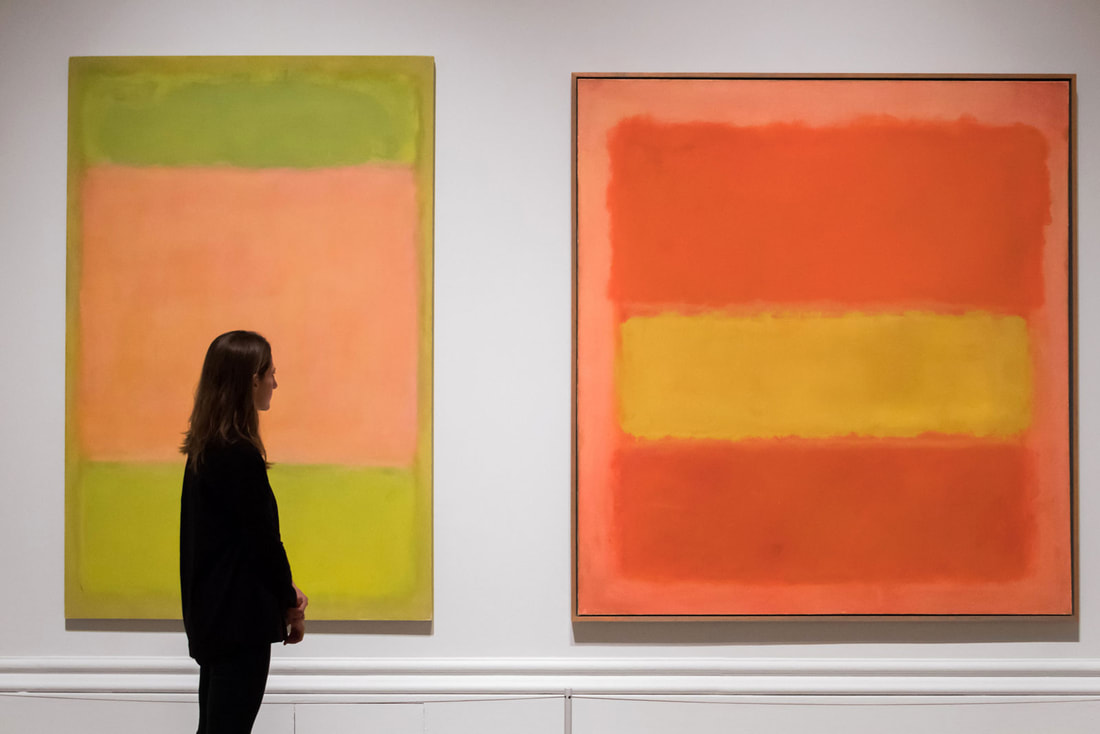
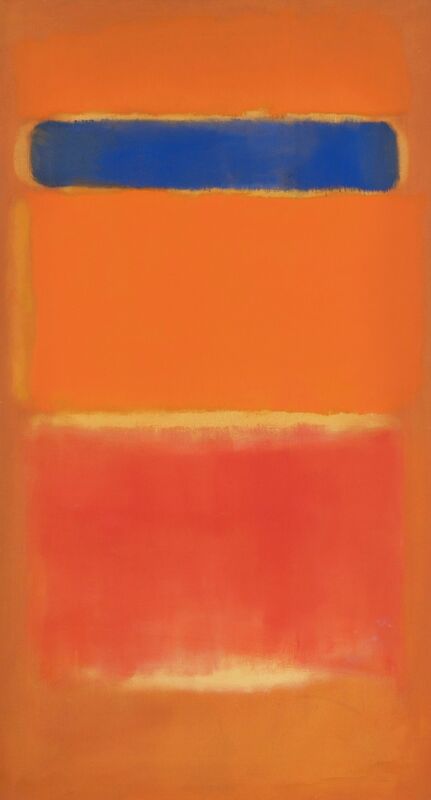
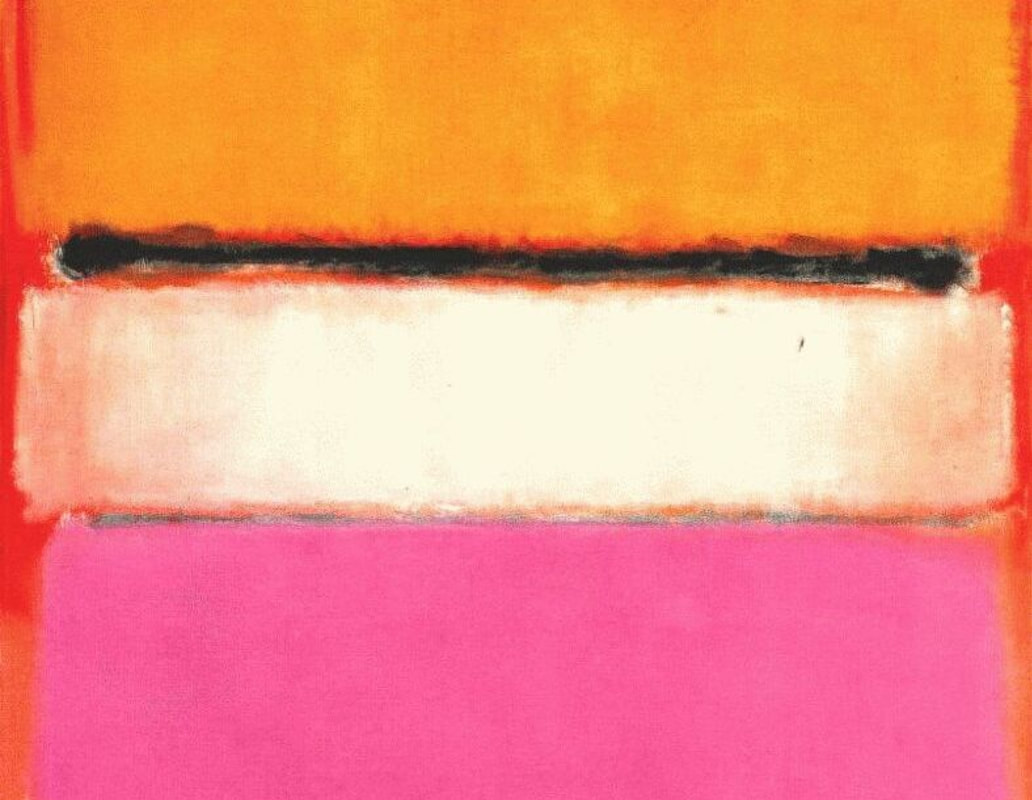
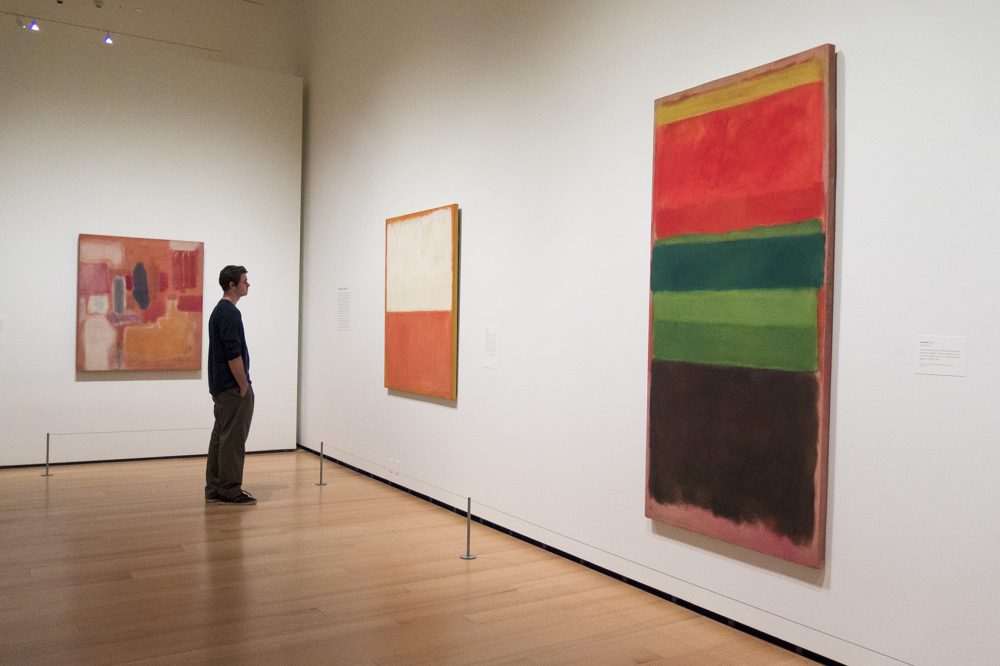
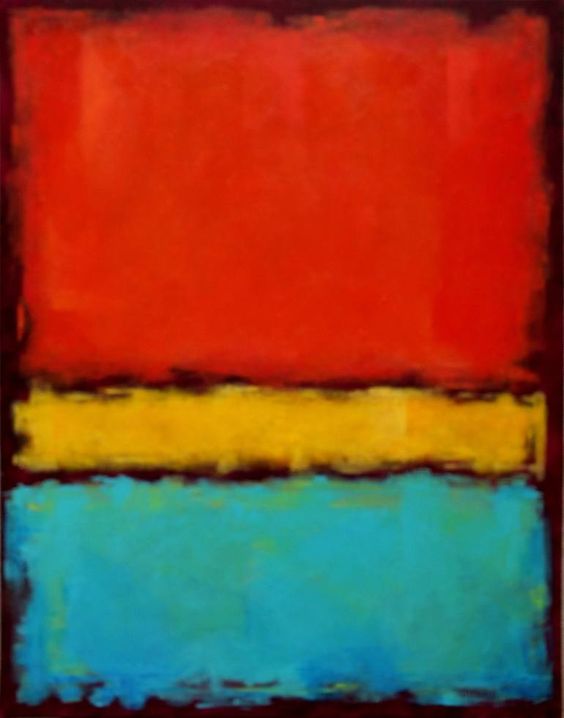
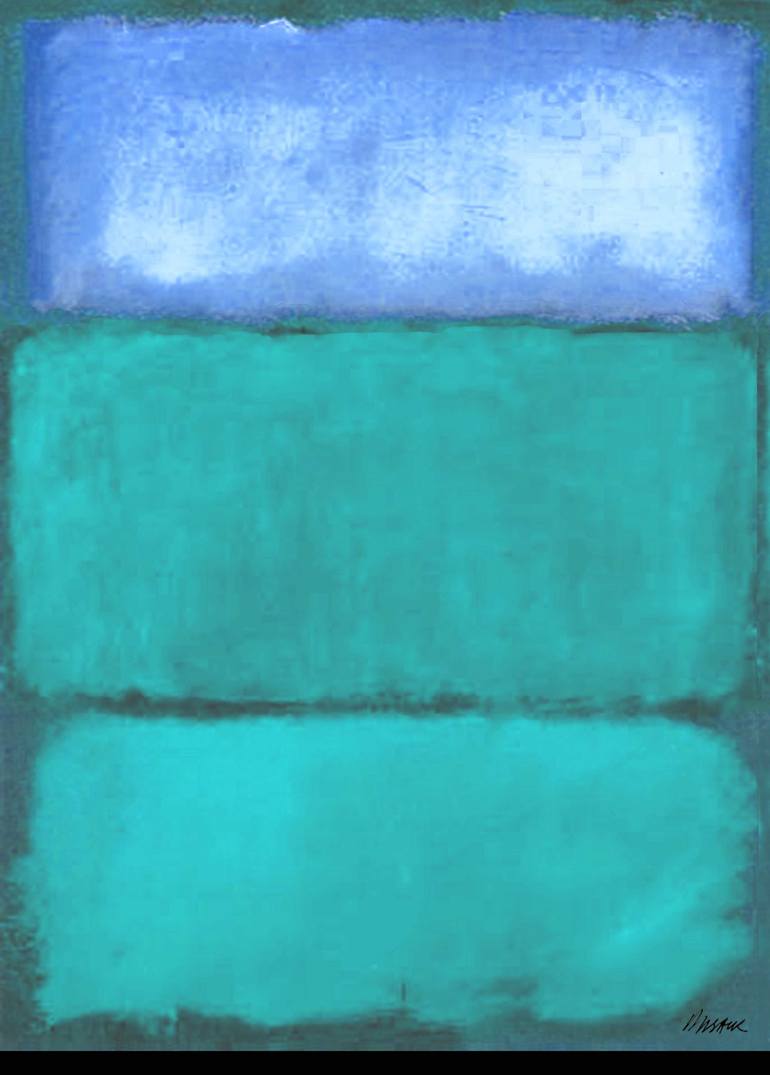
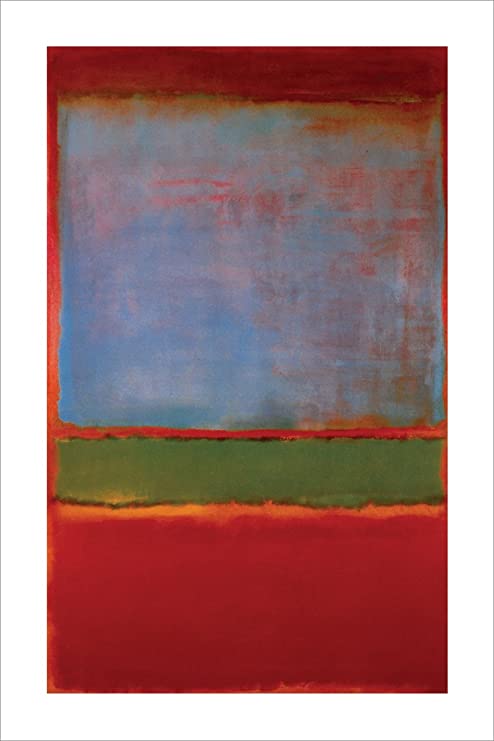
Another artist you can look to for inspiration for this project is Mark Rothko. Here are some links to learn more about this artist:
https://kids.kiddle.co/Mark_Rothko#:~:text=Mark%20Rothko%20(September%2025%2C%201903,expressionism%20or%20color%20field%20painting.
https://www.tate.org.uk/kids/explore/who-is/who-mark-rothko
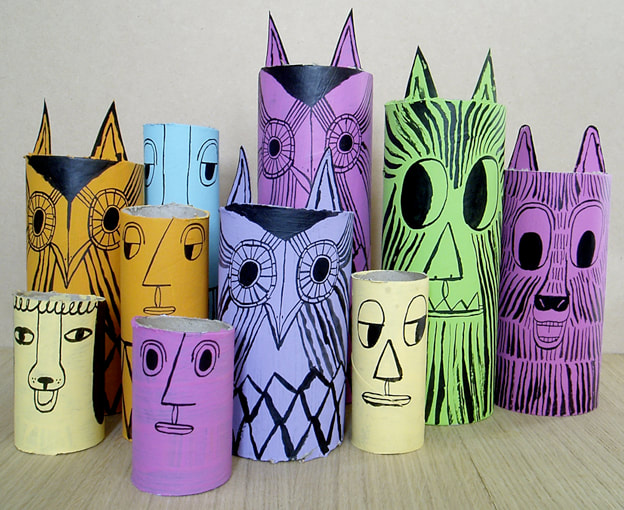
If made small, with a simple string on top for a hook, these could be great ornaments. Your Christmas tree could be a work of modern art! The first image in the gallery below shows what they would look like if done small. Or, you could go big and hang it up behind your couch!
https://kids.kiddle.co/Mark_Rothko#:~:text=Mark%20Rothko%20(September%2025%2C%201903,expressionism%20or%20color%20field%20painting.
https://www.tate.org.uk/kids/explore/who-is/who-mark-rothko
If made small, with a simple string on top for a hook, these could be great ornaments. Your Christmas tree could be a work of modern art! The first image in the gallery below shows what they would look like if done small. Or, you could go big and hang it up behind your couch!


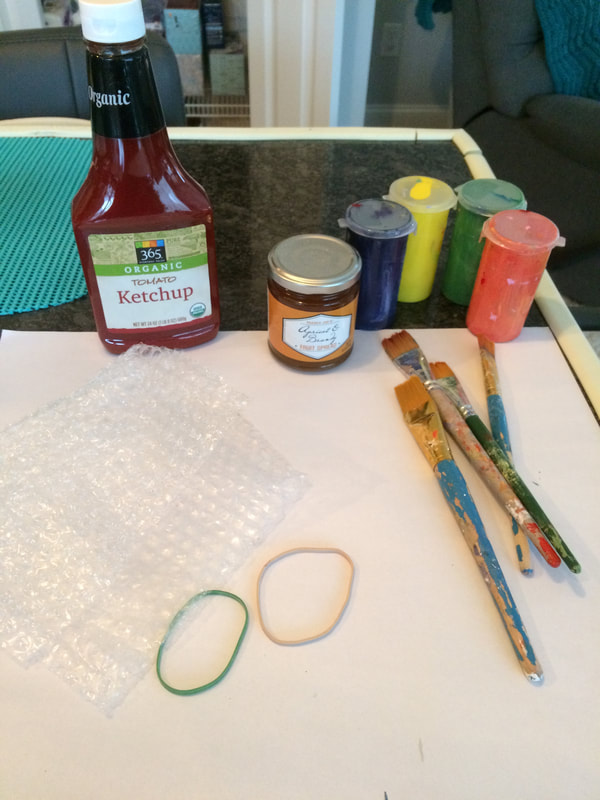
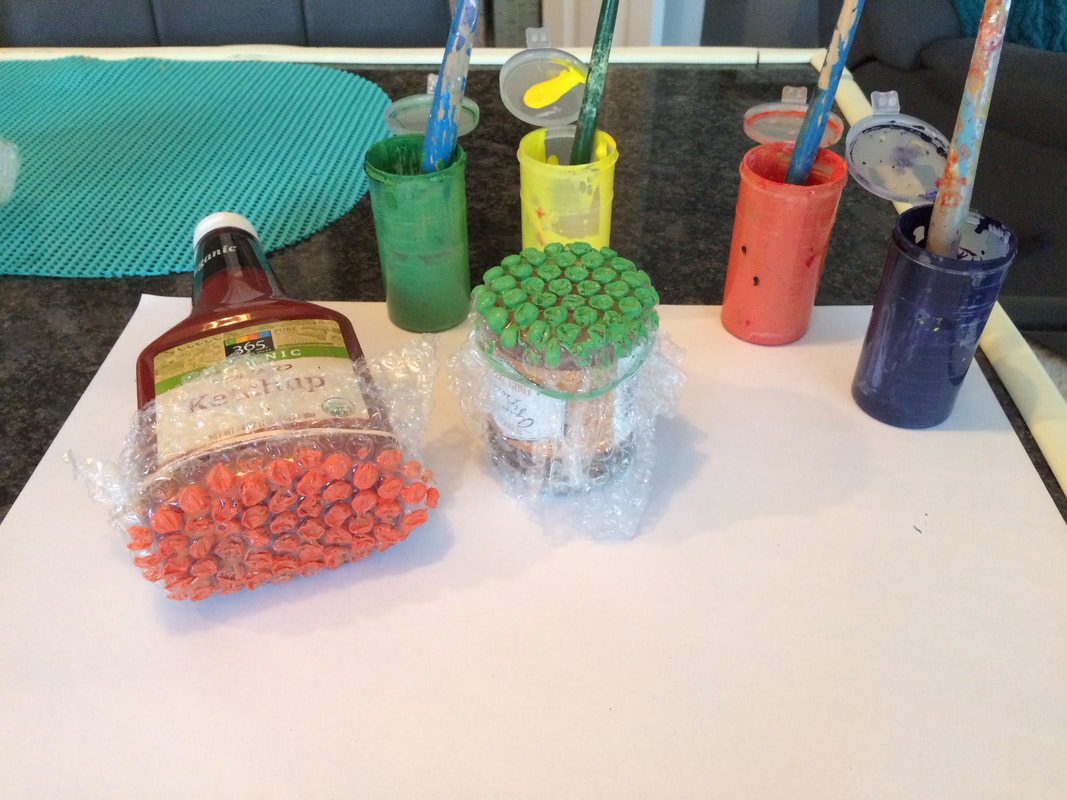
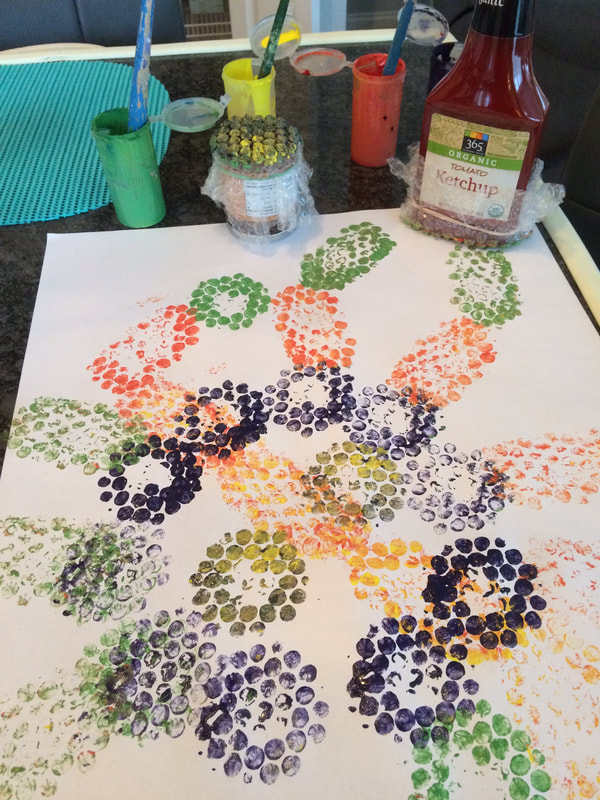
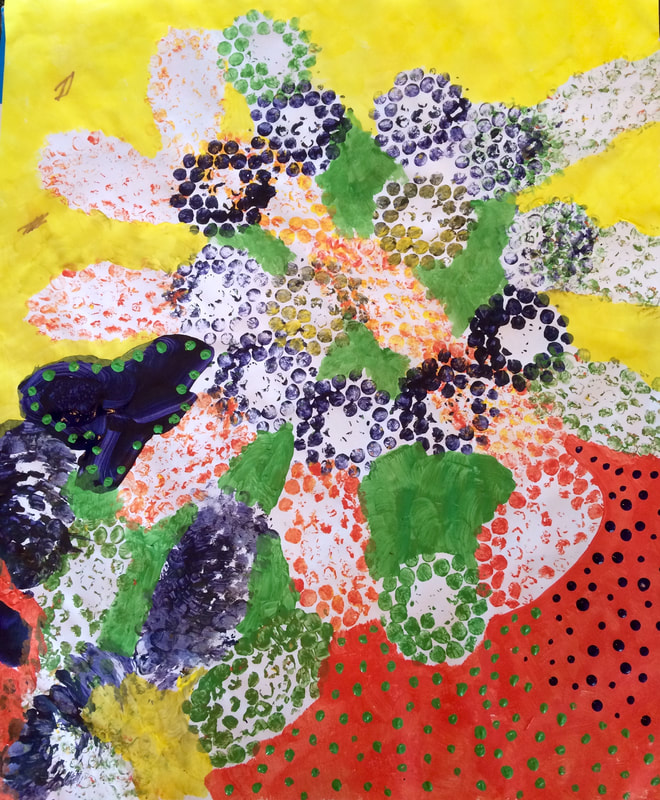
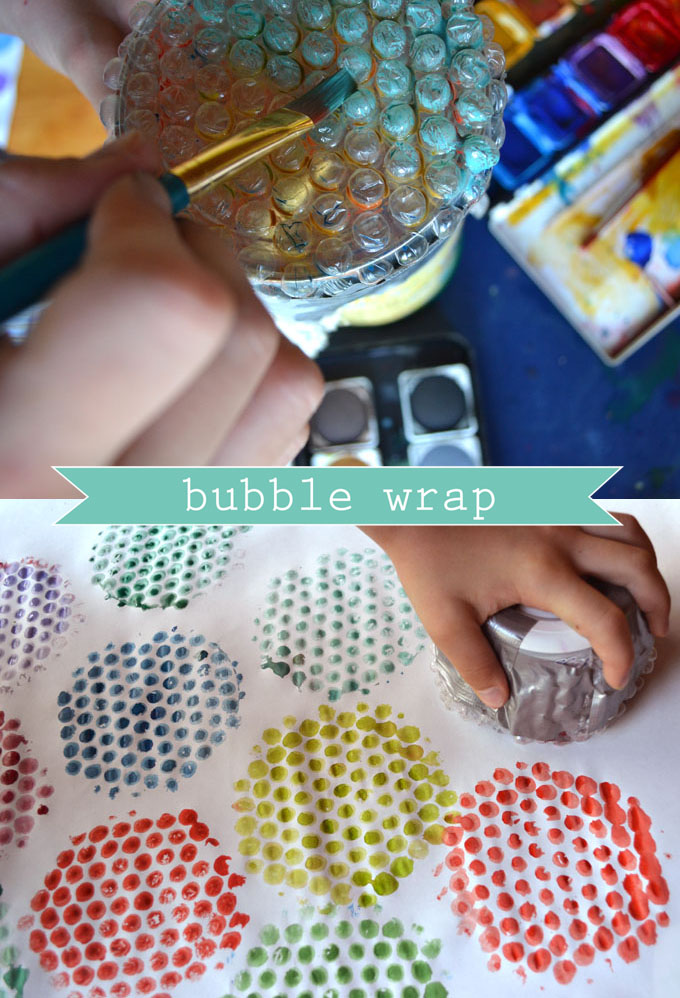
All Ages: Bubble Wrap Prints
We experimented with these in 2nd and 3rd grade in the art room before the closure. With some modifications using common items from your pantry this can be a slam dunk art project at home too. Scroll through the images below to see how it works.
We experimented with these in 2nd and 3rd grade in the art room before the closure. With some modifications using common items from your pantry this can be a slam dunk art project at home too. Scroll through the images below to see how it works.

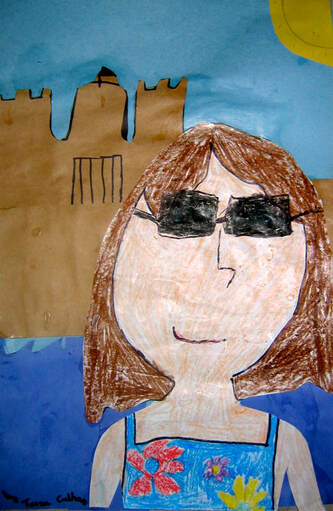
Week 11 (6/10-6/17): Summer Self Portraits
As the school year winds to a close and summer officially begins, let's review how to draw self portraits by drawing pictures of ourselves at our favorite beach or pond. Watch the you tube video for your grade level and use my lesson plan to complete the project using whatever materials you have on hand at home. There are lots of ways to do this project. Modify the basic lesson plan to meet the needs of your child. I have also included a downloadable assessment if you'd like to test your art vocabulary knowledge.
|
| ||||
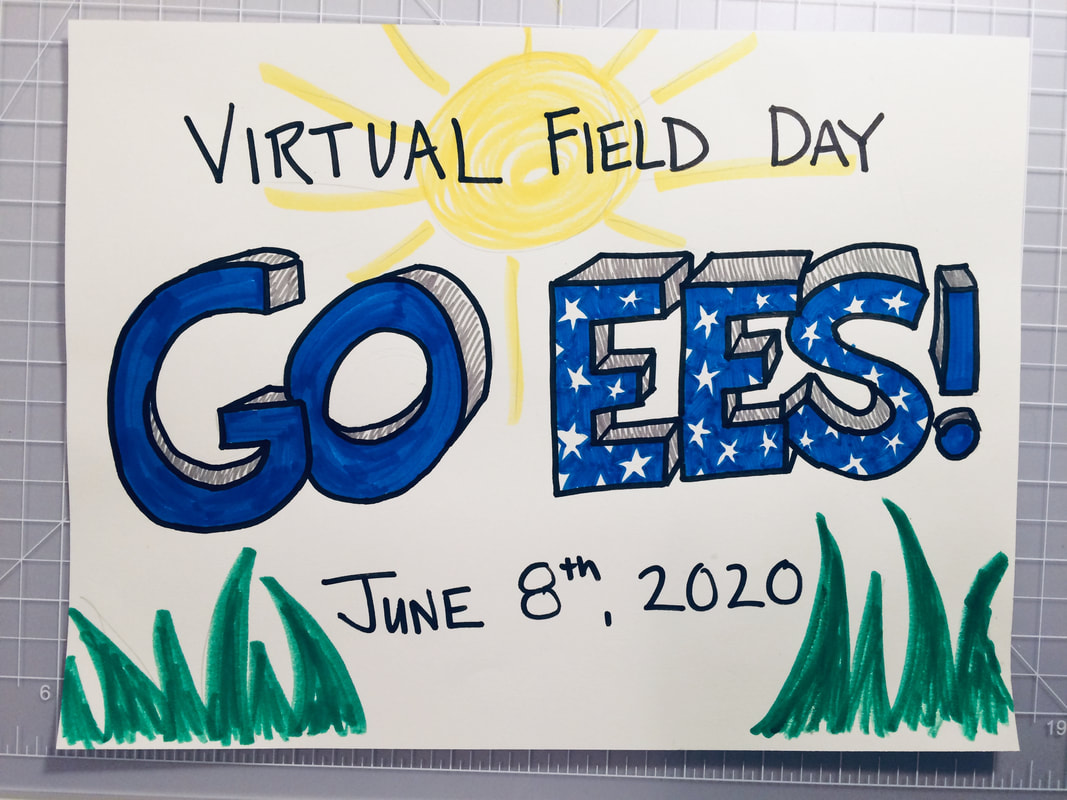
Week 10 (6/3-6/10): EES School Spirit for our Virtual Field Day!
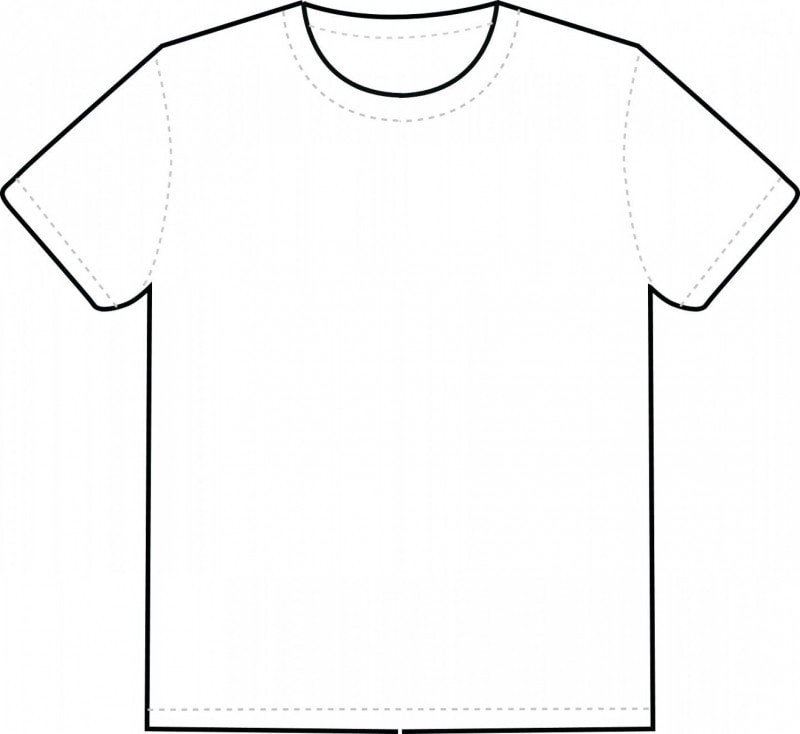
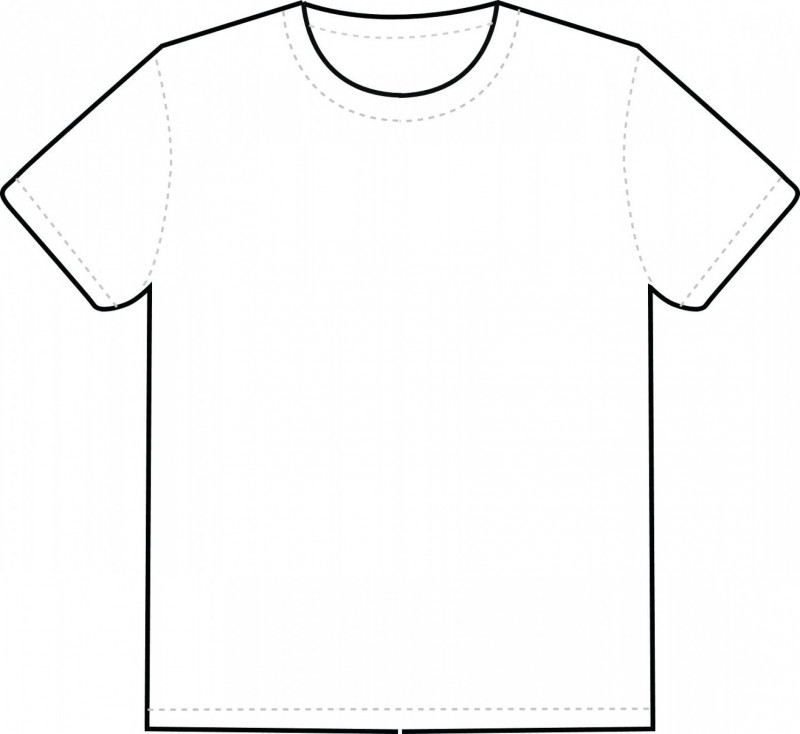
To build moral and get geared up for our first ever virtual field day on June 8th, there are two art invitations this week. Let's drum up some school spirit by designing our own EES tee shirts and learning how to write our names, or any words you want, in block letters with one point perspective. Use our Eastham school colors, blue and white, to make patterns and designs on your shirts and letters!
All grades: Use the template below to design your own T-shirt showing off your Eastham pride. Or if you happen to have a blank white T-shirt and some fabric markers or paints, design a T-shirt you can actually wear while you participate in the field day activities!
|
Not sure what to draw? Here are some ideas:
| ||

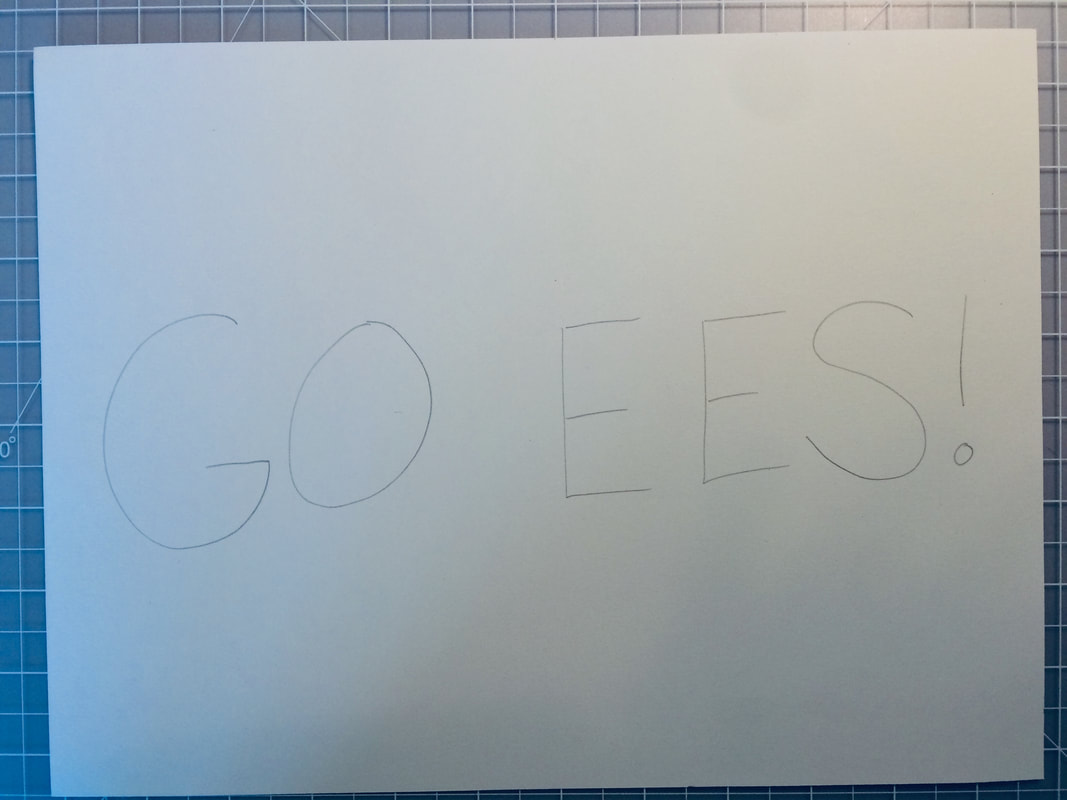
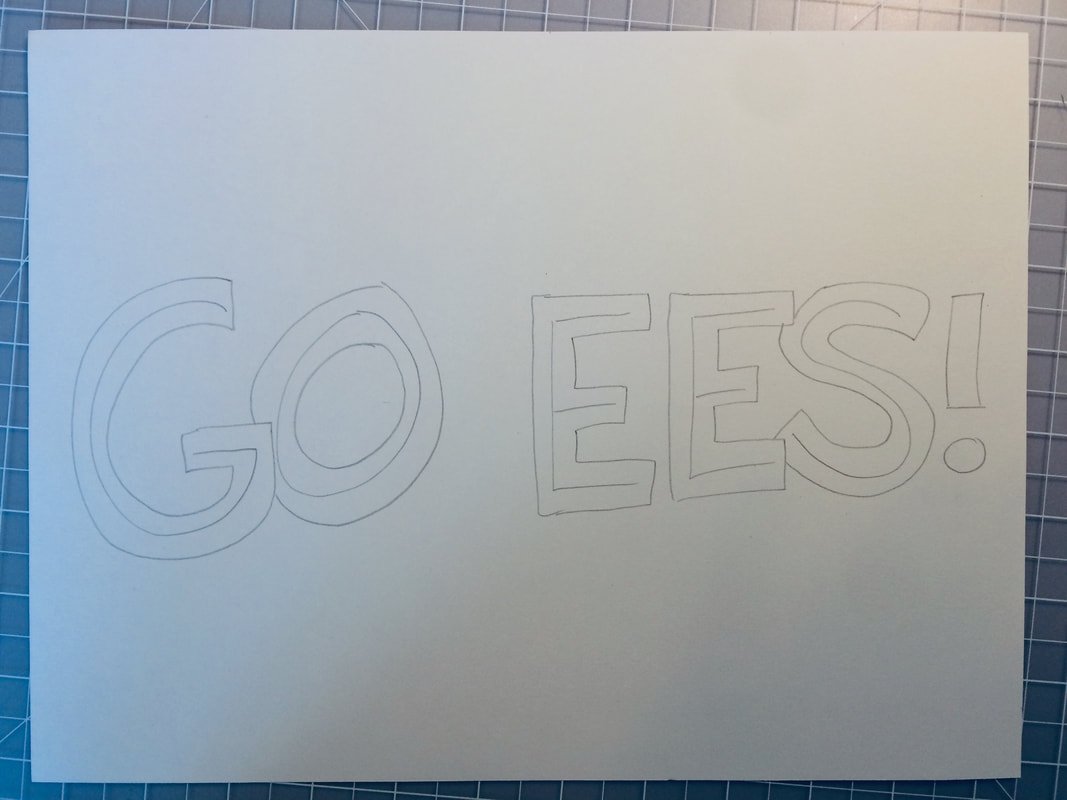
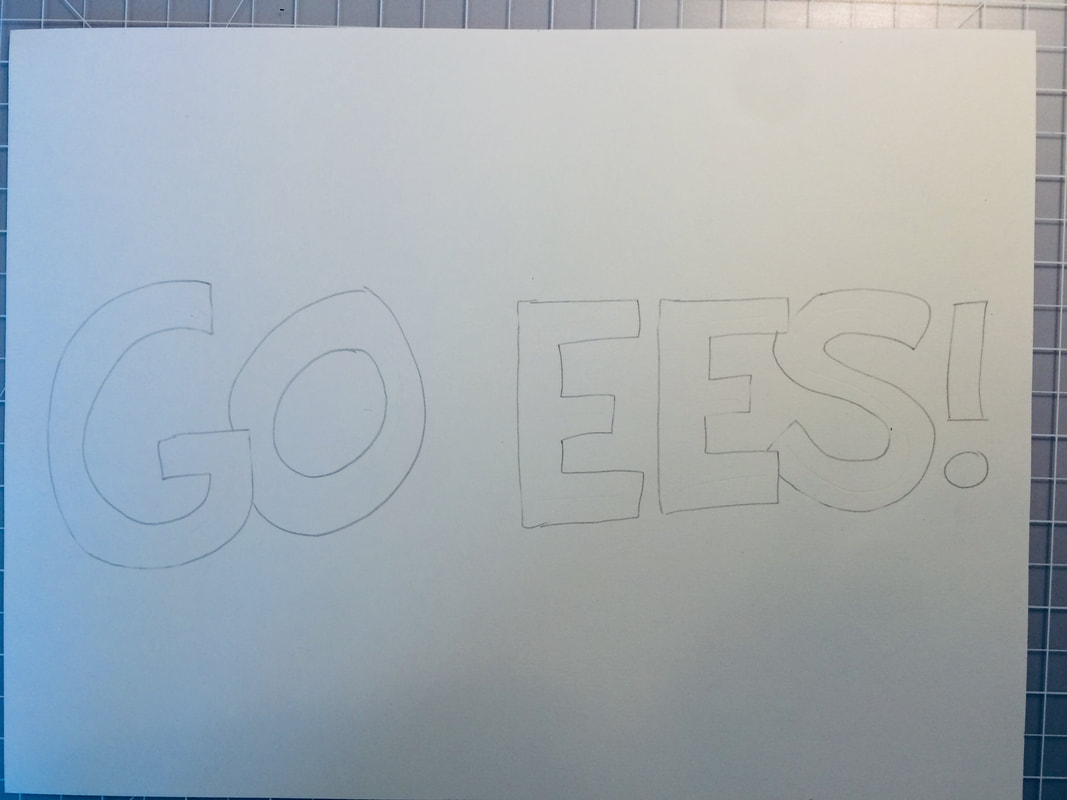
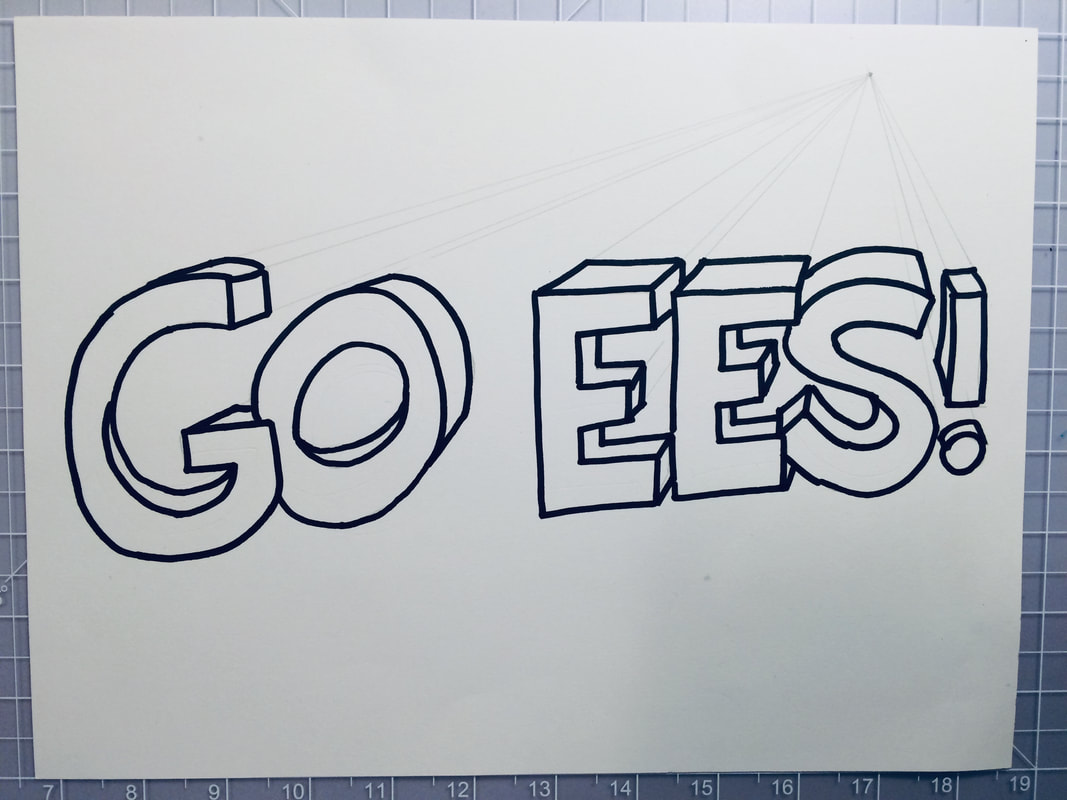
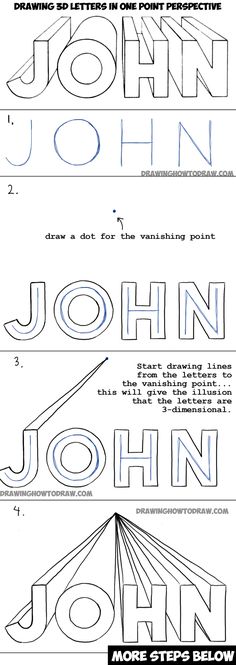
Grades 3-5: Block Letters in One Point Perspective
This is a challenging project, I'd recommend starting out with just one letter to get the hang of it. Scroll through the pictures below to follow along with how I made my sign, then watch the you tube video I have attached below. You can also download my 1 page step by step lesson plan which shows these same pictures with short captions explaining the steps. When it comes to adding color, think about using interesting patterns with our school colors, blue and white.
| 3d_block_letters.docx |

|
|
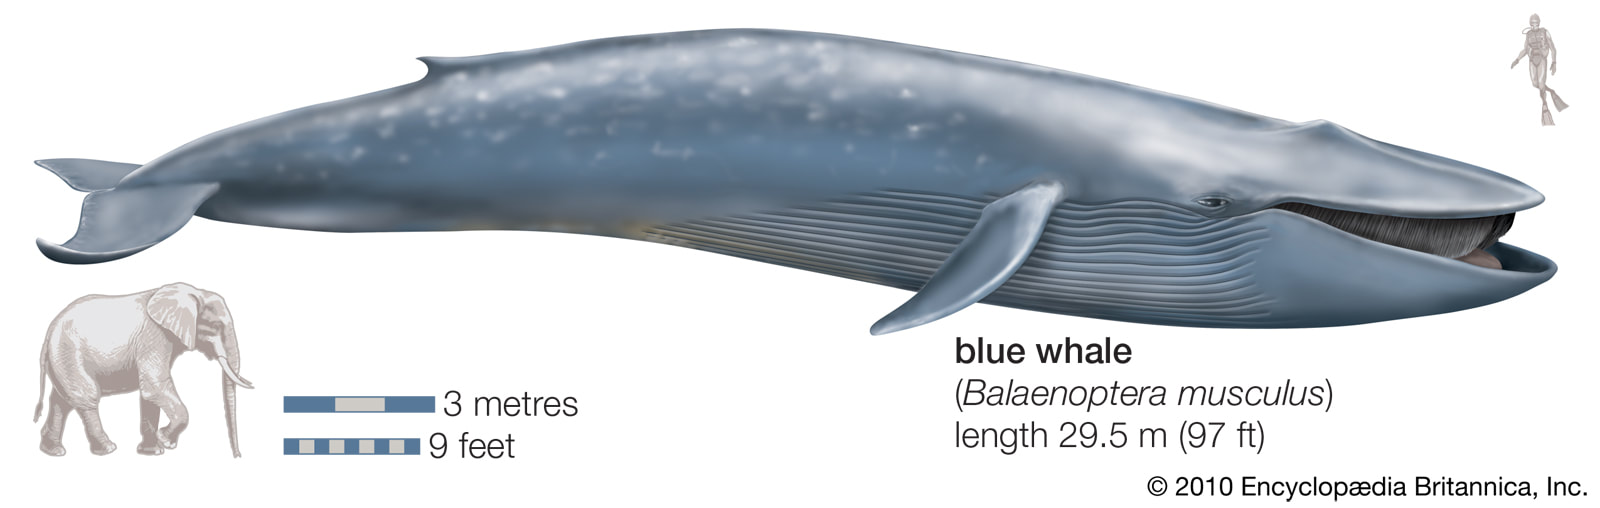
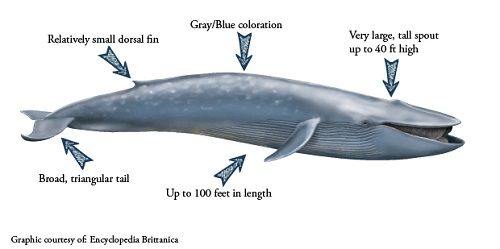
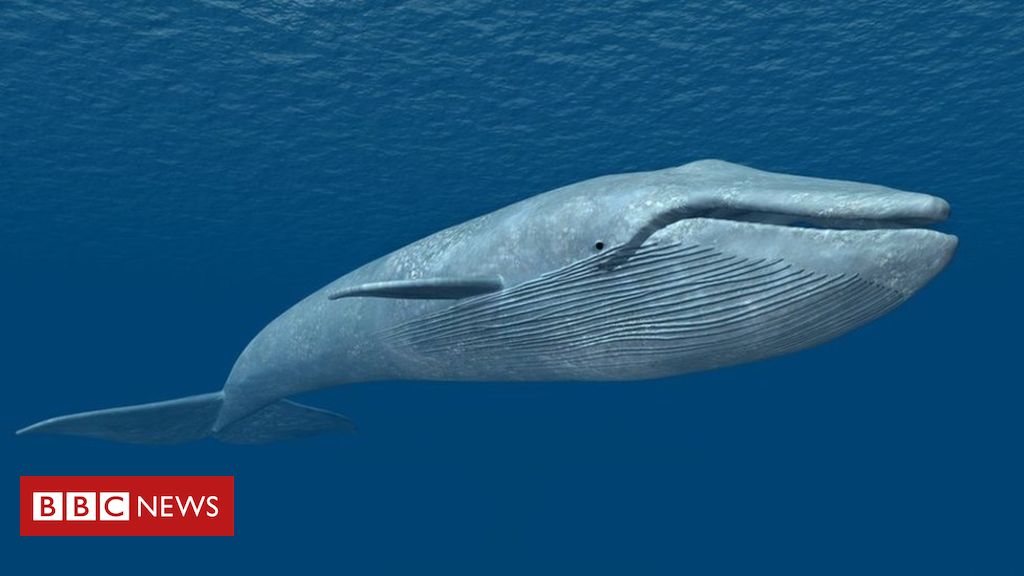
Week 9 (5/27-6/3): Giants of the Deep
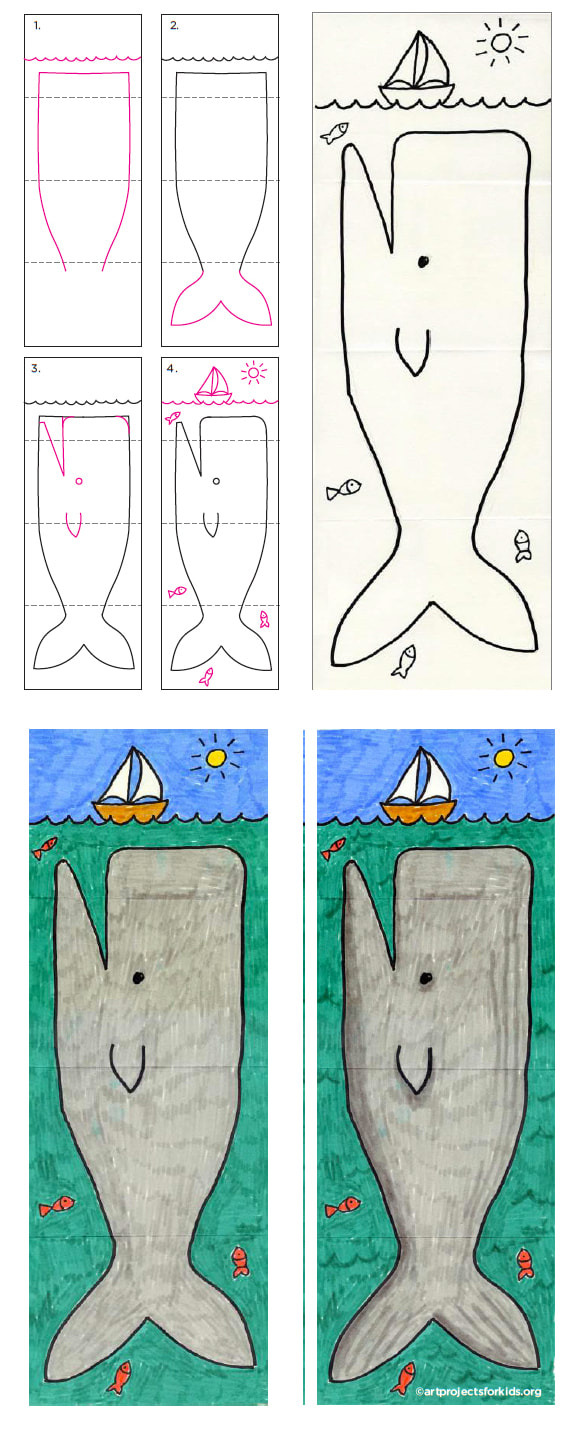
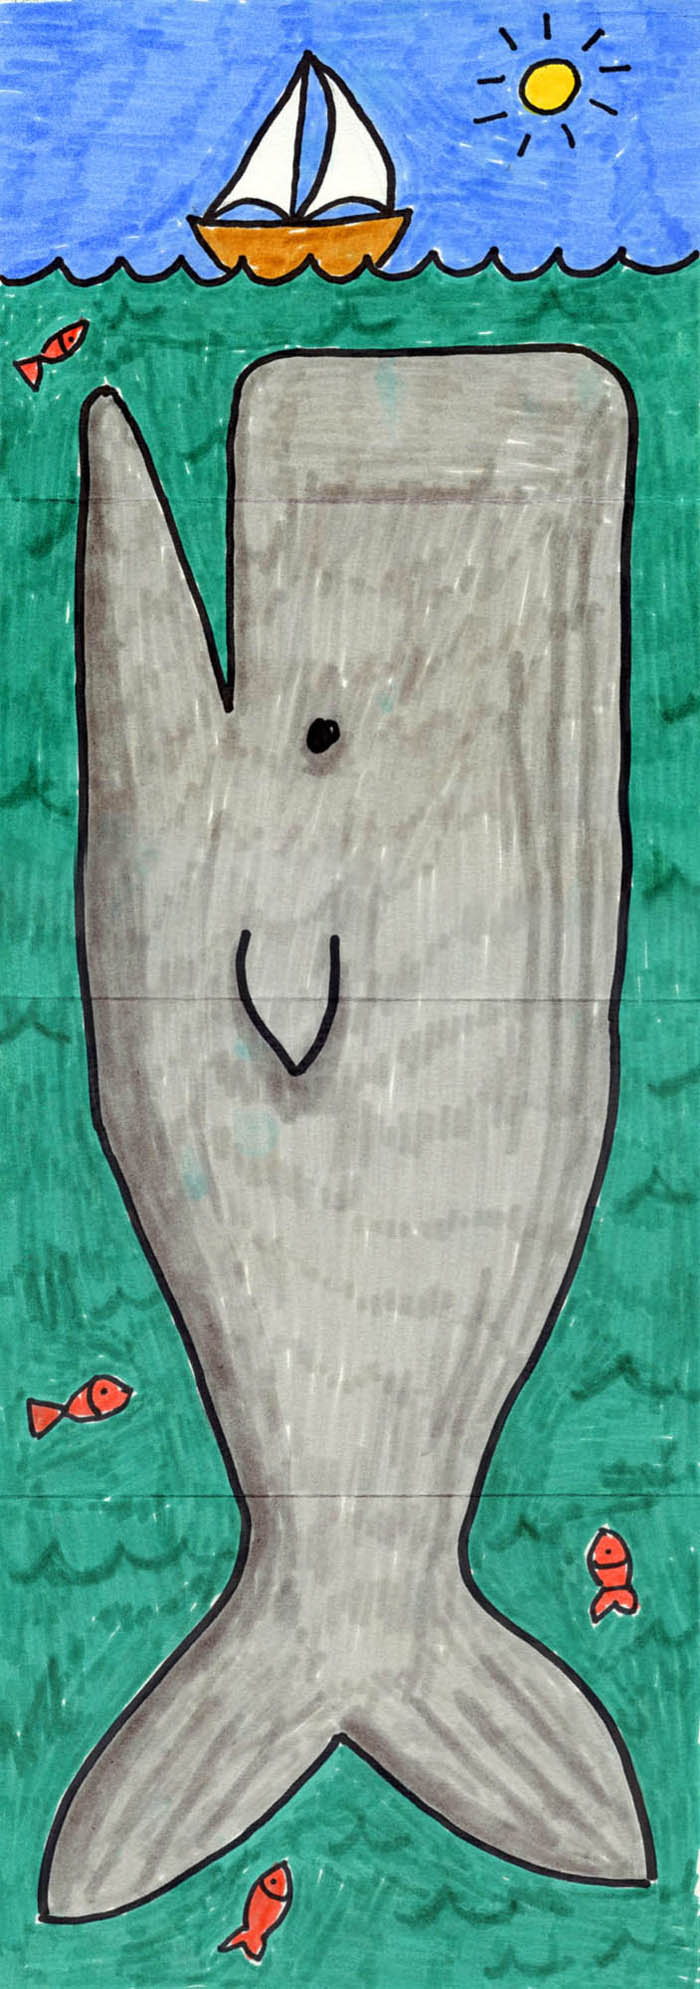
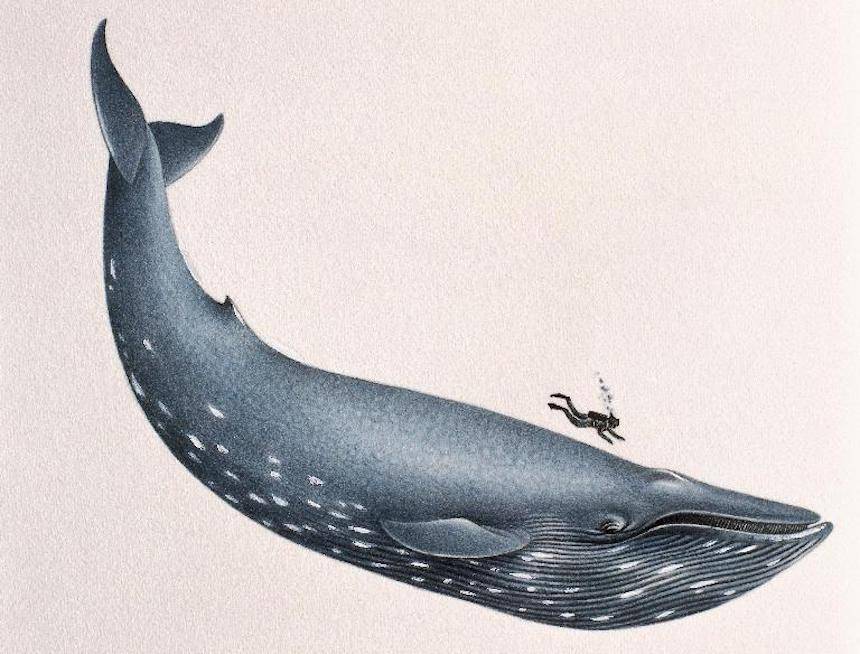
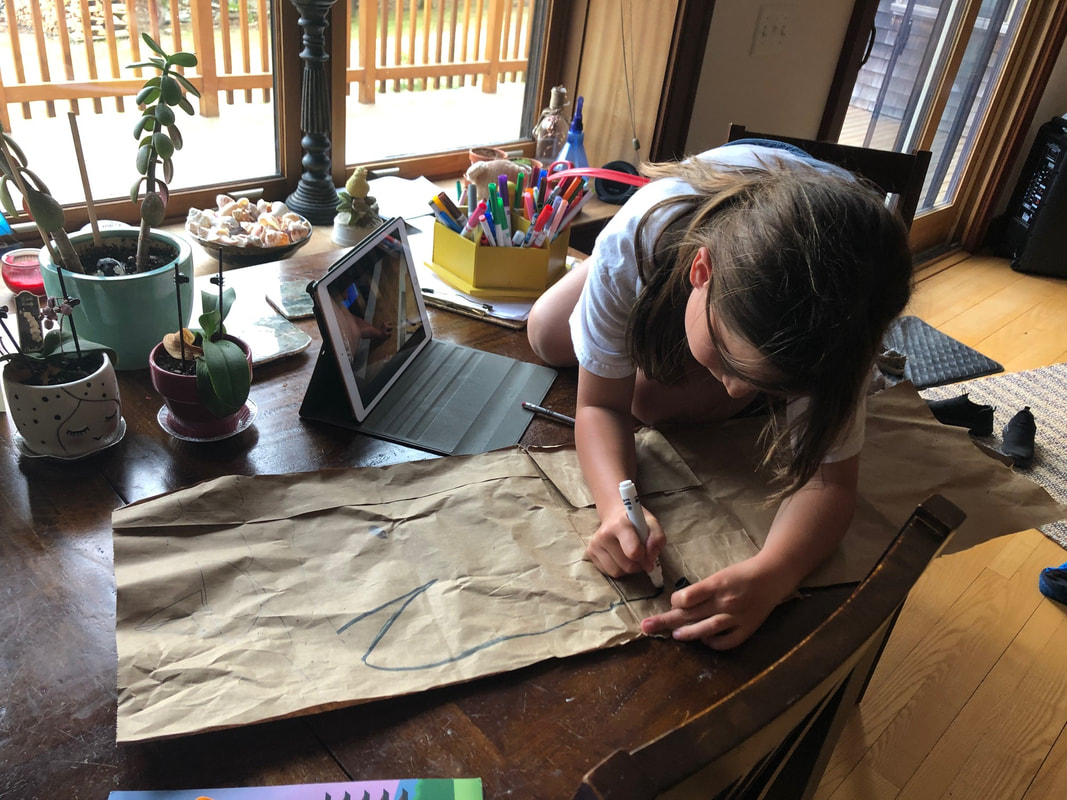
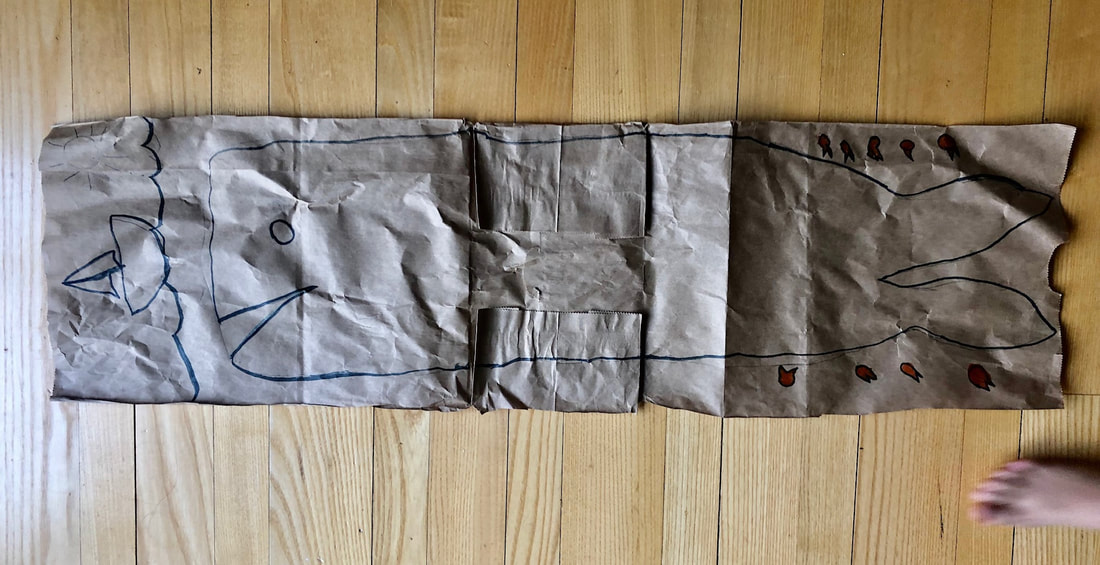
Grades K-2: Drawing a Huge Blue Whale on a Brown Paper Grocery Bag
Start by listening to Nicola Davies read her book "Big Blue Whale" to learn more about these incredible giants of the deep.
Next, try drawing your own big blue whale. Since all the grocery stores are making us use the brown paper bags again, most people probably have a pile of them by now. Cut along the folds to make big flat piece of paper (like we used to do in high school to cover our text books) and use it to draw a huge whale. See the step by step image below and scroll through the picture gallery I have created for inspiration. If you have chalk, paint or crayons those would probably be best to use since it will be such a large drawing.
|
|
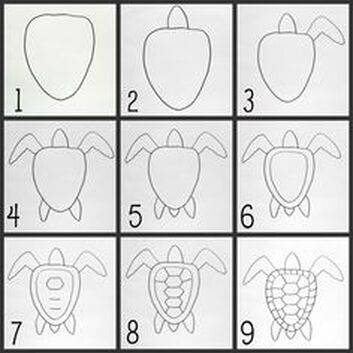
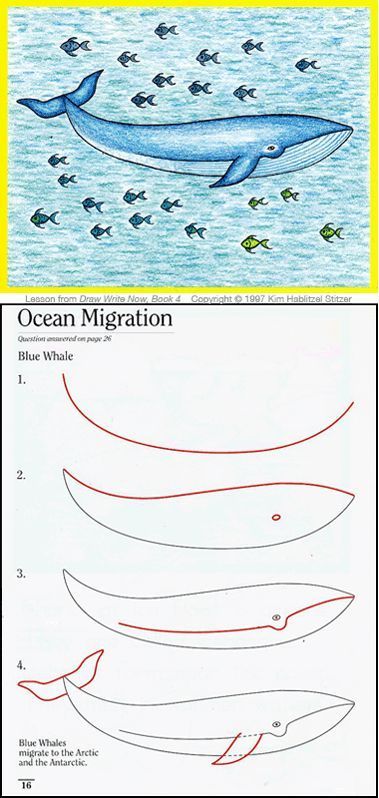
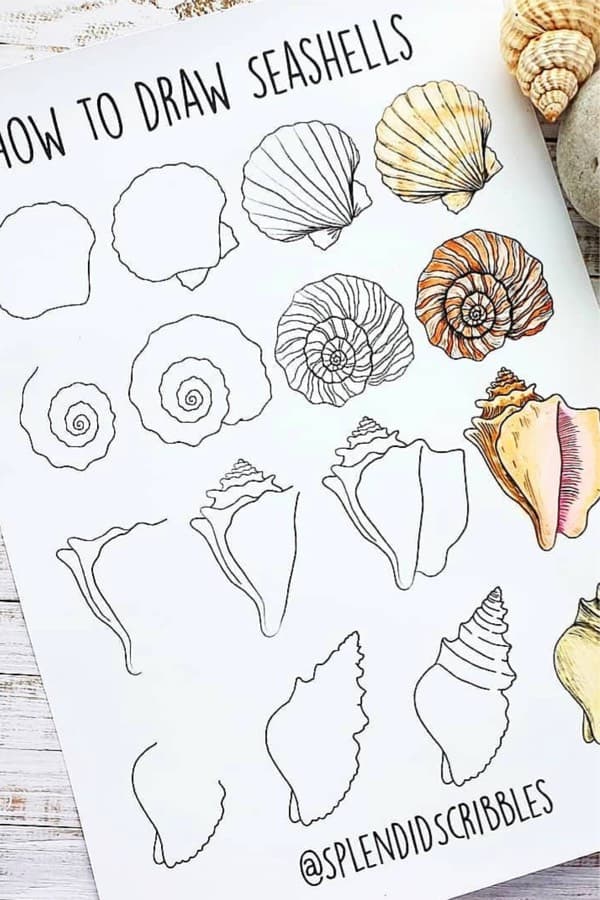
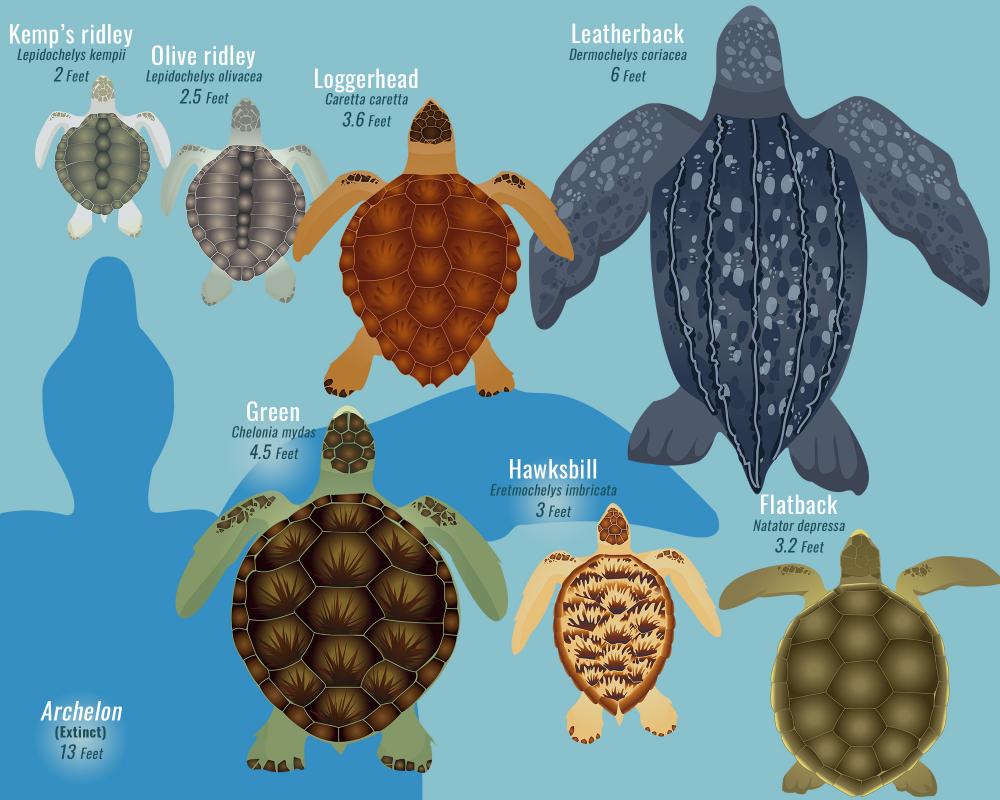
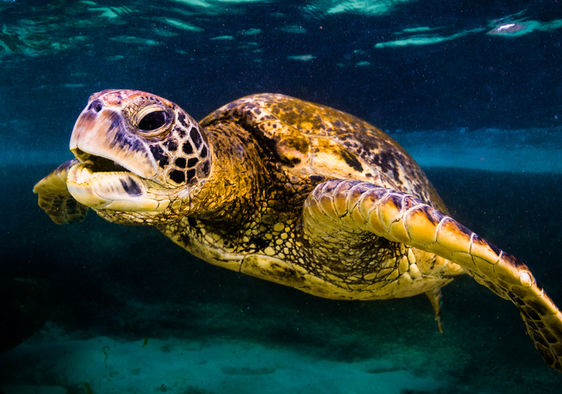
Grades 3-5: Drawing Giant Sea Turtles and Blue Whales
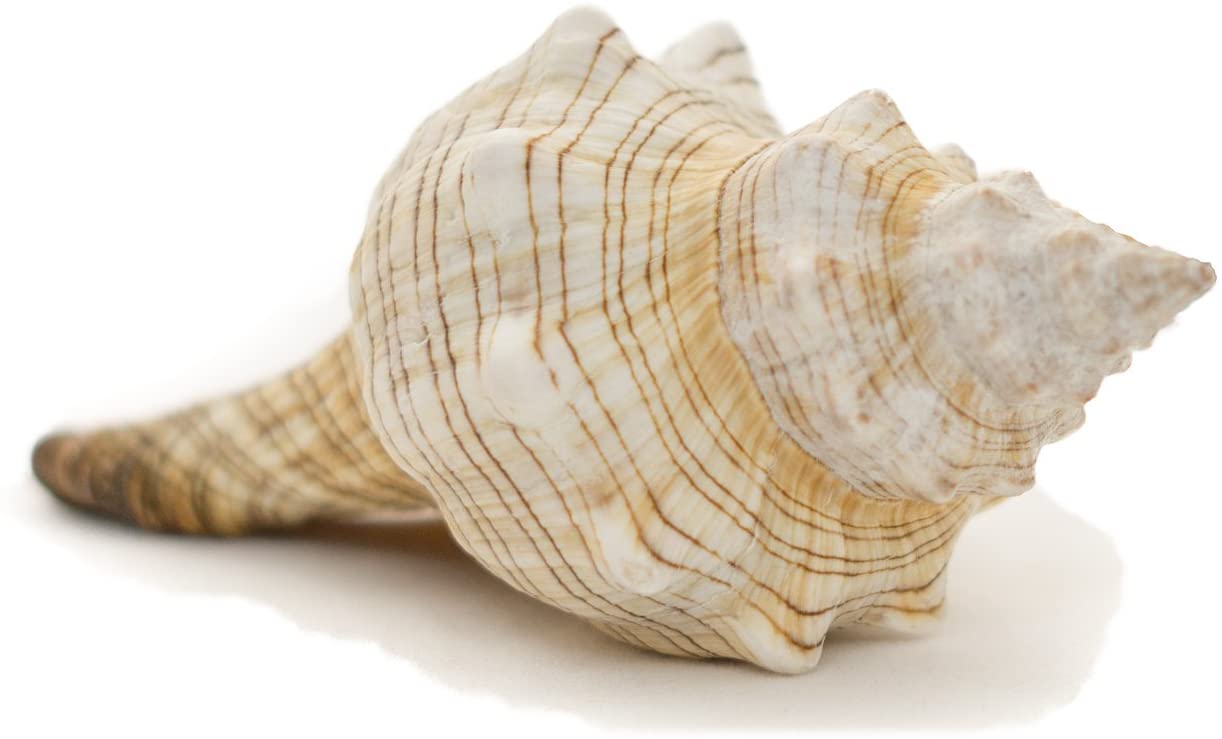
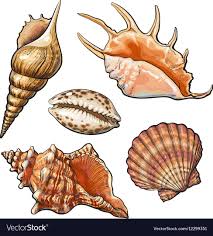
Scroll through the gallery of images below for inspiration and use these step by step tutorials to draw your own Blue Whale or Giant Sea Turtle. I included some pictures of shells if you'd like to add some details to the ocean floor or beach if your turtle is nesting. There are also downloadable PDF step by step directions that you can print.
|
|
| ||||
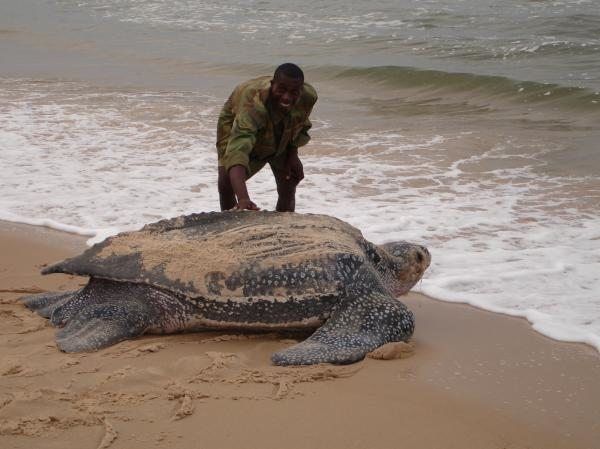


And here's this, for your viewing pleasure
Week 8 (5/20-5/27): Dandilions, Daisies and One Point Perspective
This week's art invitation is all about drawing, so the art elements we'll be focusing on are Line, Shape, Space (and Color if you choose to color in your drawings, which I hope you will!) K-2 are invited to draw a field of dandelions, and 3-5 are invited to try out drawing a landscape in One Point Perspective. Please see lesson plans, gallery and you tube videos below for help completing the projects.
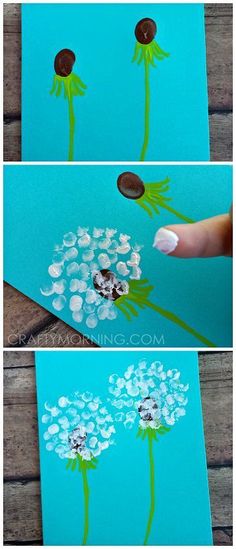
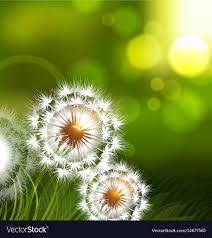
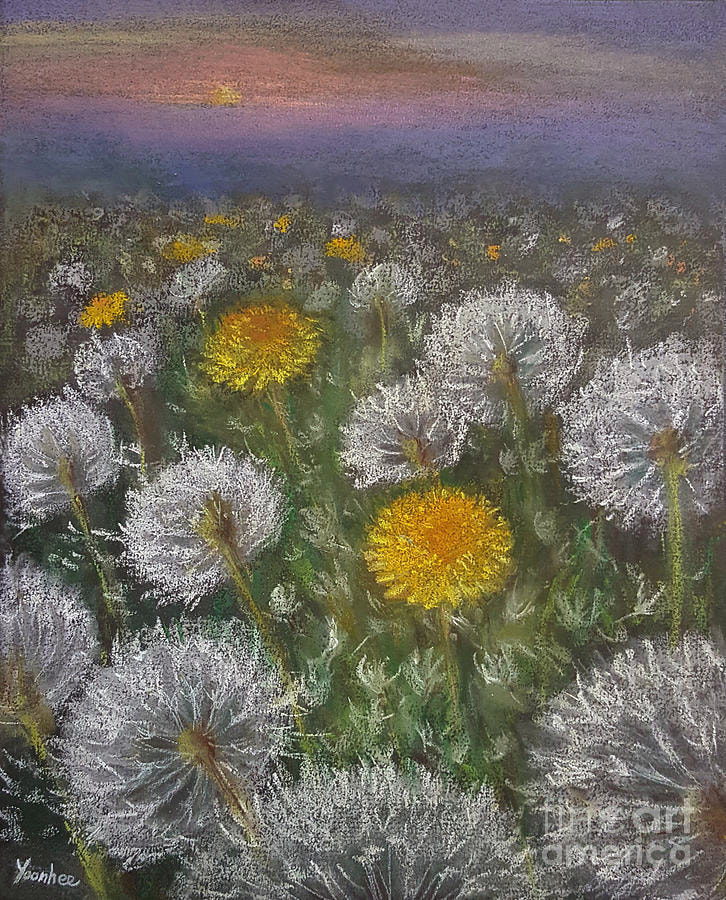
Grades K-2 Field of Dandelions (or Daisies)
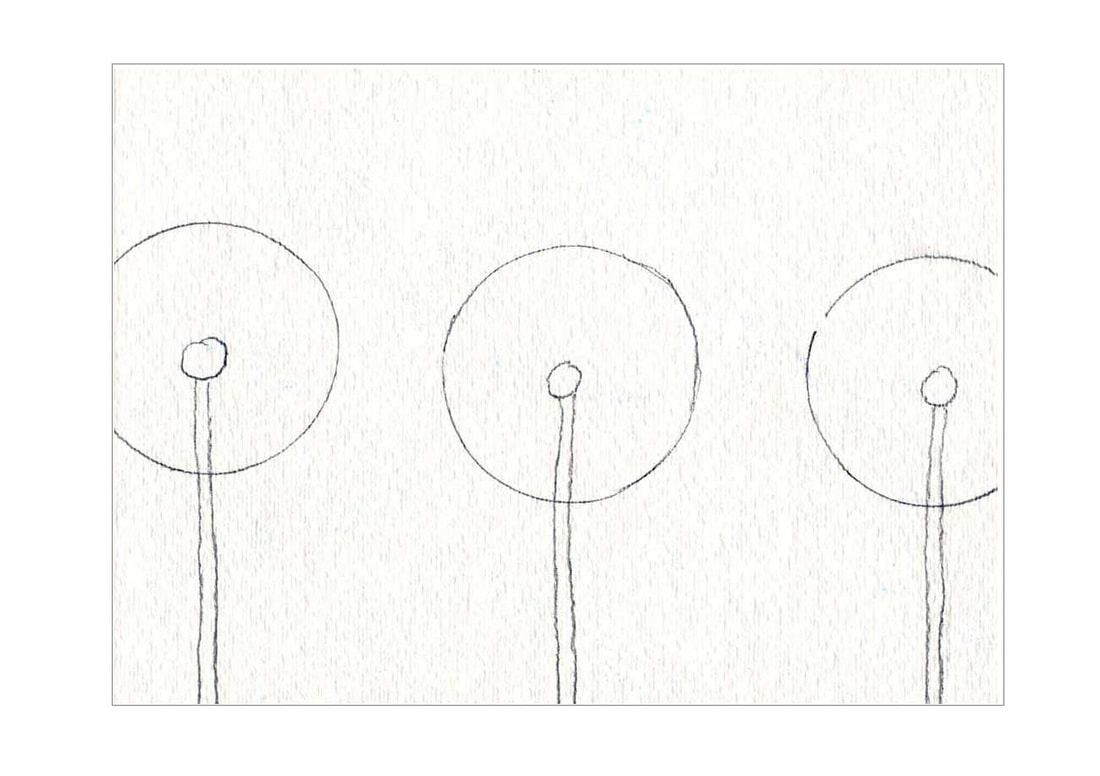
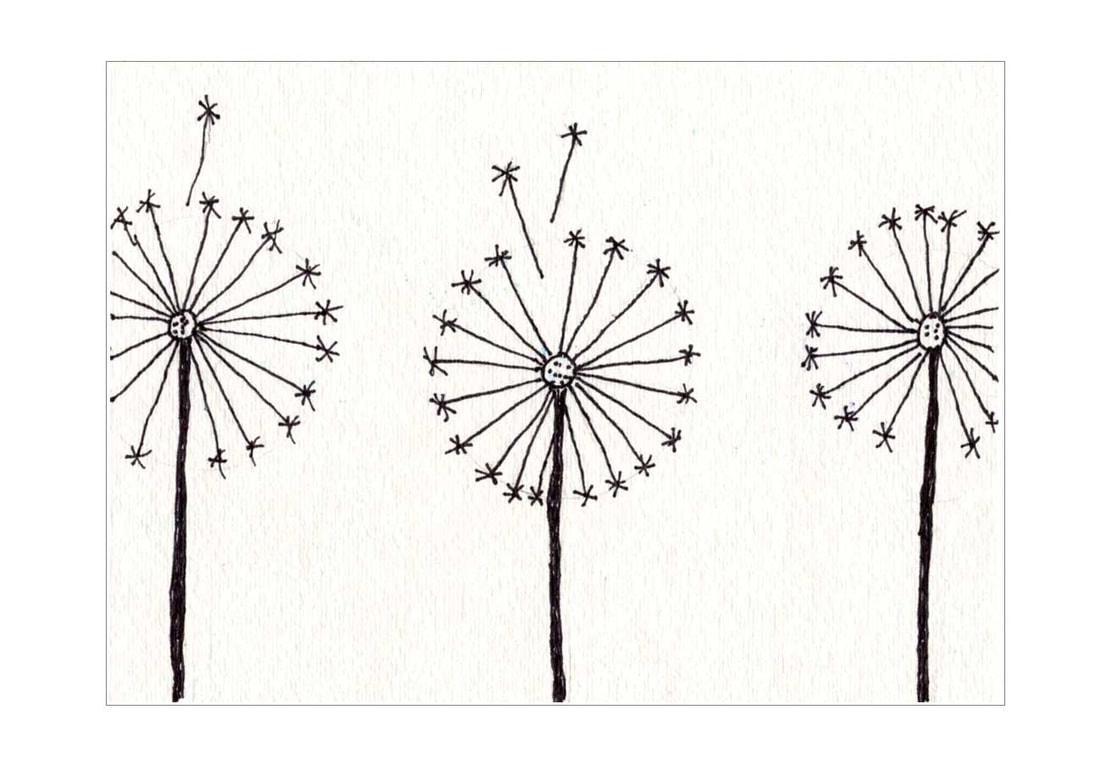
This is a fun painting activity that can be modified to suit grades K-2. Watch my you tube video below to learn how to easily paint a dandelion that has gone to seed. If you have colored paper, that would provide the best background for the white paint to show. If you just have white paper, you could paint a quick "wash" of blue, or whichever color paint you prefer to make your own colored paper.
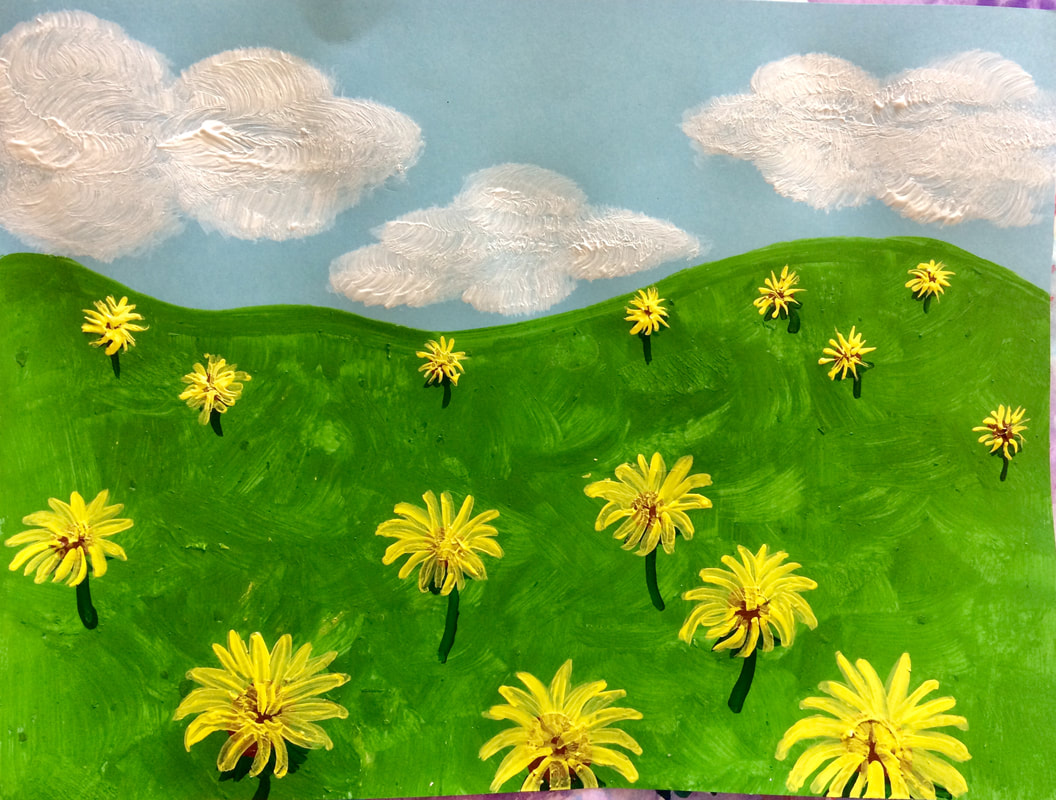
To modify this activity for 1st and 2nd graders, have them first draw a horizontal Horizon Line across their paper, then paint large dandelions in the Foreground, medium sized in the Middleground, and small dandelions in the Background. This will give their painting a sense of Space.
To modify this activity for 1st and 2nd graders, have them first draw a horizontal Horizon Line across their paper, then paint large dandelions in the Foreground, medium sized in the Middleground, and small dandelions in the Background. This will give their painting a sense of Space.
|
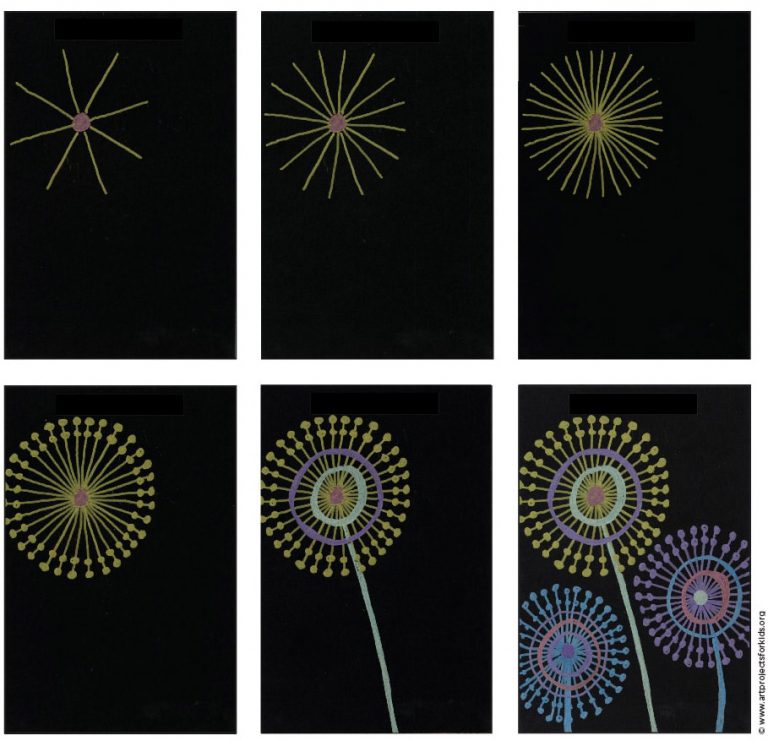
Here are printable downloads on drawing a yellow dandelion
| ||||


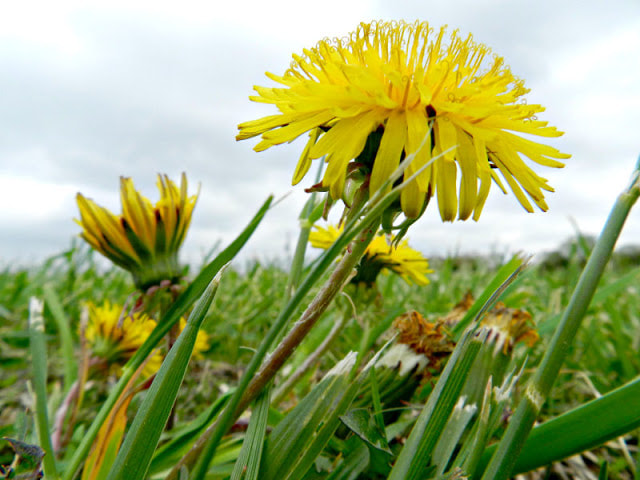
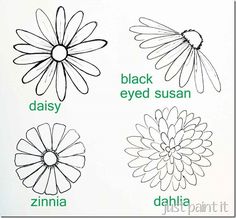
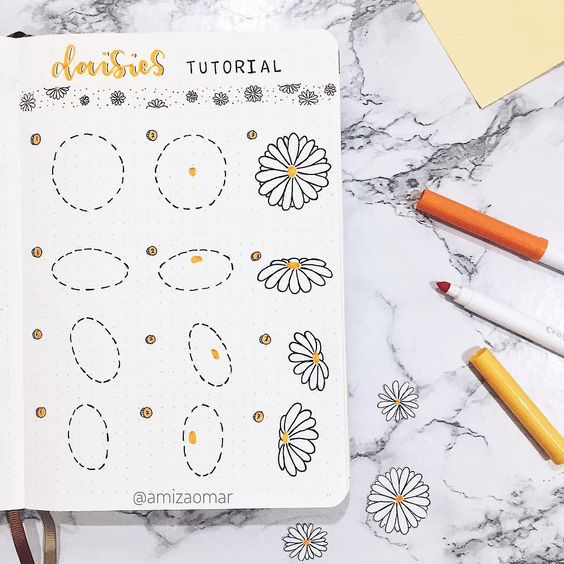
If you'd like to try drawing or painting some other flowers, here are some helpful "how to's" to experiment with
|
|
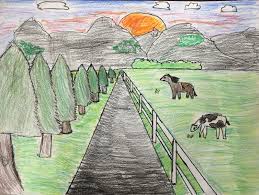
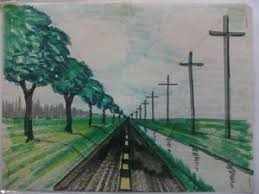
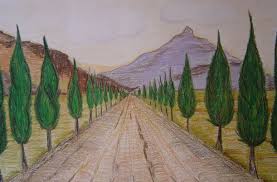
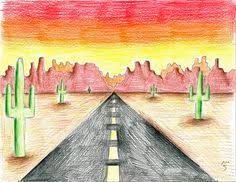
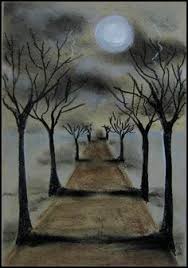
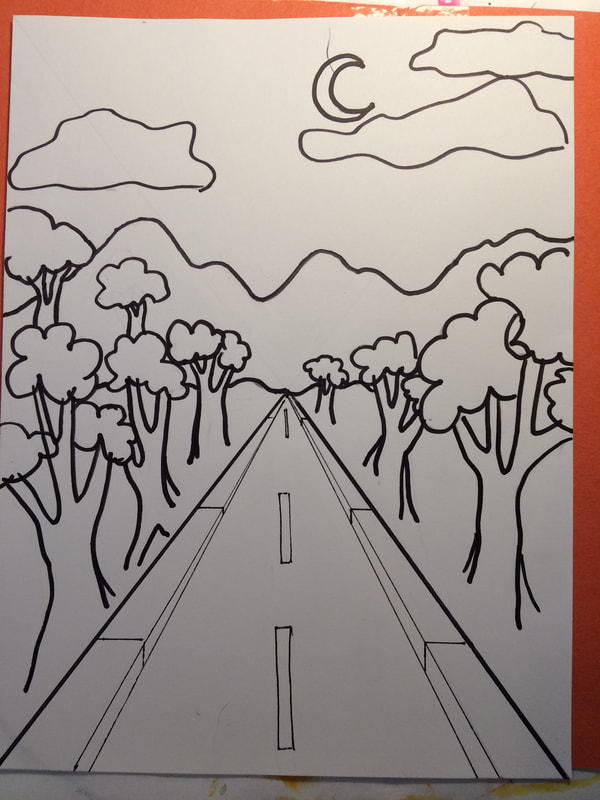
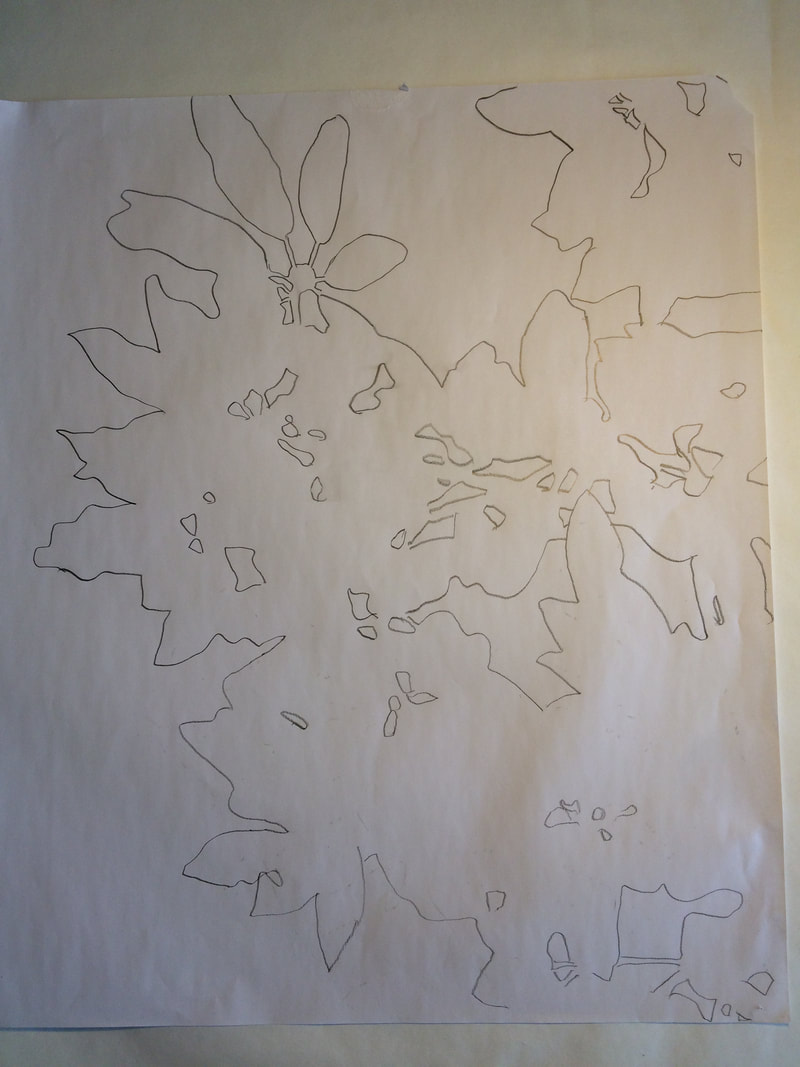
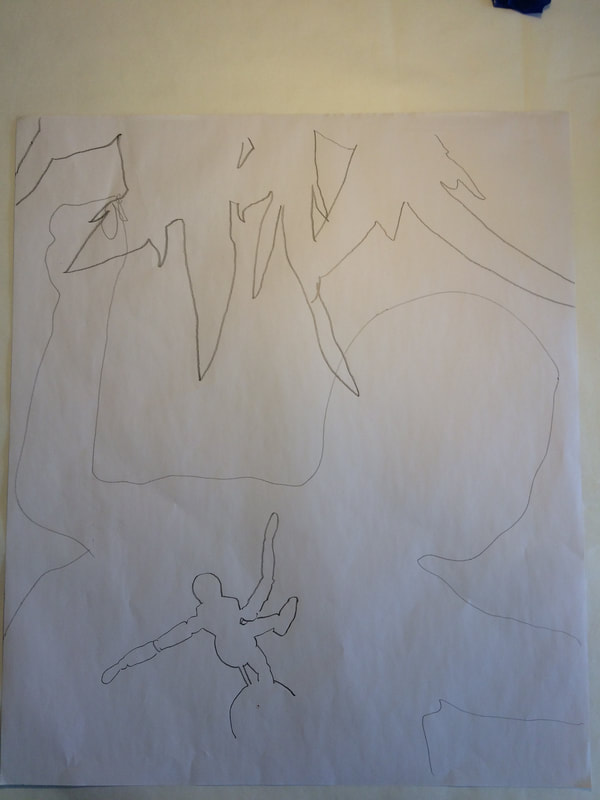
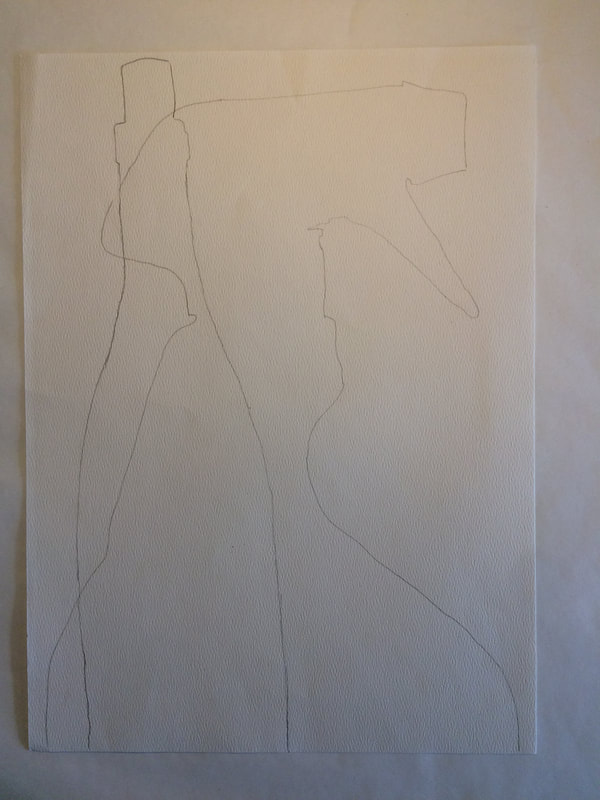
Grades 3-5 Landscapes in One Point Perspective
Scroll through the images below, paying close attention to how the scale (size) of the objects in the images adjusts according to their distance from the viewer. The closer they are to the vanishing point in the center of the picture, the smaller they become. Some of the drawings were done by grown-ups and some were done by 5th graders. Can you tell which ones were done by kids?
After you have looked at the images, download my lesson plan or the PDF file explaining the steps to complete the drawing. I have provided two options to use as some people learn better from step by step directions and some learn better from looking at pictures. Use whichever you prefer.
Before you get started drawing, watch me model the project (like we usually do in class) by watching my short you tube video. When you are finished with your drawing, be sure to email a picture to [email protected].


|
| ||||||

If you want to try to draw a house or building on one side of the road, rather than trees, this step by step will be helpful
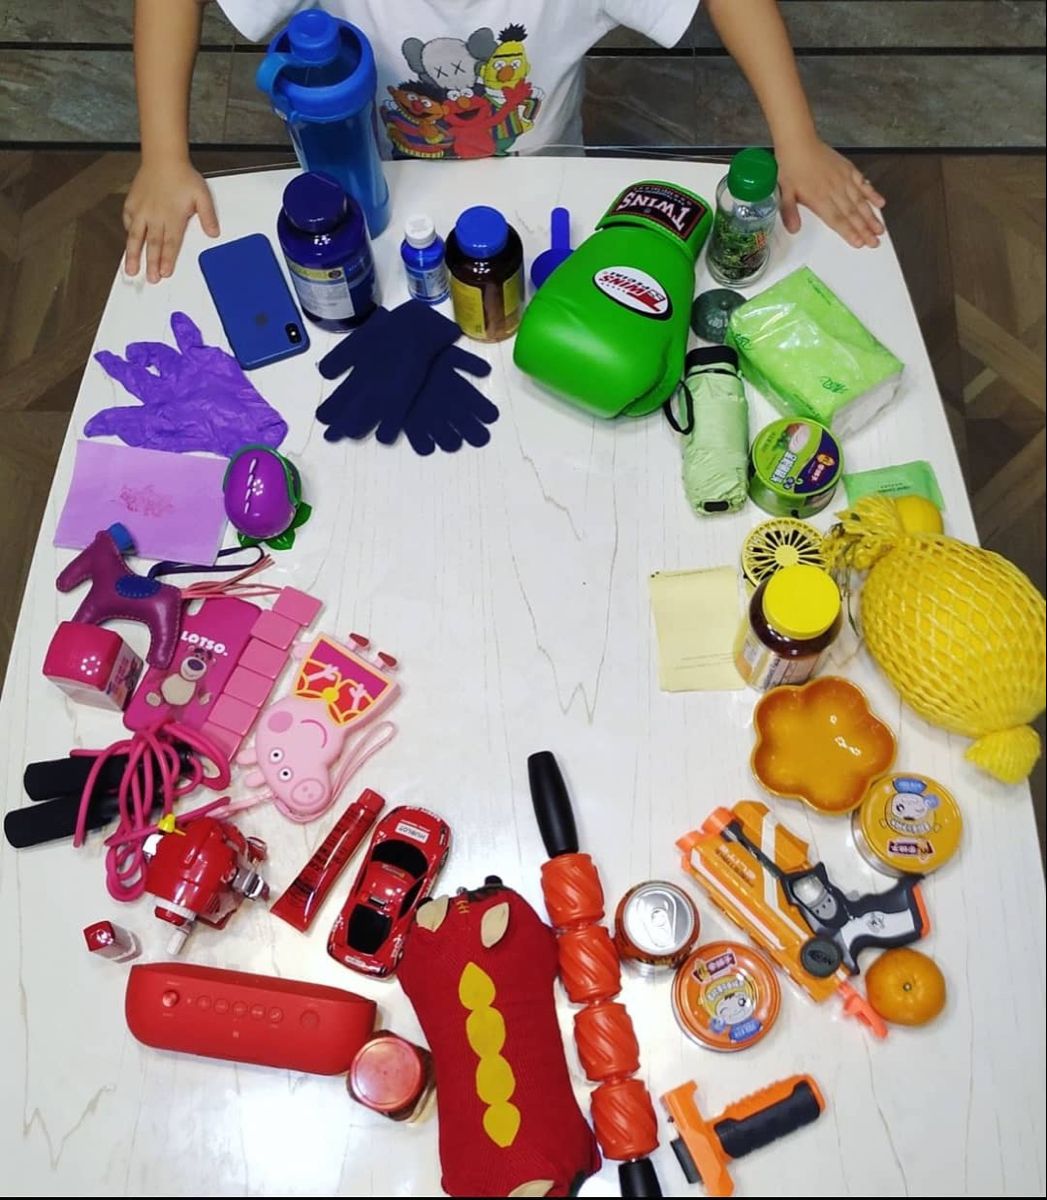
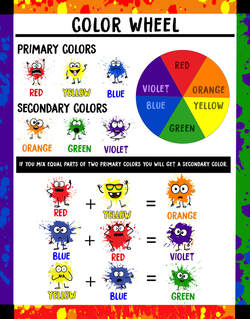
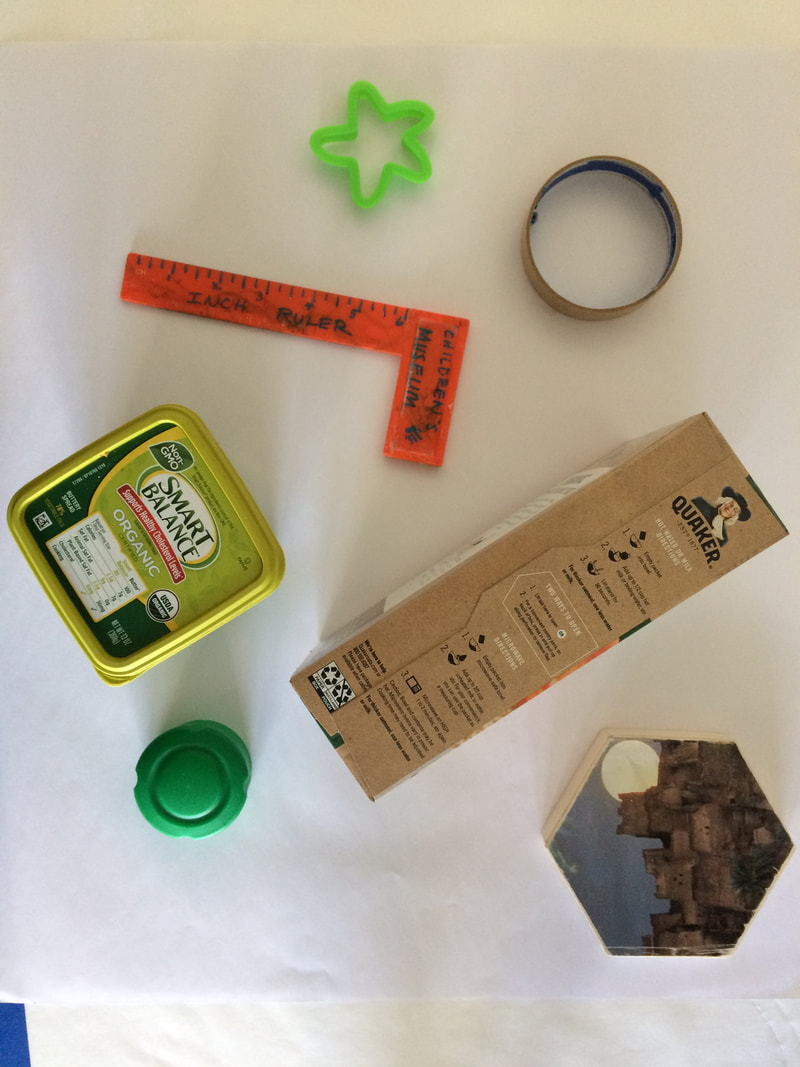
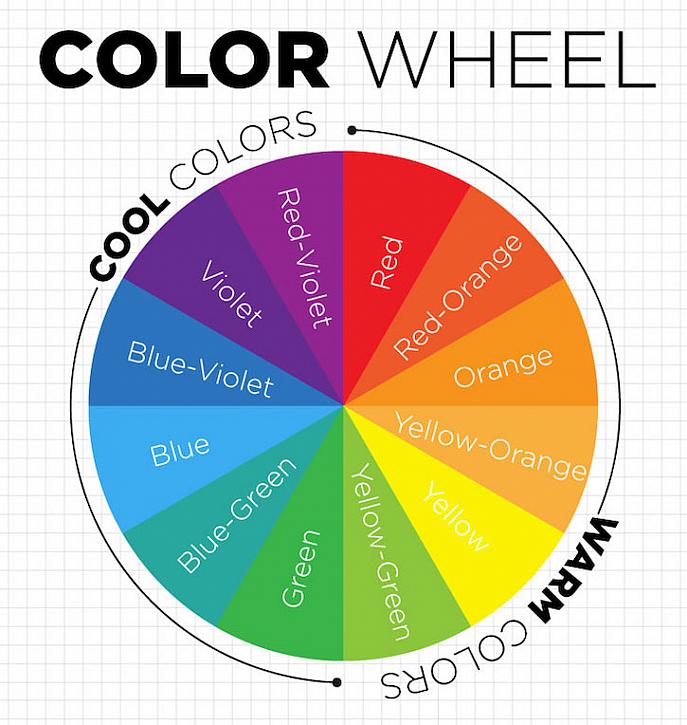
Week 7 (5/13-5/20): Found Object and Collaged Color Wheels
This week let's take a closer look at the color wheel and make one of our own using things we already have around the house. It's easier than it looks! For grades K-2 I would suggest trying the found object version (on the left) and grades 3-5 the collaged version (on the right). Click on the you tube links to hear fun songs about the color wheel and learn more about color theory and to watch me model the collage project. Download the documents for step by step instructions on how to create each of the projects and for mandala coloring pages that can be colored with specific color schemes in mind. As always, take pictures of your creations and send them to me via my school email so that I can add them to our growing blog page! [email protected].
|

|
|
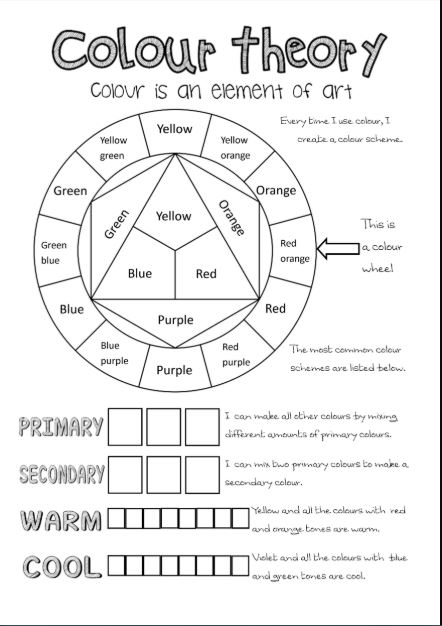
Lesson Plans, Coloring Pages and Worksheet
|
| ||||||||
| color_wheel_ws.jpg |
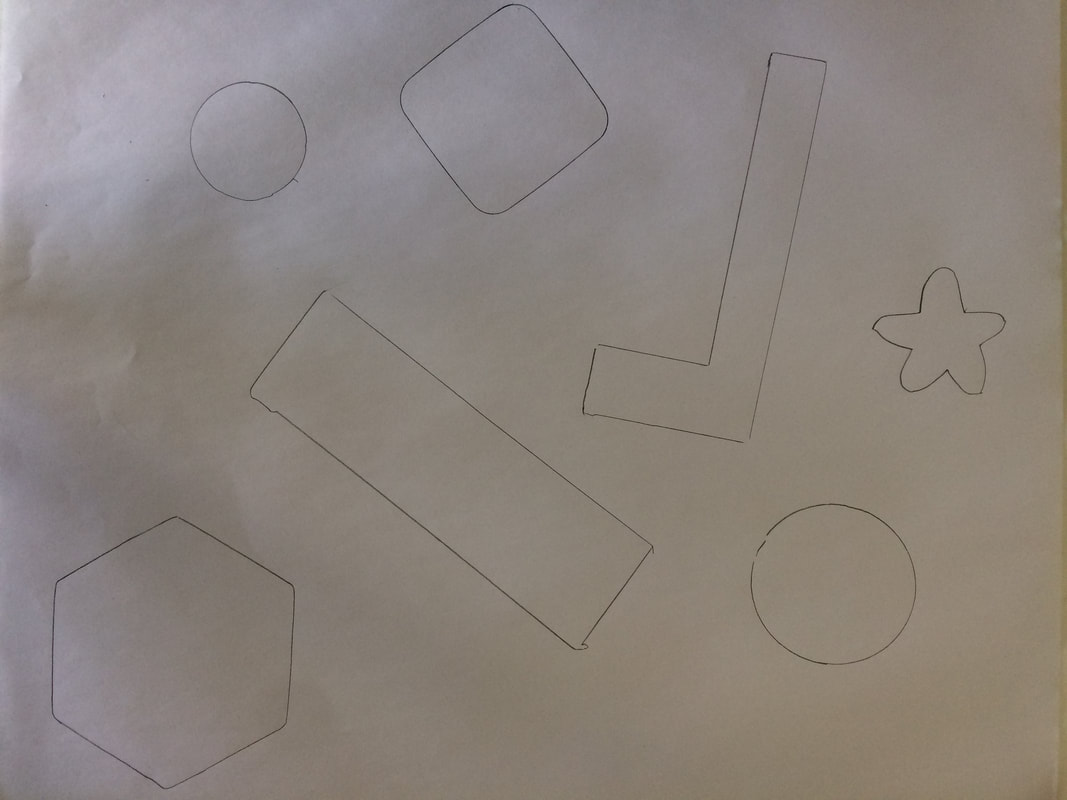
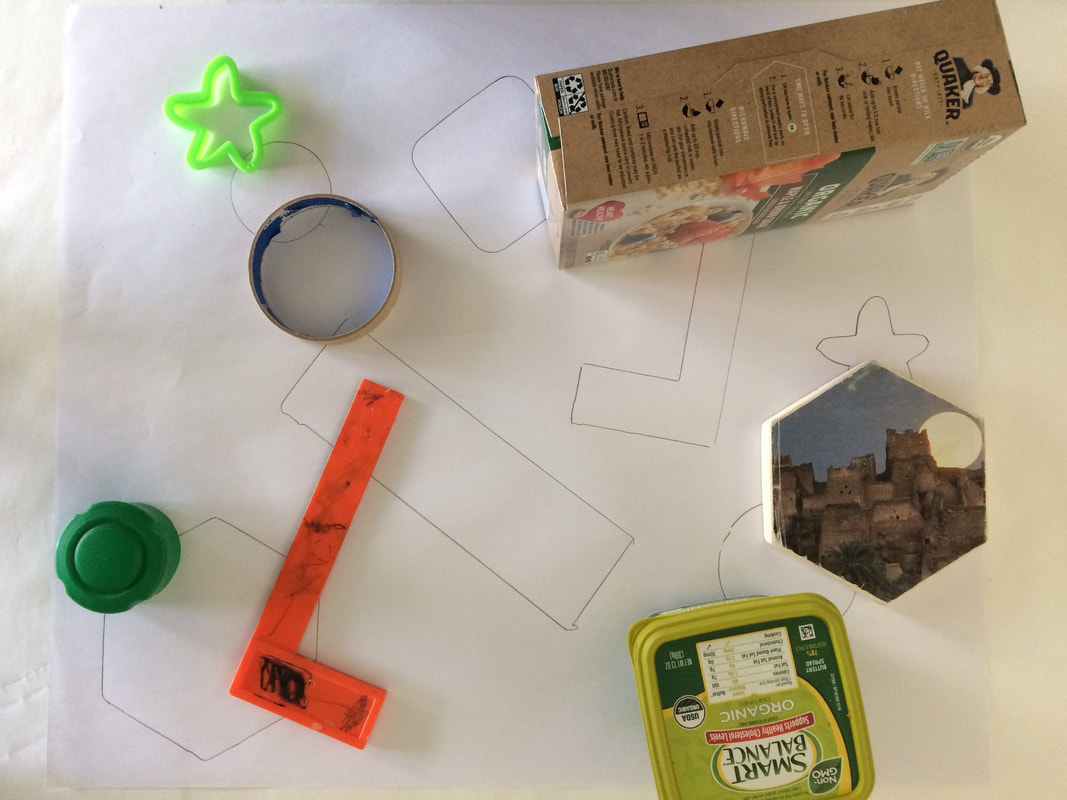
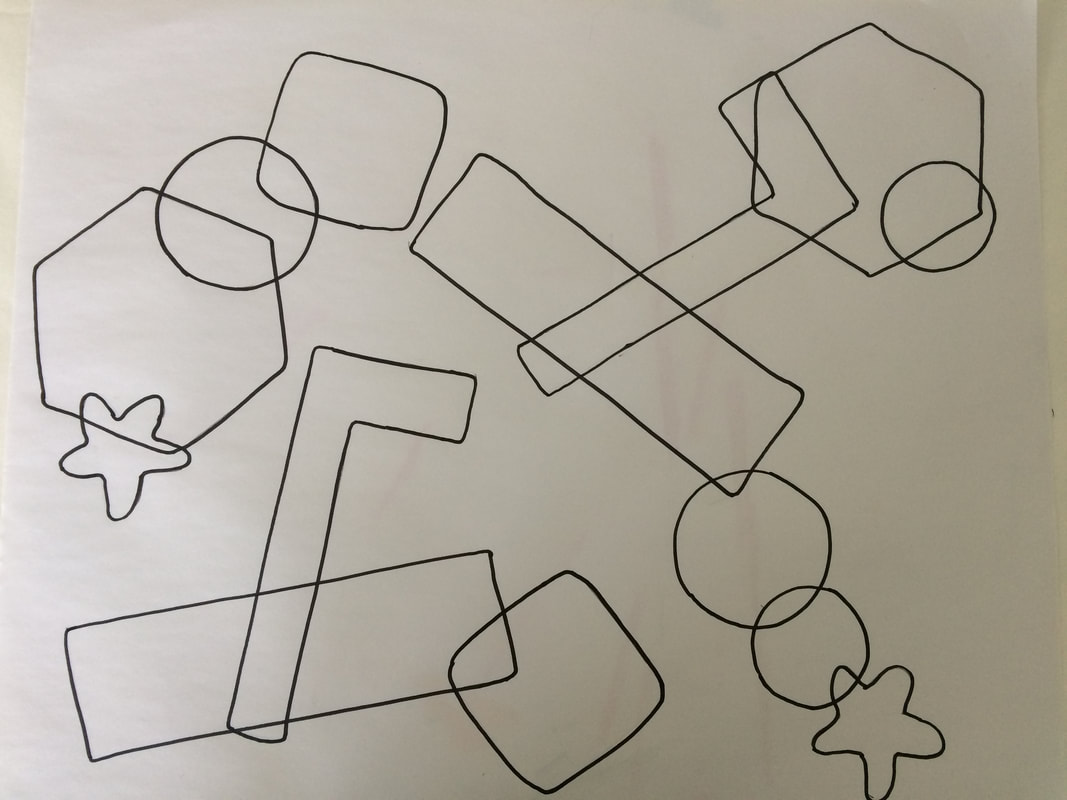
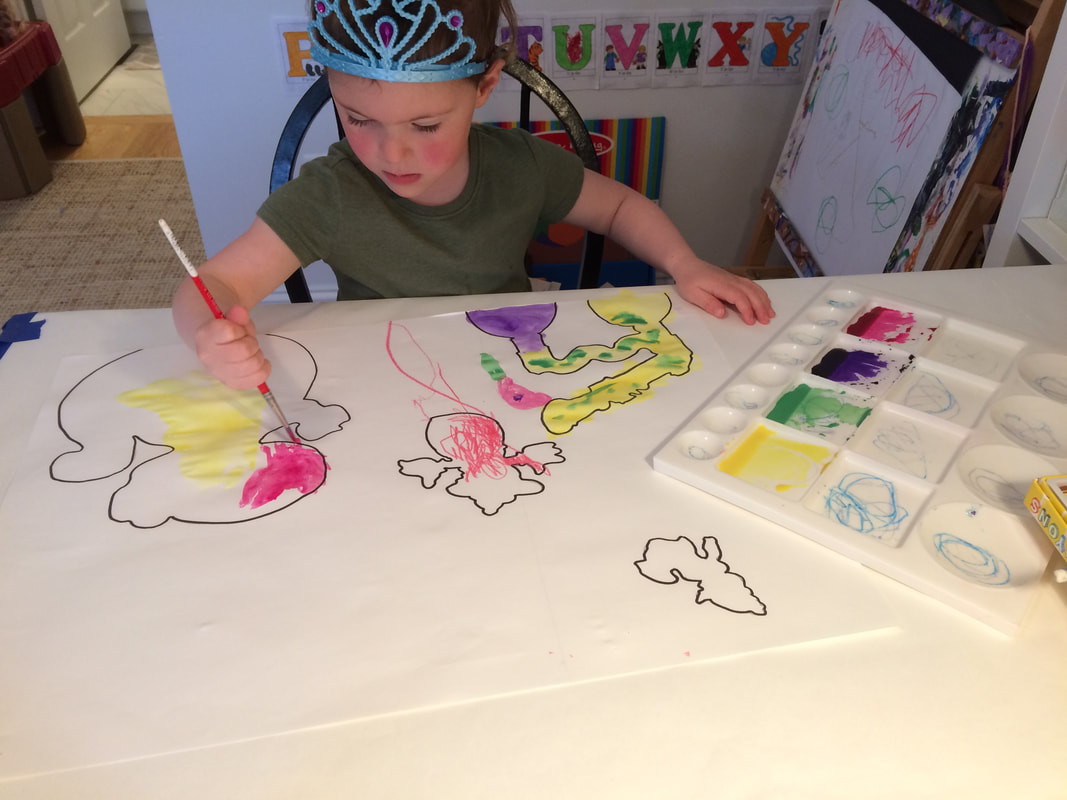
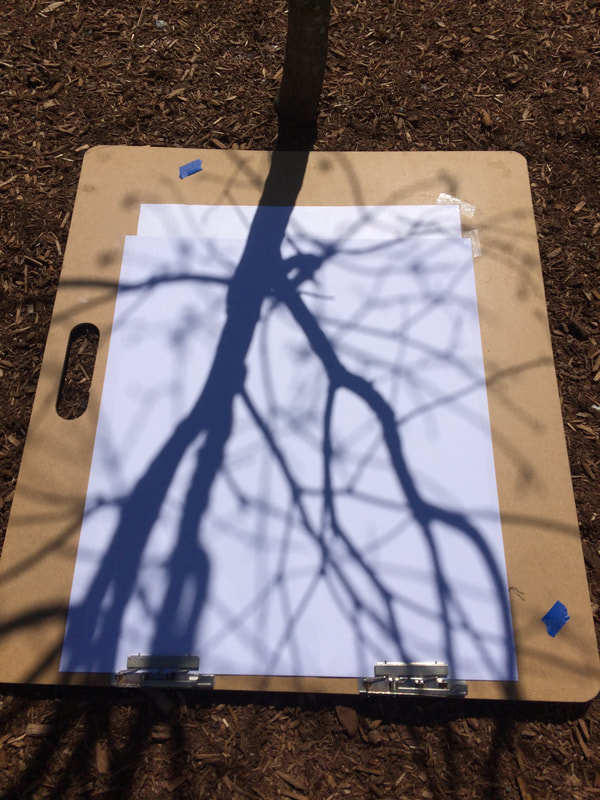
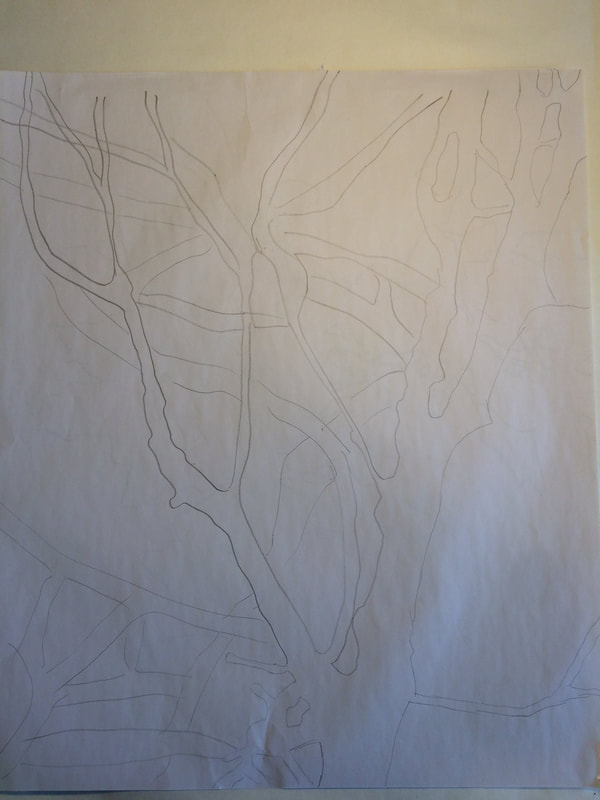
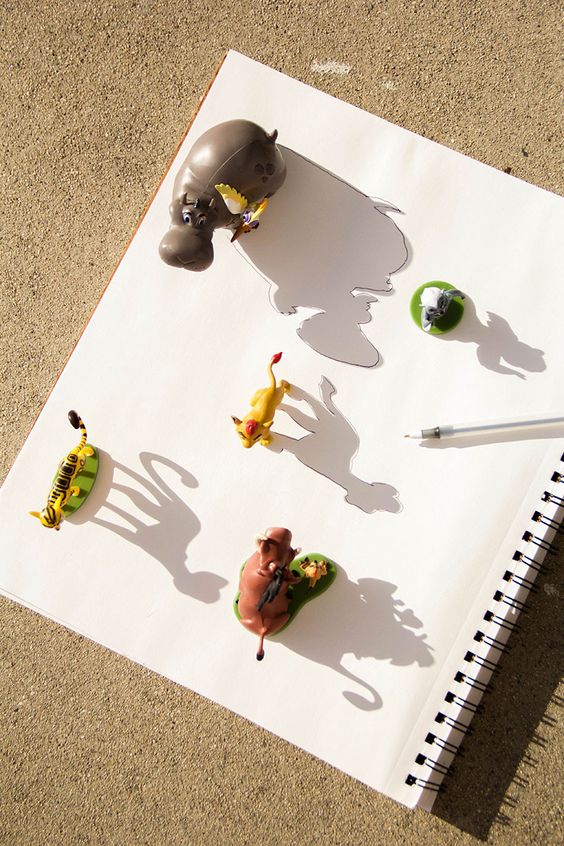
Week 6 (5/6-5/13): Tracing Shapes and Shadows
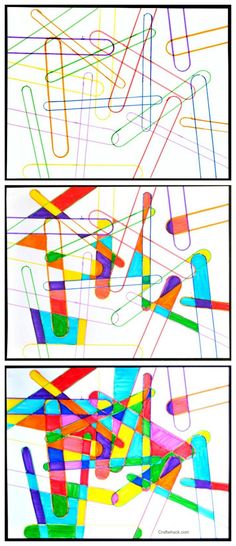
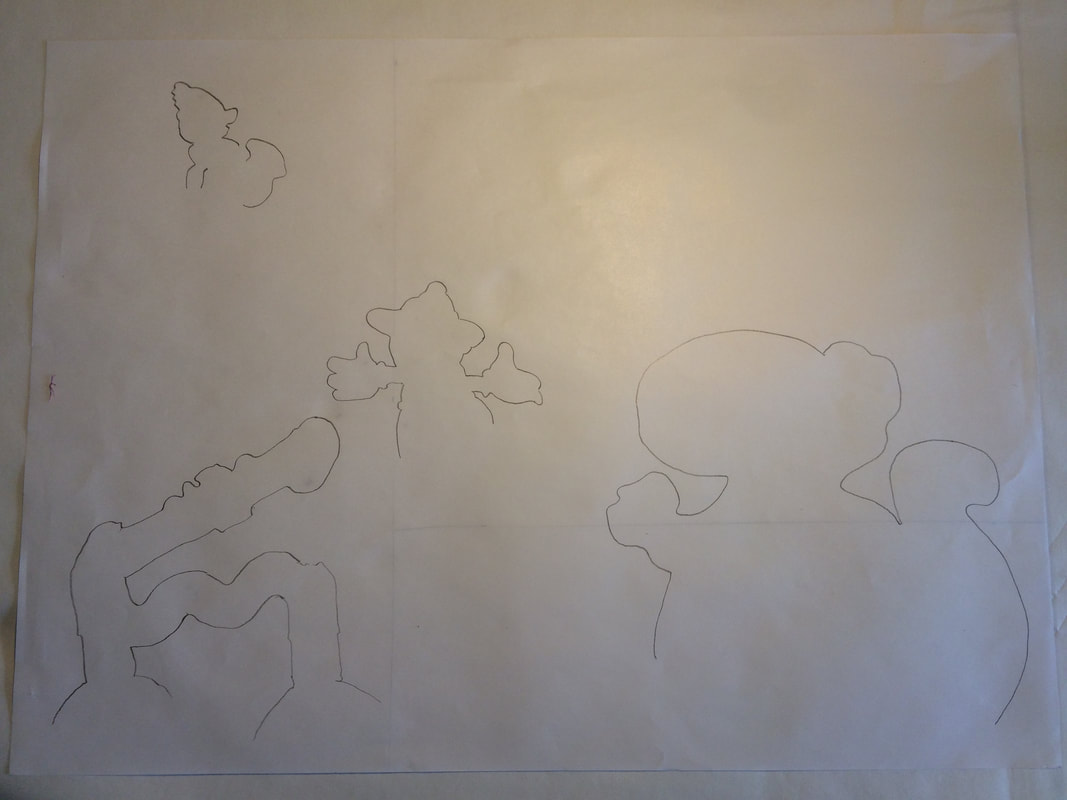
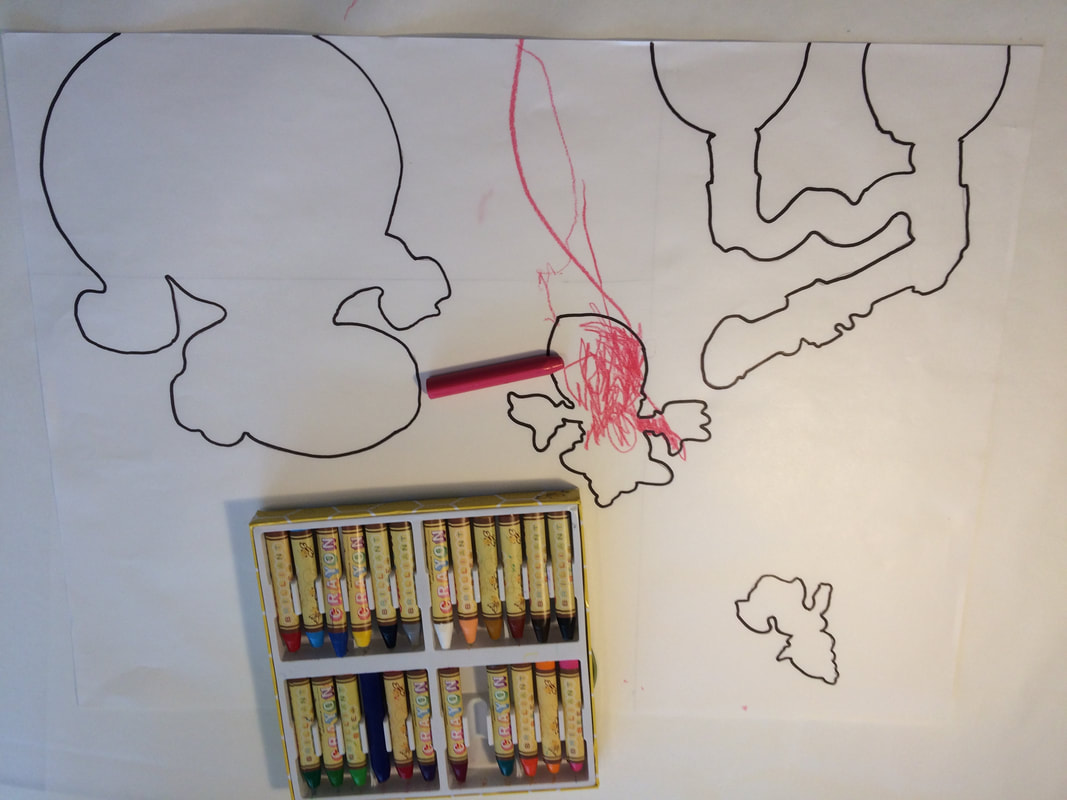
This week's art idea is all about the elements of Shape and Color. My daughter and I worked on these projects on and off all day yesterday, I'm excited to share our pictures with you. First scroll through each of the project galleries, then choose a lesson plan to download for step by step instructions. This project idea is adaptable for all ages. In fact, I am really looking forward to finishing my own! Grades 3-5 should challenge themselves by using some principles of color theory when it comes to painting or coloring in their shapes. (See lesson plans for specific directions) I have also included the you tube video that inspired me out try out the idea. She has some great tips on how to create your own pigments, and also how to use your phone flashlight to create shadows for your objects if sunlight and wind are a problem outside.
My Lesson Plans
|
|
This is an excellent resource for the basics on Color Theory.
| ||||
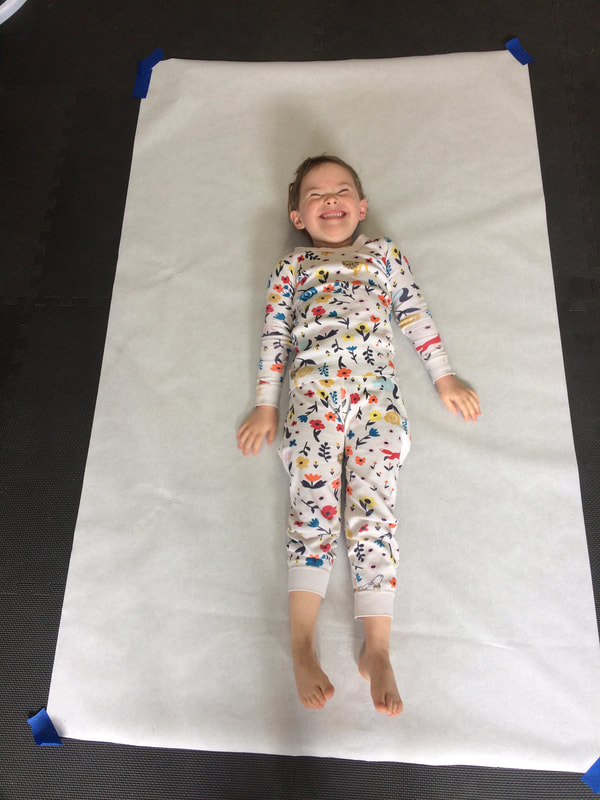
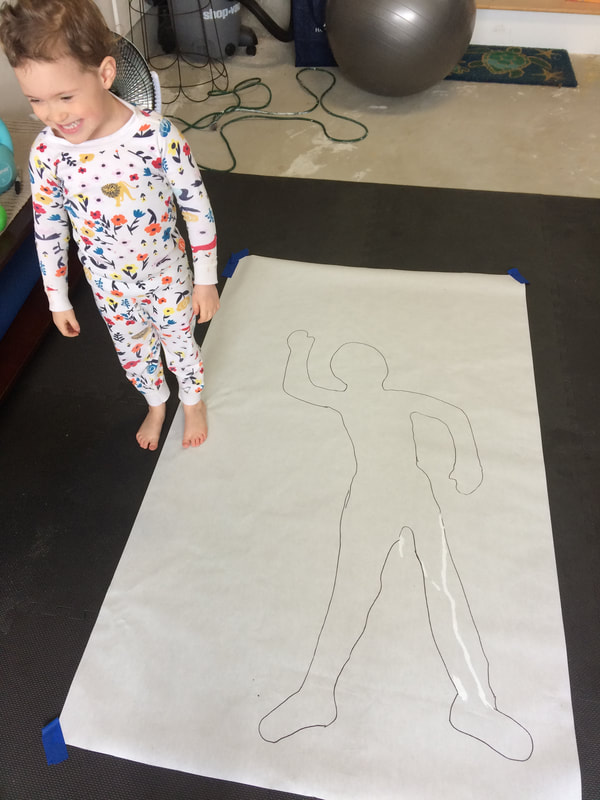
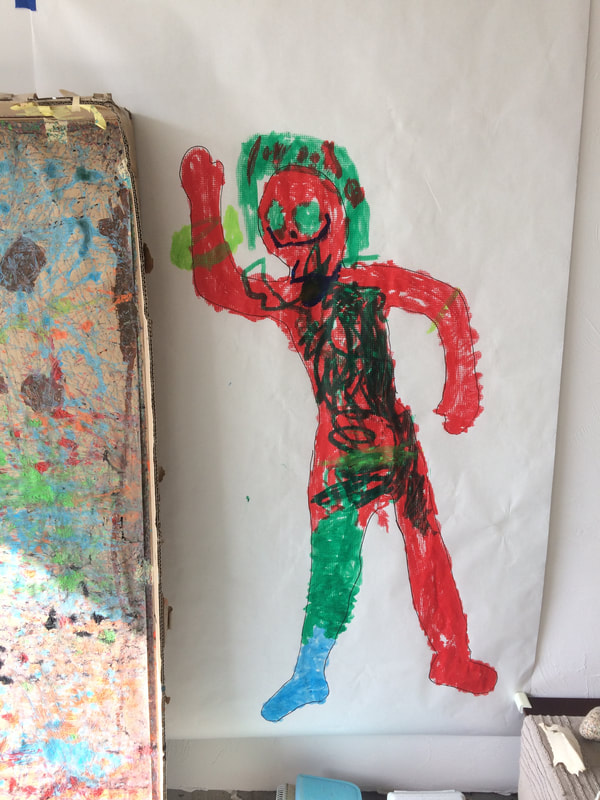
Trace Your Body! This would be fun for K and 1st graders
Overlapping shapes with common household items. Suitable for all grades with modifications.

Tracing Shadows. Suitable for all grades with modifications.
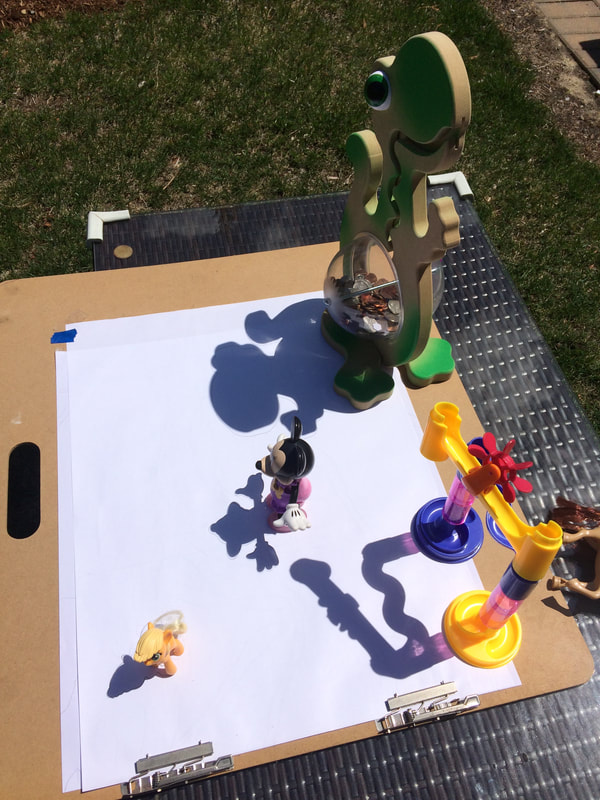
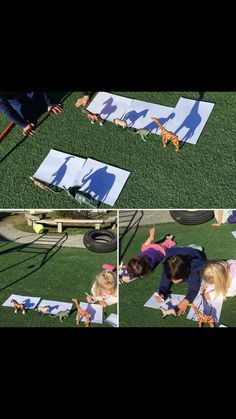
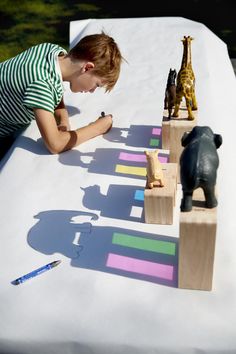
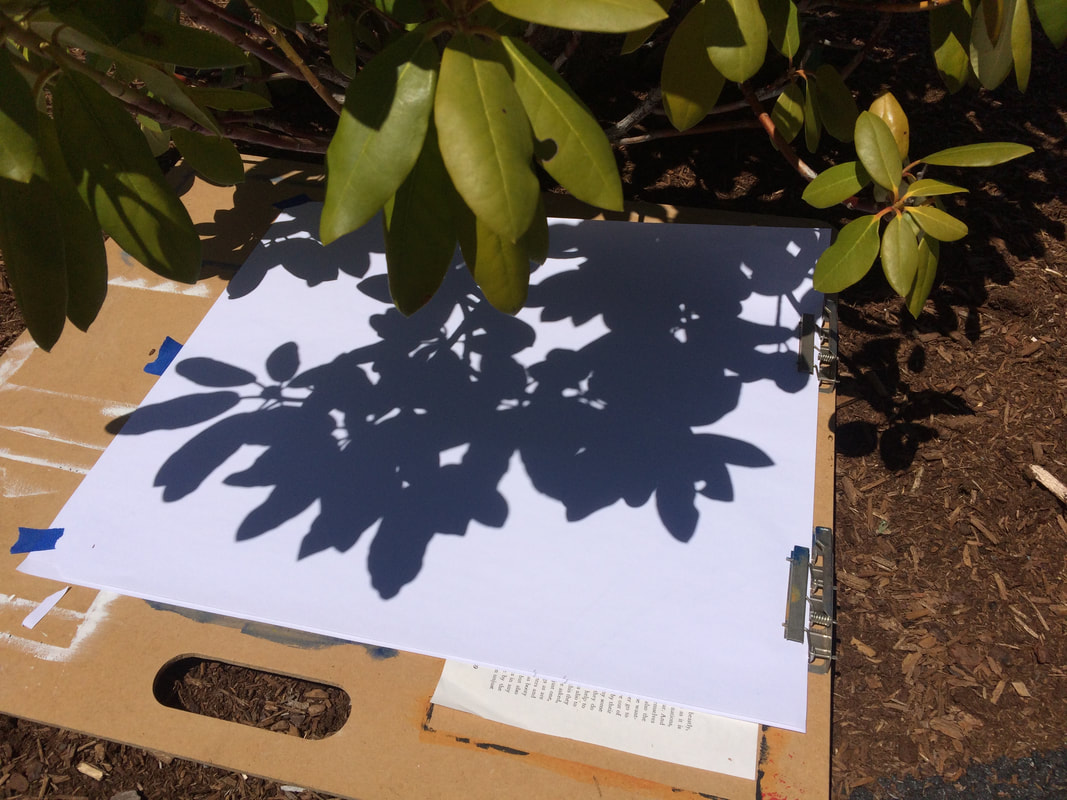


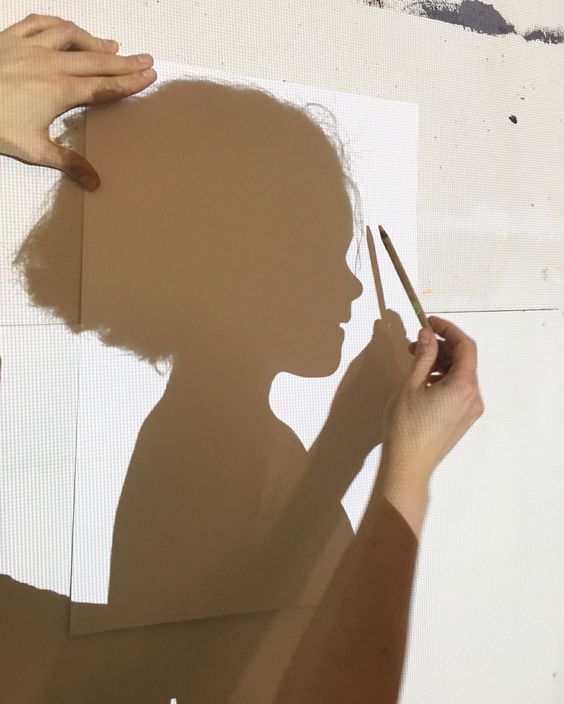
A very informative video on different techniques to try with shadow tracing
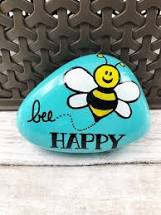
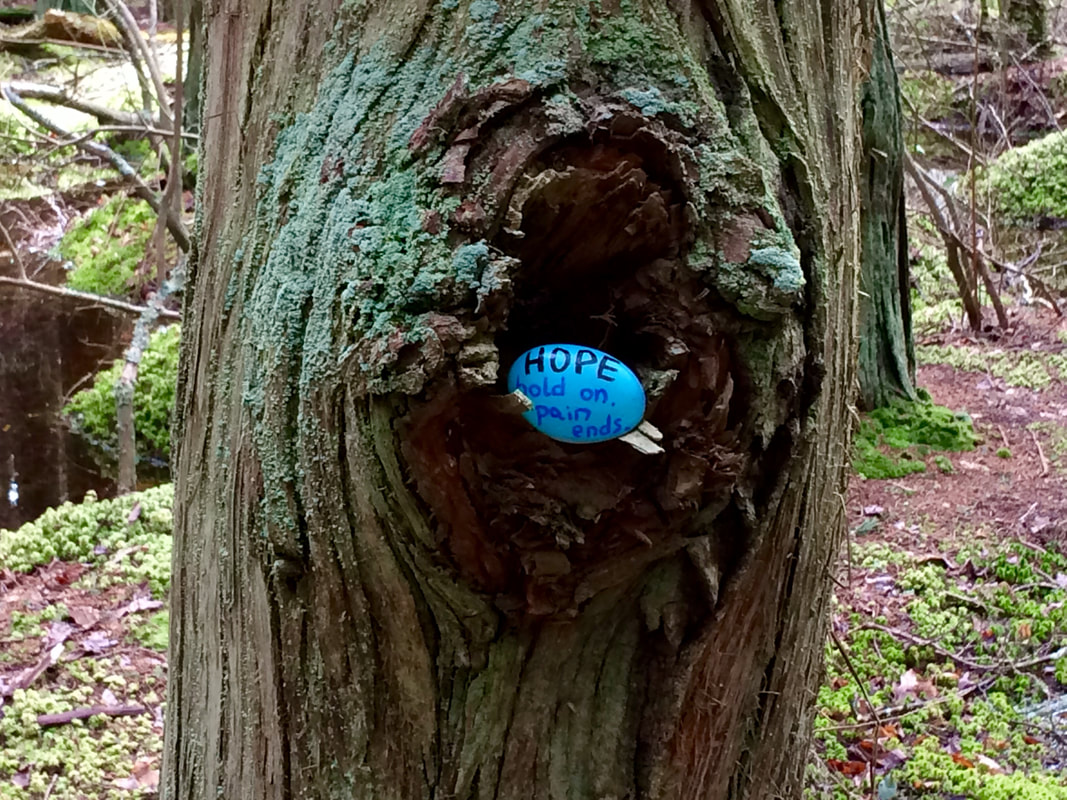
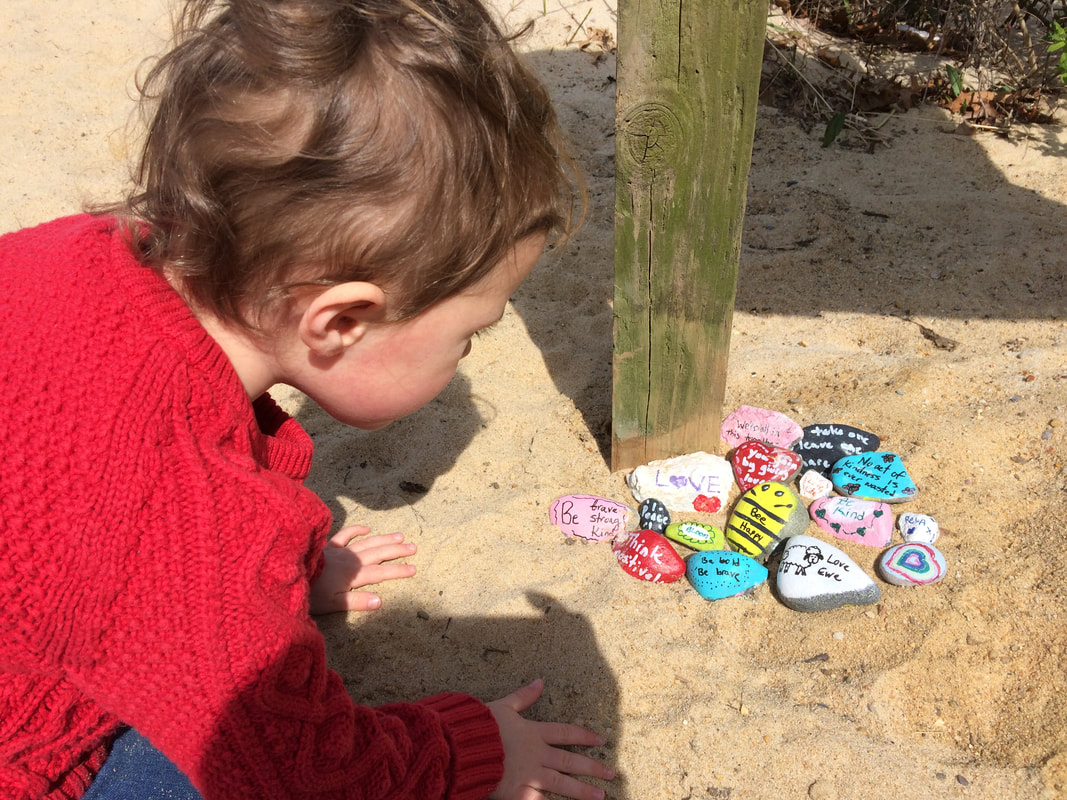
Week 5 (4/27-5/1): Welcome Back! Scribble Stones and Nature Art with Andy Goldsworthy
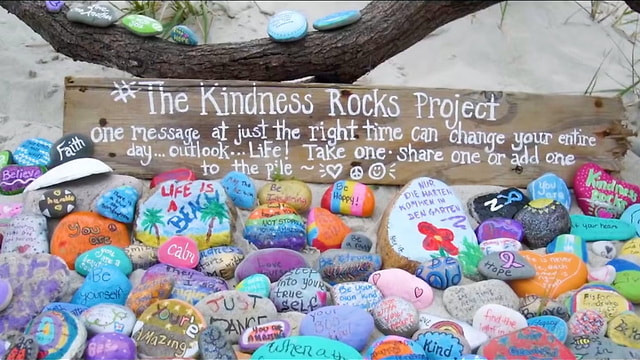
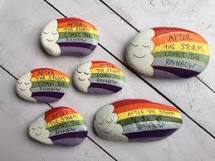
Watch this read aloud of "Scribble Stones," by Diane Alber to get inspired to create your own painted rock to share with the community. Infact, why not make a few? Leave one at your favorite beach or spot on the bike trail for others to find, and save one to bring back to EES to be used in a school landscaping project. We have been spotting "happiness rocks" here and there on our walks and they always bring a smile and remind me that we are all in this together!
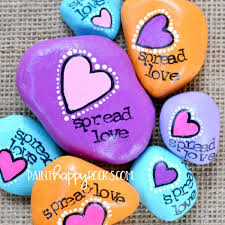
Some Tips on Painting Rocks:
1. I like to cover the front of my rock with a solid color of paint first to give the background a bright starting point for other colors to "pop" on.
2. Acrylic paints will work best, but feel free to use what ever mark making materials you have on hand. Rocks brought back to EES will be varnished before being added to the landscaping project.
3. Sketch out your idea in pencil once your background color is dry.
4. If you'd like to learn more about what makes a painted rock look great, this artist has some great knowledge to share!
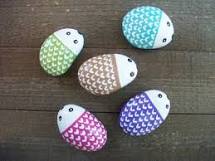
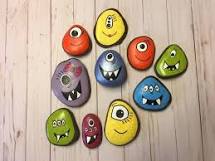
Themed Step By Instructions for Painting Stones
|
|
| ||||||
|
|
| ||||||
|
|
| ||||||
|
|
| ||||||
|
| ||||
|
|
|

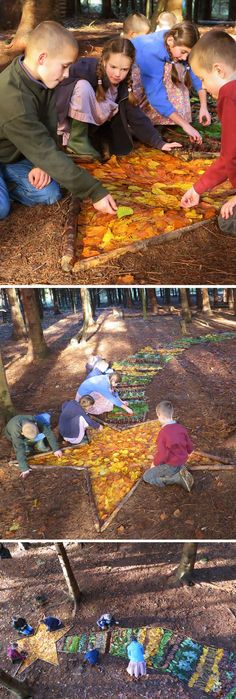
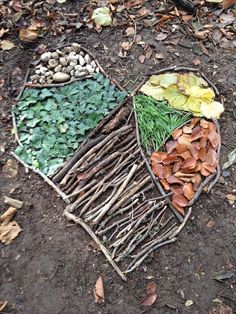
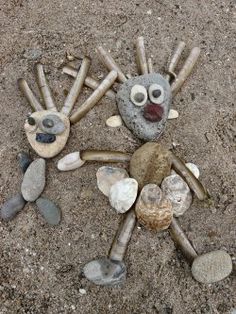
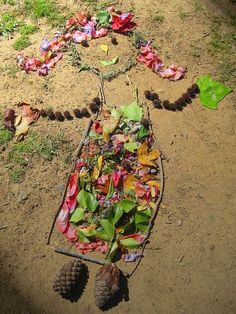
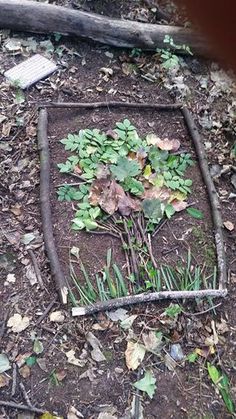
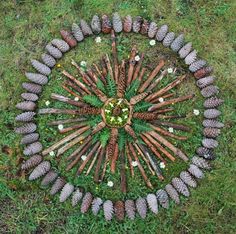
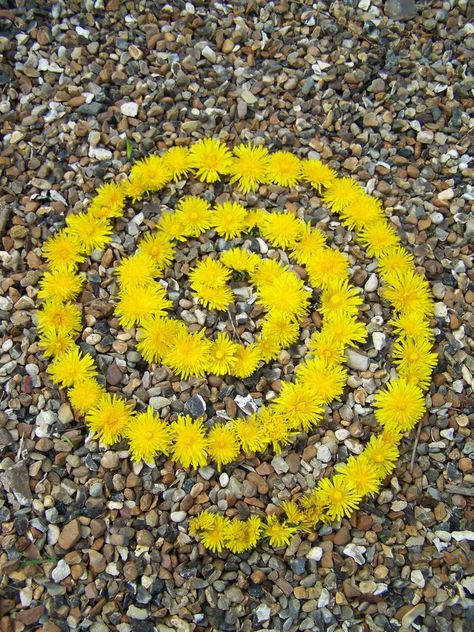
Watch these videos to familiarize yourself with the work of Andy Goldsworthy, then take the Andy Goldsworthy Challenge! Make sure to take a picture of your nature art and email it to me at [email protected] so that I can see what you did and share your images with your classmates on our "what's everyone up to" blog! I have also provided a document to remind you what the 7 Elements of Art are, please refer to this list before starting your nature art and have a few in mind while you are creating. Make sure to tell me which elements you were focusing on when you email me your picture. Take your time and have fun!
| the-elements-of-art.pdf |
|
|
|

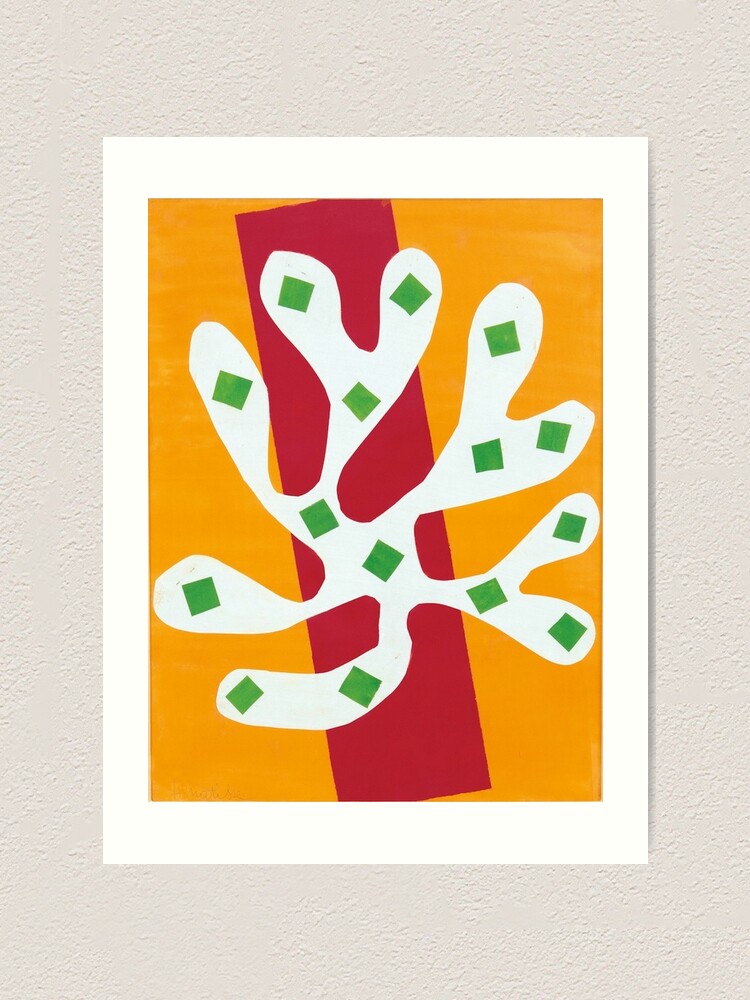
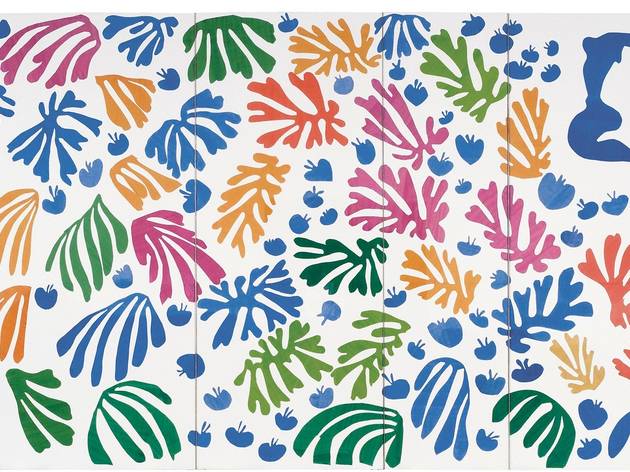
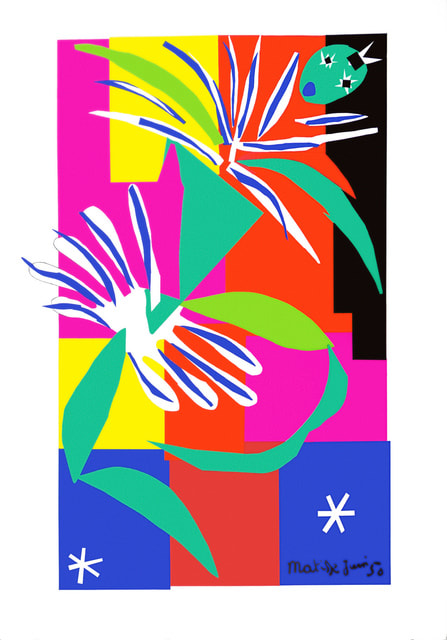
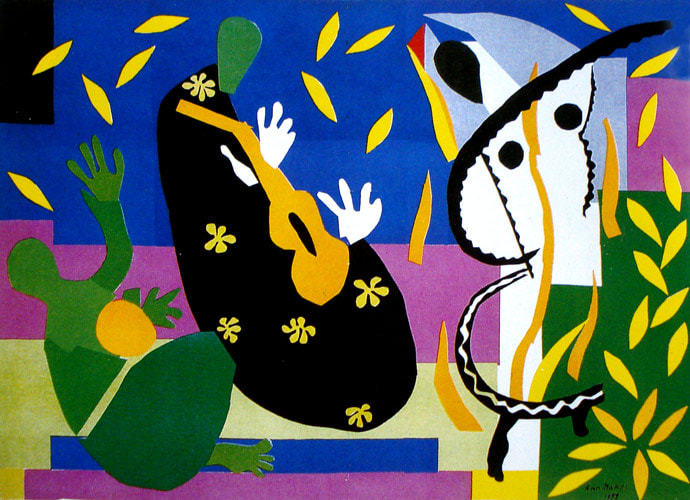
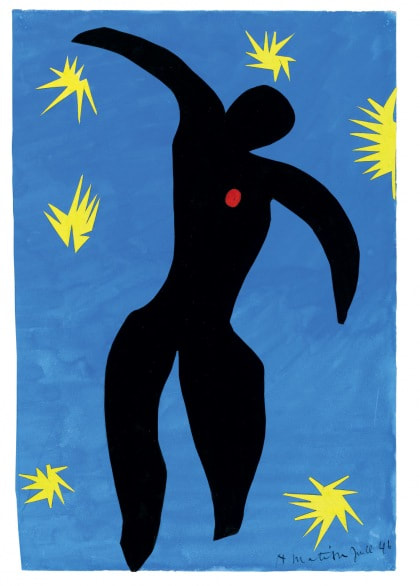
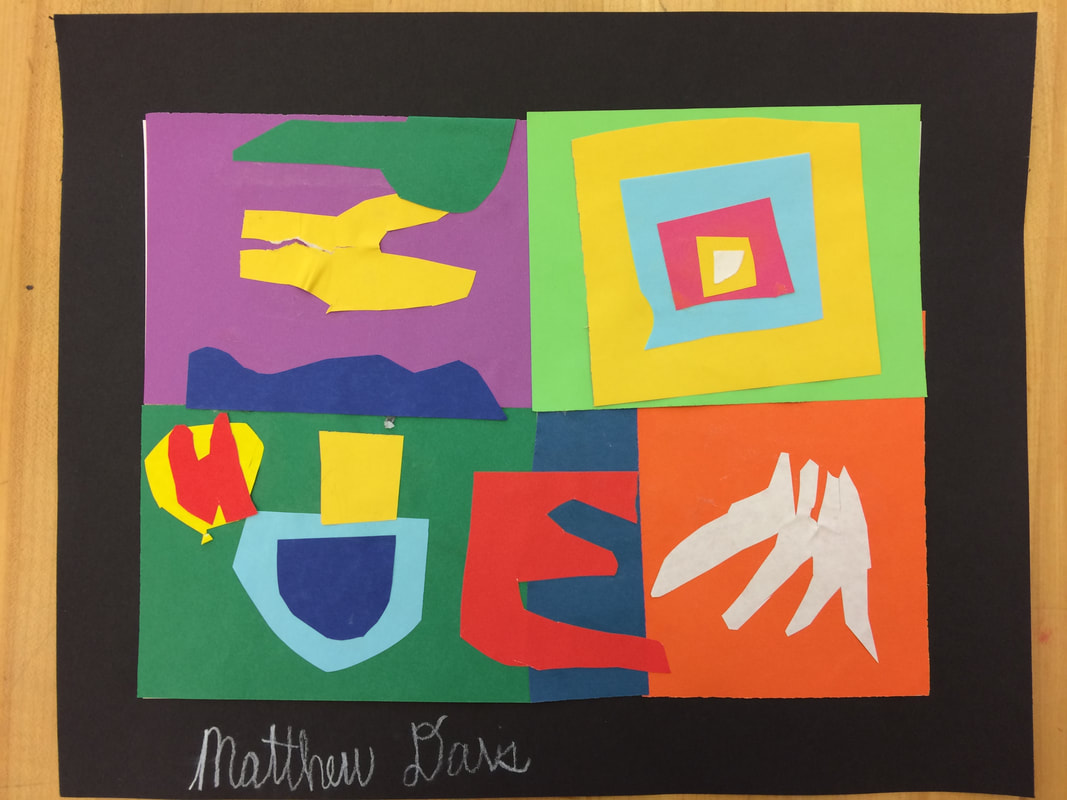
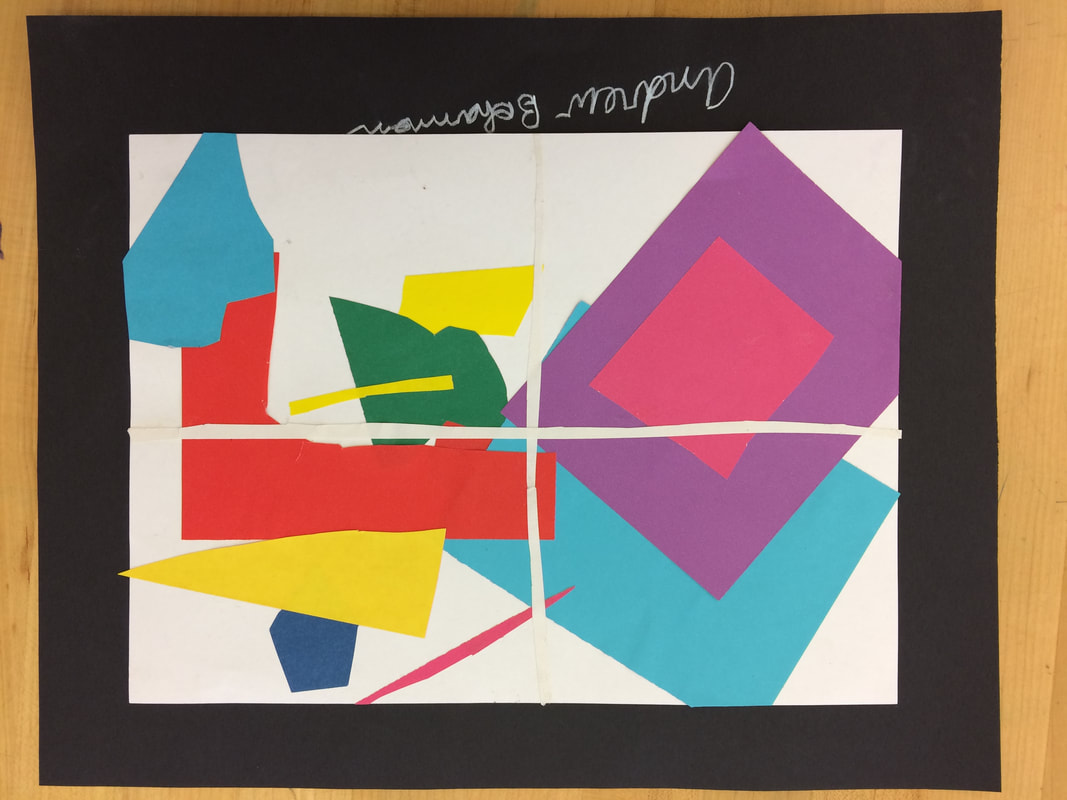
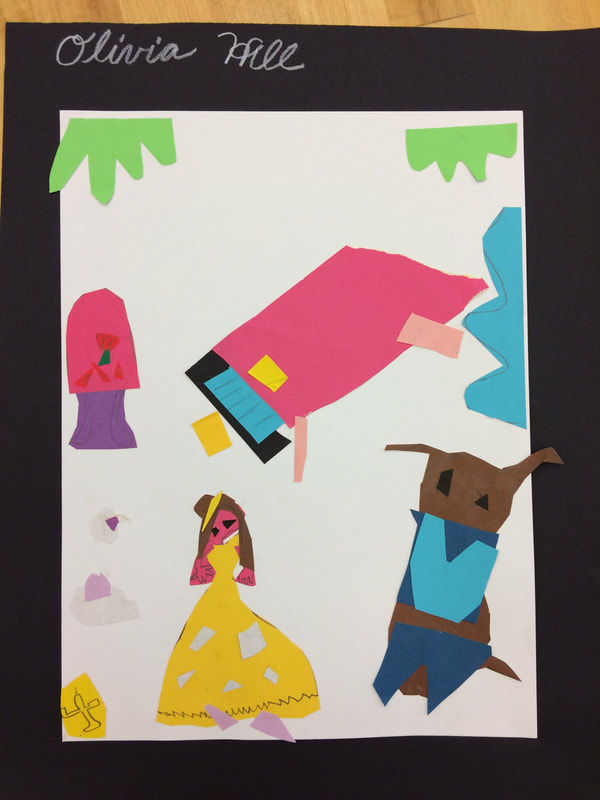
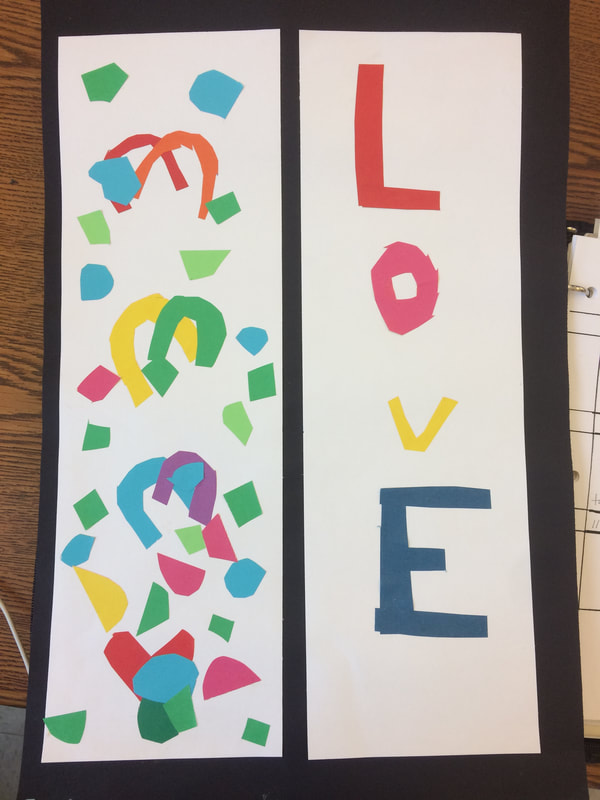
Week 4 (4/13-4/17): Painting with Scissors like Henri Matisse
All grades will enjoy watching this video of children viewing the work of Henri Matisse. There is something so pure and beautiful about they way children interact with art.
https://www.tate.org.uk/kids/explore/kids-view/meet-matisse
https://www.tate.org.uk/kids/explore/kids-view/meet-matisse
Next, choose a link to explore, view the gallery selections and download my Matisse remote learning lesson plan along with the "who was Matisse" bio information to complete the project. There are also coloring page downloads available for younger students.
|
This is a nice read-aloud for grades K-2
|
This is a bit more informative for grades 3-5 and outlines the project nicely
|
|
|
|
|
Cut Paper Cut-Out's by Henri Matisse
|
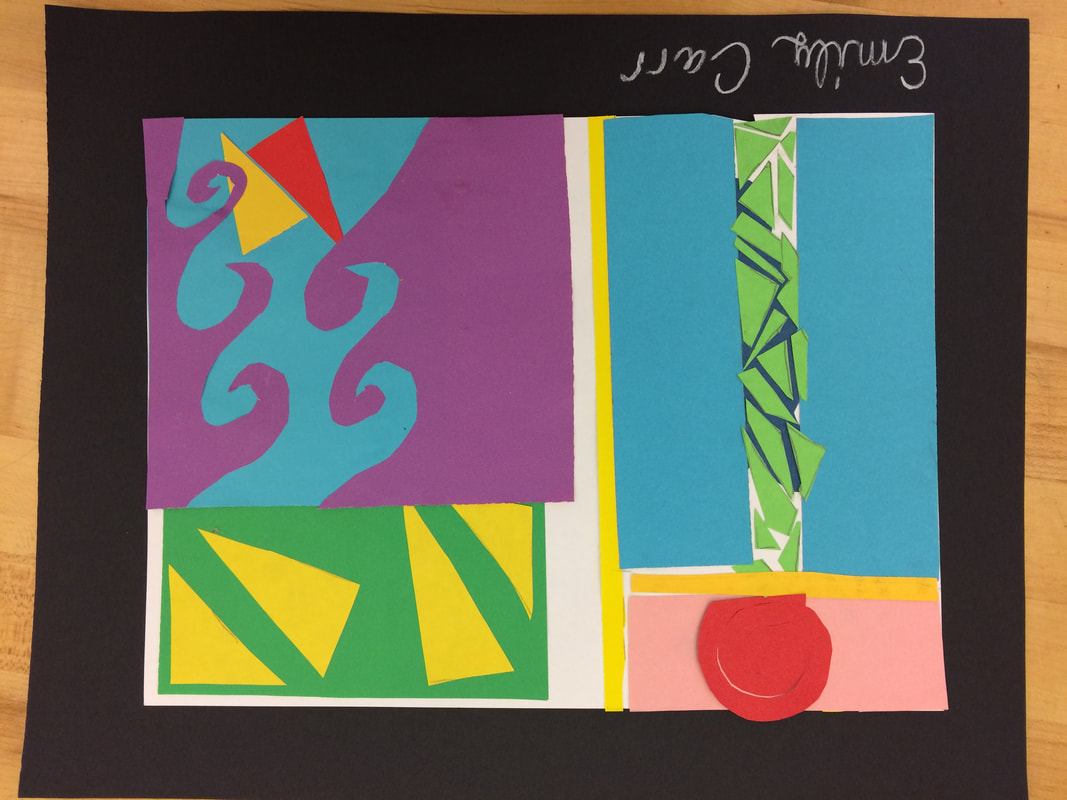
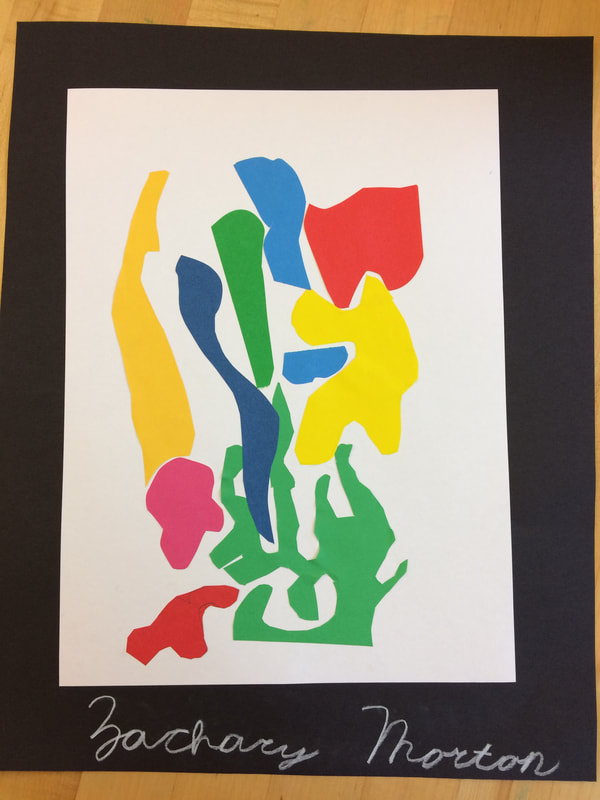
Cut Paper Cut-Out's by EES Students
|

|
|
|
| ||||||||
Week 3 (4/6-4/10): Claude Monet, Impressionism and Spring Flowers
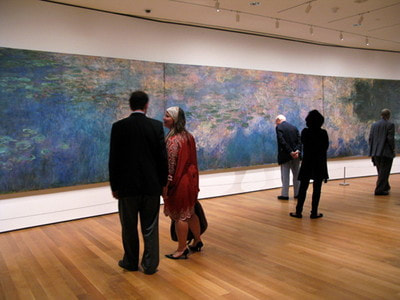
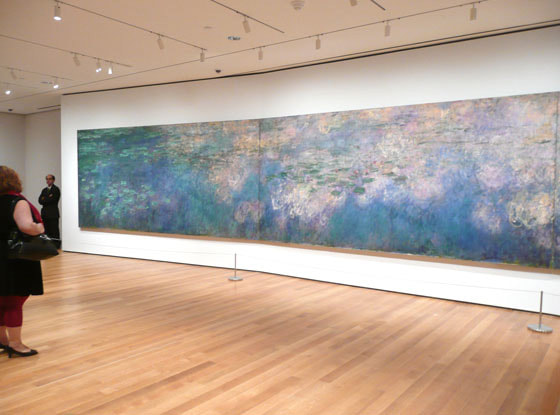
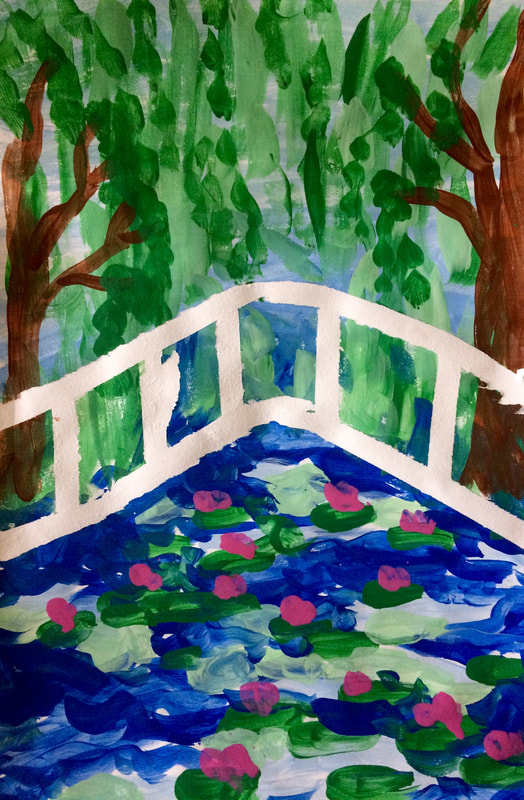
K/1: Monet's Waterlilies
K/1: Monet's Waterlilies
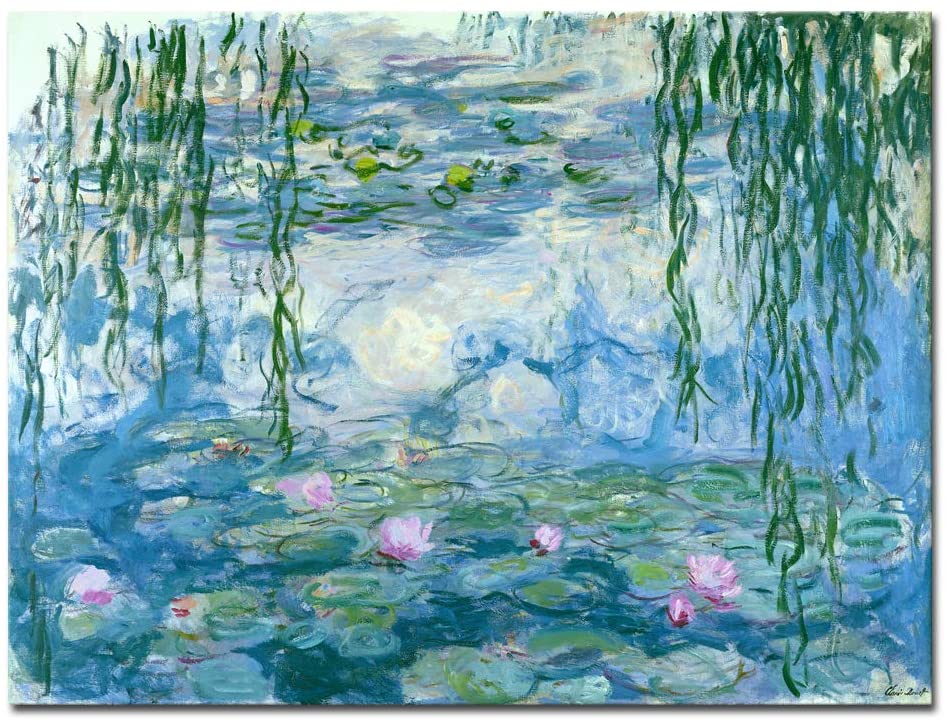
Watch this read aloud to learn about Monet's most famous works
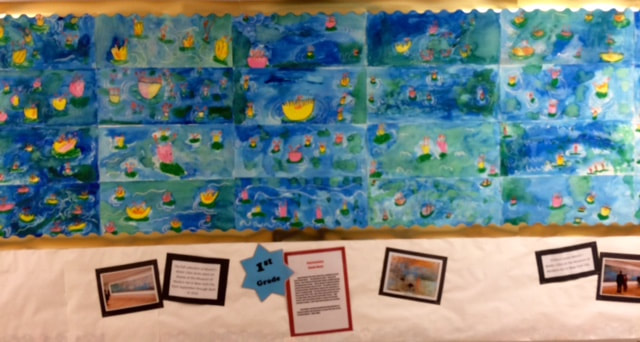
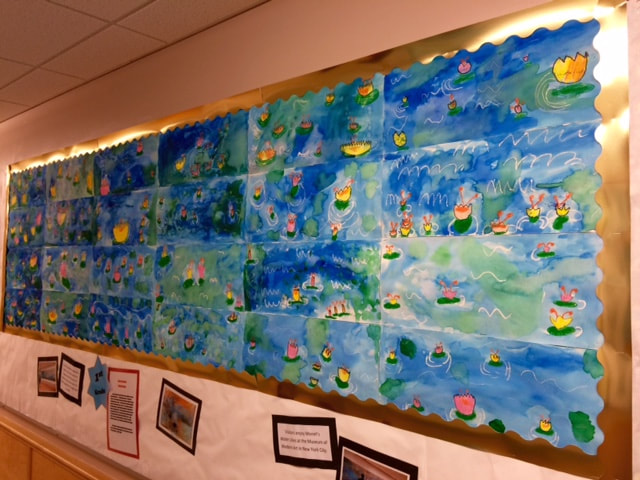
Then scroll through the pictures in the gallery I have provided to see "Waterlilies" when it was on display at the MFA in Boston, and our own version at EES a few years back, done by 1st graders.
Then use my lesson plan to make your own version of "Waterlilies." Be sure to email me a picture of your finished artwork so I can post it on our blog!
|
|
|
| ||
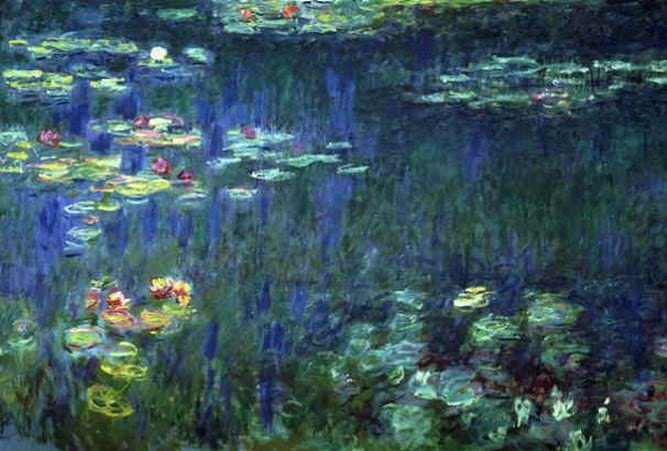
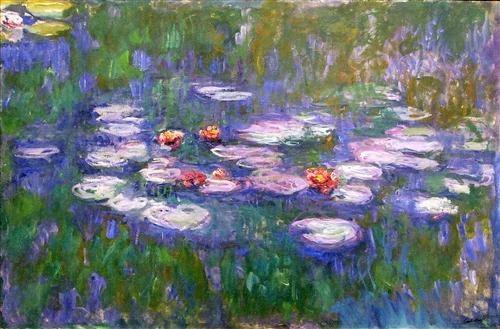
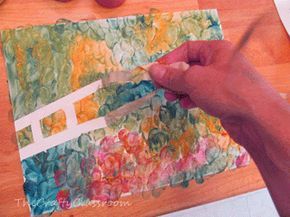
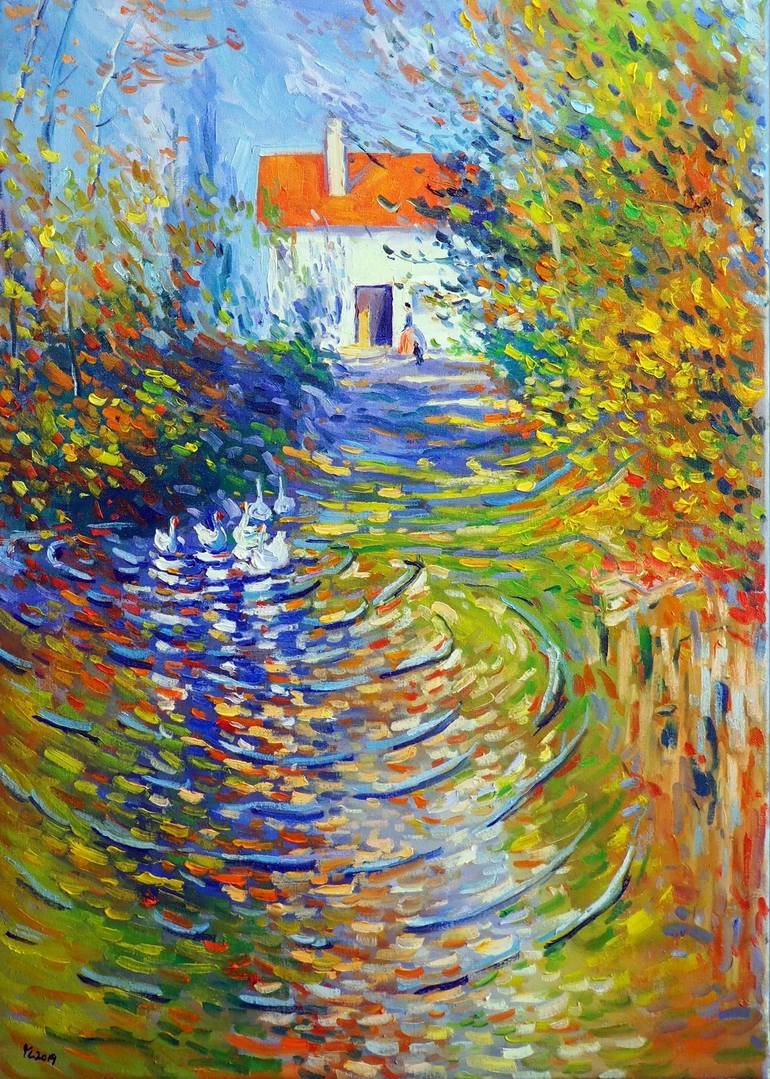
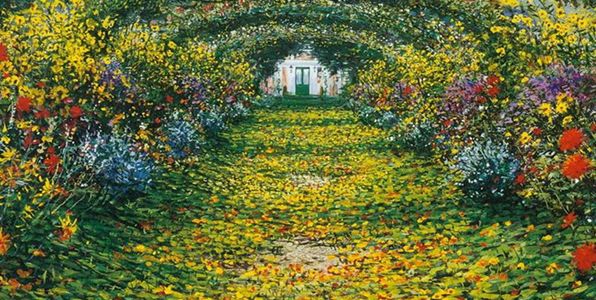
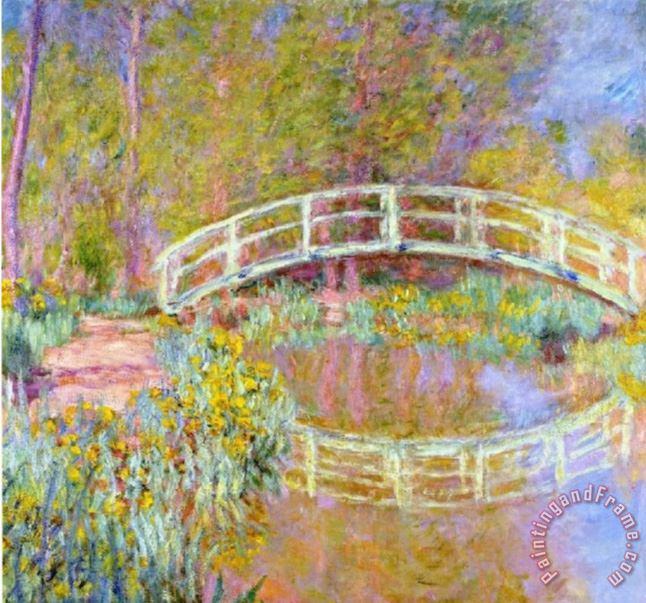
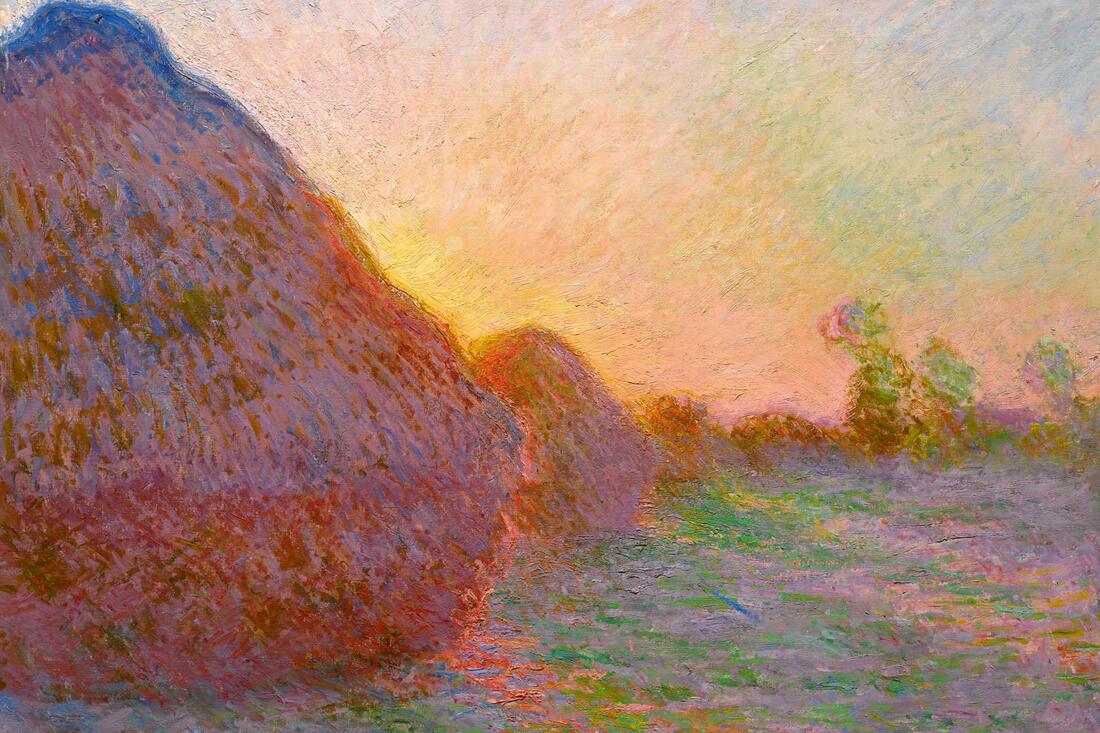
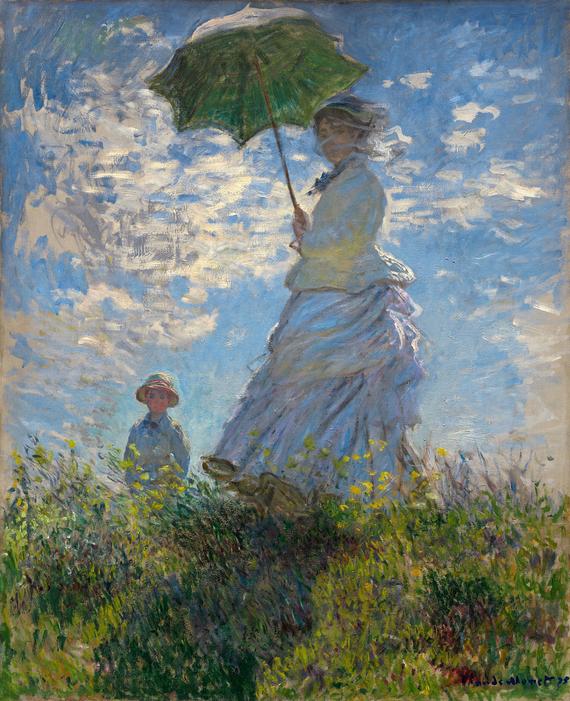
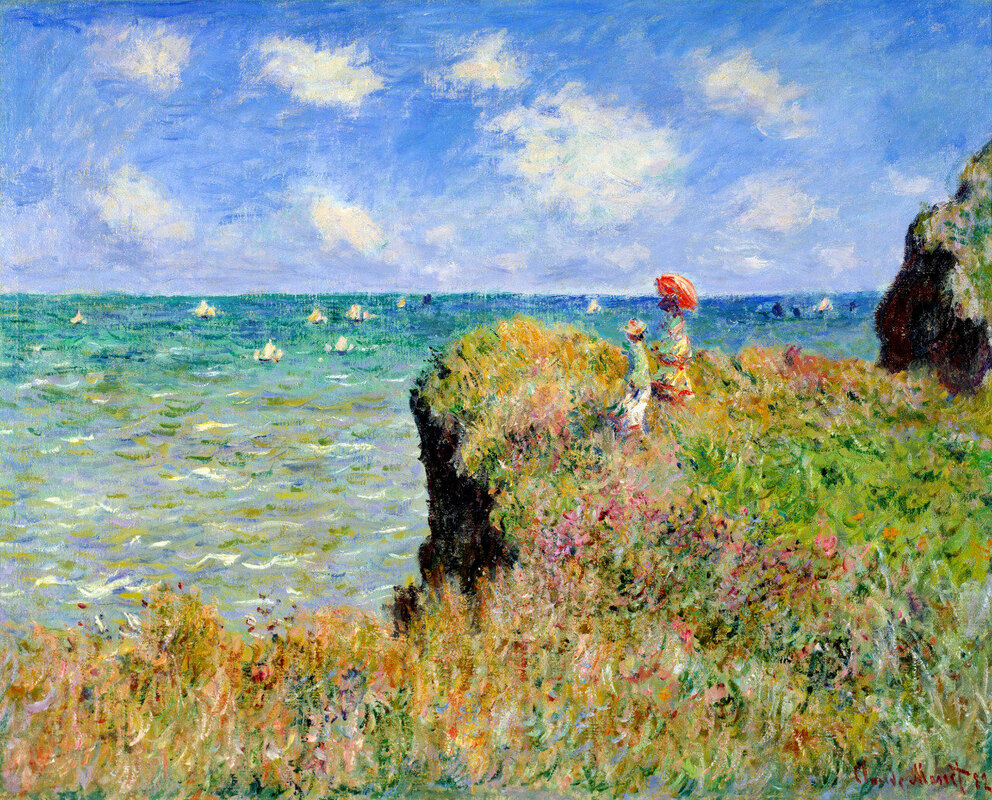
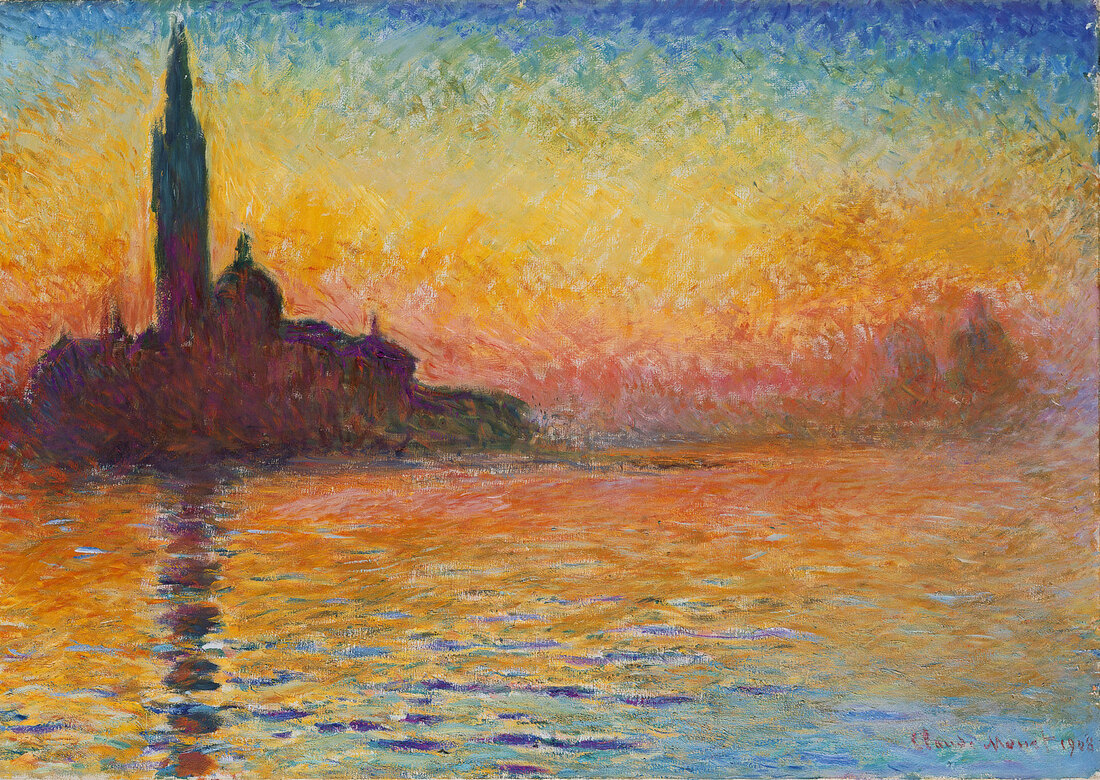
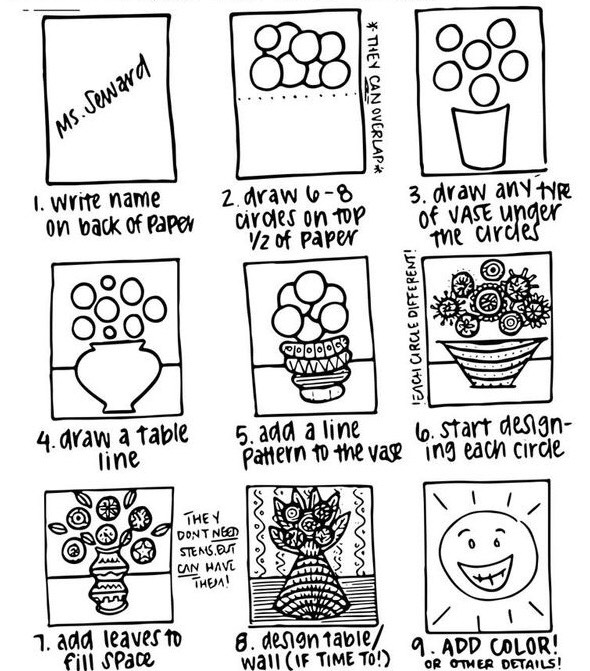
Grades 2/3: Painting like an Impressionist
Watch the short YouTube video below on famous French Impressionist artist Claude Monet. This link to the Tate's website also has a nice, kid-friendly introduction to Impressionism, and who Claude Monet was, if you'd like to get some more background knowledge before you dive in.
Next, scroll through the gallery of images I have provided and make some observations about what you notice
Then use the lesson plan I have provided to to guide you through the steps of the project. Be sure to email me some pictures of finished artwork so I can post them on our blog!
Next, scroll through the gallery of images I have provided and make some observations about what you notice
Then use the lesson plan I have provided to to guide you through the steps of the project. Be sure to email me some pictures of finished artwork so I can post them on our blog!
| monets_waterlilies.docx |
|
|
|

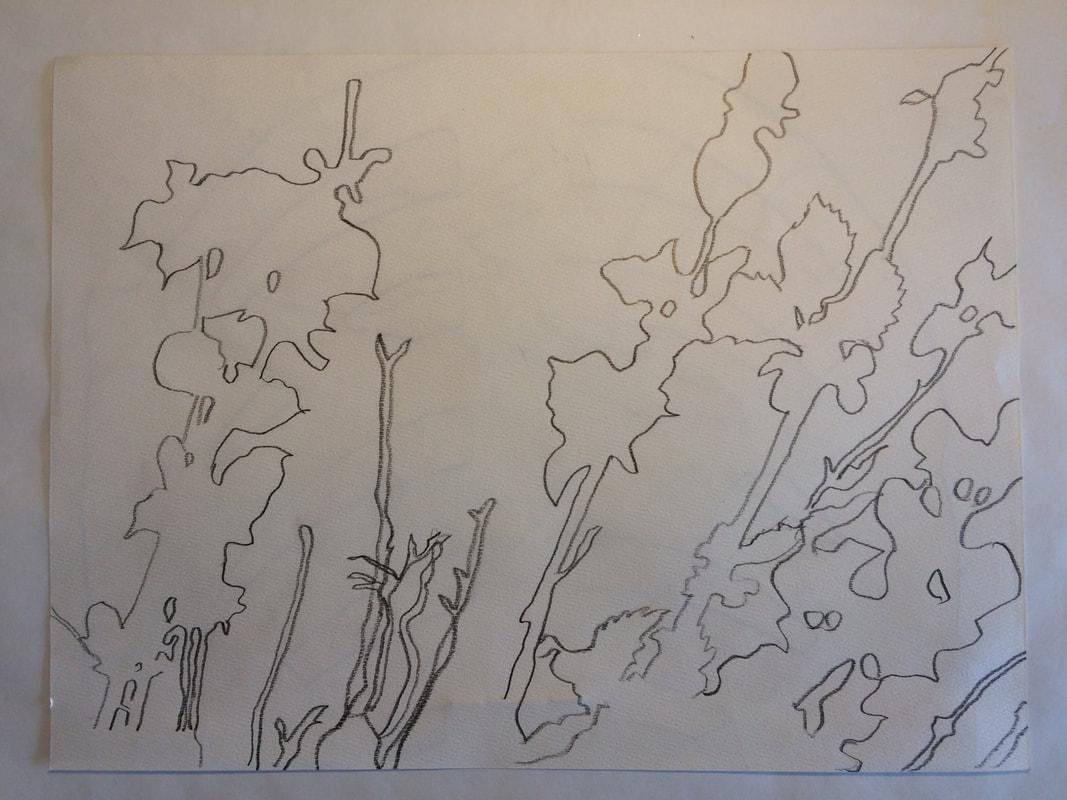
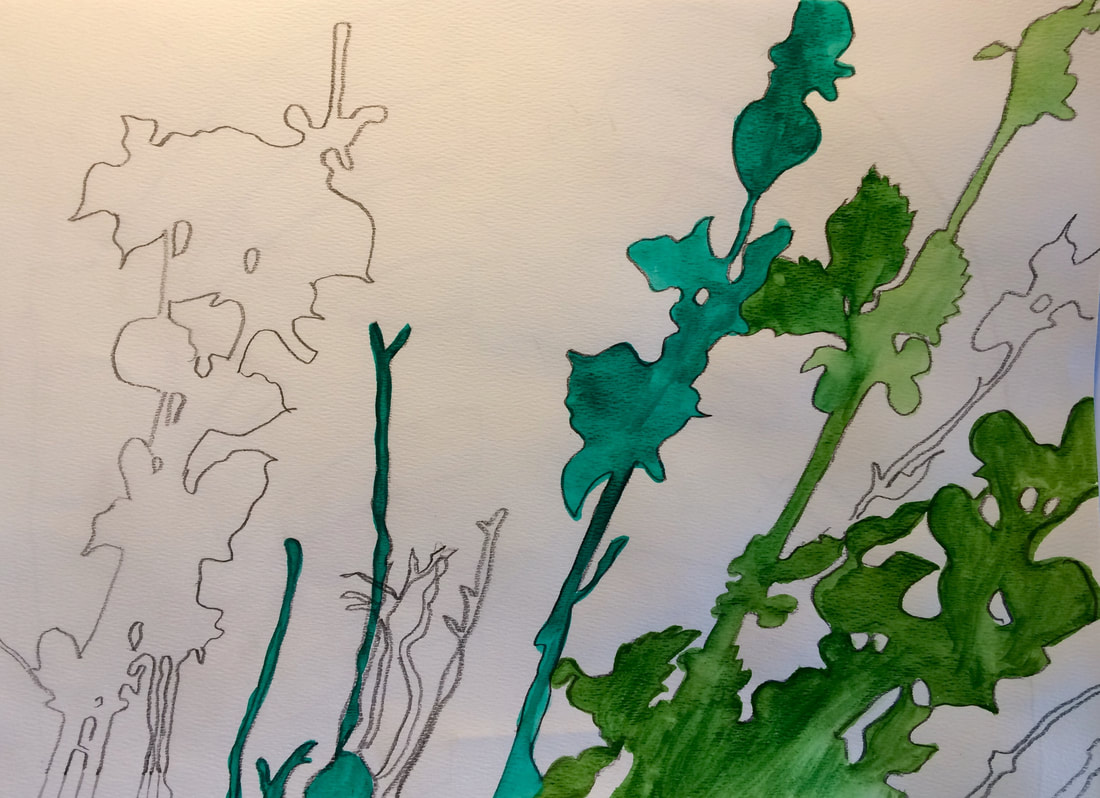
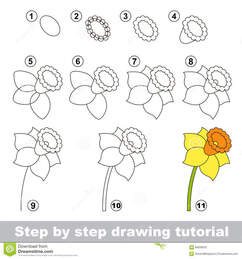
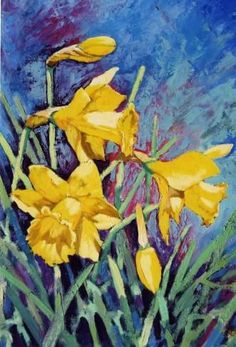
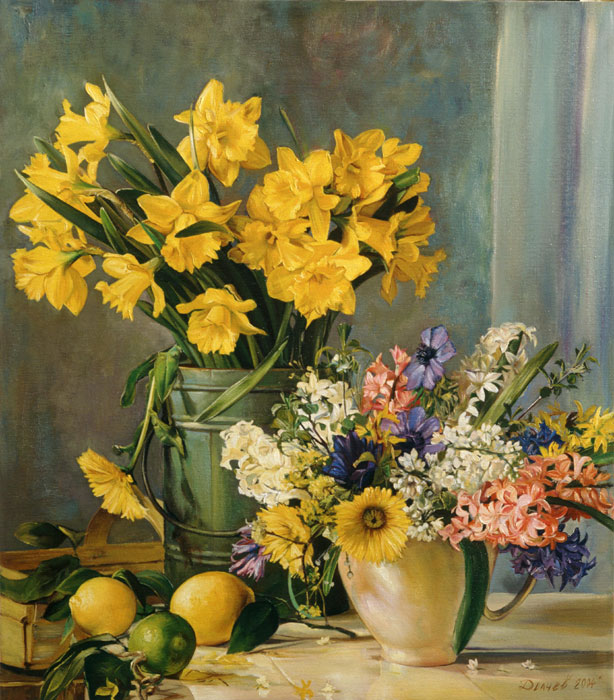
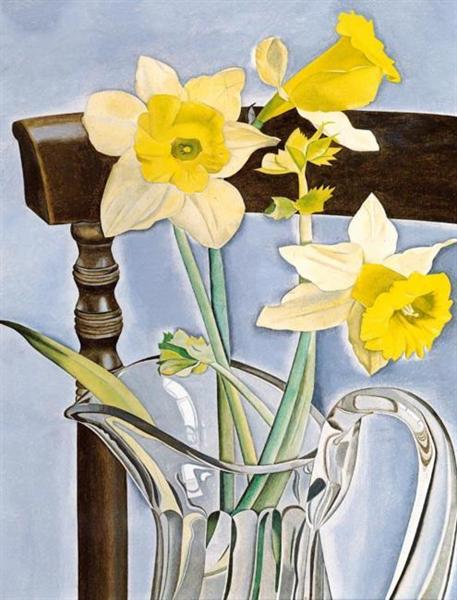
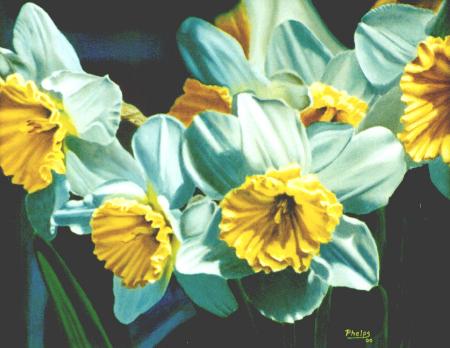
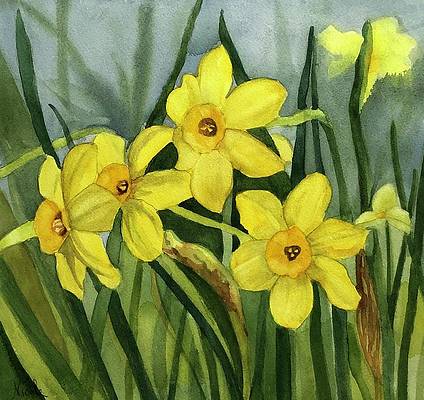
Grades 4/5: Drawing Daffodils
The beautiful yellow daffodils in bloom everywhere have been cheering me up lately. In keeping with our drawing things from nature theme, this week try to make a drawing or painting of either a field of daffodils or a still life of daffodils arranged in a vase. You may also work from the pictures in the gallery below. If you have decided to compile your drawings in an altered book, this will be another great one for your "things from nature" section.
Click on my lesson plan document below for steps to guide you through the project, and be sure to email me a picture of your finished work so I can add it to our blog!
Click on my lesson plan document below for steps to guide you through the project, and be sure to email me a picture of your finished work so I can add it to our blog!
| spring_daffodil_drawings.docx |
|
|
|
|
Grades K-5: Here are some easy, calming drawing activities for grades K-5. Feel free to try more than one!
|
|
| ||||||
|
|
| ||||||
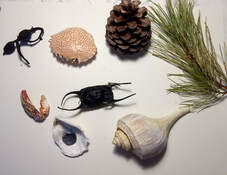
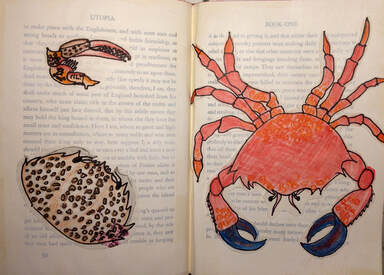
Grades 3-5: My daughter and I have been having fun collecting treasures at the beach and along the bike trail to add to our "nature specimens tray." If you have a sketchbook or journal, or some loose leaf paper you can keep together in a folder, let's start a collection of drawings of things you can find outside. Either at the beach, the ponds, along the bike trail, or in your own back yard. I will share my drawings with you once I finish them, please send me pictures of yours too and I will give you some feedback (and share them here if you want).
I decided to add my drawings to an Altered Book I have been working on. First I placed my natural objects under a lamp and sketched with pencil while looking closely at the types of basic shapes that made up each object. When I was happy with my sketches, I outlined them with black sharpie marker and erased all the stray pencil marks. Then I used colored pencils to add color to my drawings. Last, I cut them out and glued them into my Altered Book. This chapter of my book will consist mainly of drawings from nature. If you have an old book that your parents give you permission to use, this may be a fun way to compile your drawings while we are out of the art room.
|
|
My Specimens
|
My Drawings

|
|
Here are some video's and "how to draw" links to get you inspired
|
|
|
|
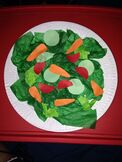
K - "Scissor Salads" Practice scissor skills by cutting out shapes of different vegetables to make a salad. If you have colored paper at home, great! If not, you can just use white paper and have them color in their shapes once they have cut them out. They can glue their salads to a paper plate (if you have one) or simply put it in a bowl. If you are in need of white paper or crayons, there is a limited supply on the art cart.
|
|
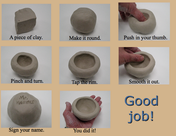
1 - "Pinchpots" There is enough potter's clay bagged up in sandwich bags on the art cart for every 1st grader to make a pinch pot, if they choose to. See the attached demo on how to make a pinchpot by pinching the clay with thumb and fingers to form a basic pot. They can use a dull pencil to decorate with lines, shapes and details and either paint with tempera or acrylic paint at home once dry, or bring it back to school to glaze and fire in the kiln once school starts back up.
|
2nd and 3rd - Printmaking with Foam Sheets and Markers I have cut up sheets of foam and left them on the art cart, along with white paper, for 2nd and 3rd graders to continue experimenting with printmaking. Watch this demo on printing with styrofoam and markers to get started. Make sure to practice your drawing first on paper before drawing it on the foam as you will not be able to erase any mistakes. Use a dull pencil to "carve" your drawing into the foam. Make sure to wet your paper with a damp sponge before printing and experiment with different color combinations on each different print. If the first one doesn't come out great, modify your technique and keep trying!
4th and 5th - Carving and Etching Printing Plates, or Altered Book Projects
I have put student's art folders on the art cart for grades 4 and 5. Grade 4 folders have each student's rubber printing plate inside, Grade 5 have clear plastic etching plates inside. I did not leave the carving tools out as they are dangerous and this is optional. If you wish to have your child continue working on carving out their printing plates for later use you might consider purchasing the speedball carving tool online or the steel twisted double pointed etching needle online 4th graders will be able to experiment with their rubber printing plates at home right away with any paint you may have on hand. 5th graders will have to wait to use the printing press PAAM has loaned us. I'm hoping they will be willing to extend our time with it.
If you would rather do something else, I have also left a box of books that may be used for Altered Book Art There is a handout loaded with ideas in the tray on the top shelf of the art cart and you can look at this video for an introduction to the art form.
